How to make a conference app in less than 30 minutes
I made an app for #MSBuild conference so I could more easily overview my sessions, follow relevant tweets and rate the sessions. This is the second app I’ve ever built and I want to share how you can easily rebuilt is as well.
I learned the very hard way, that the first thing you need to do in a Power App is not only to give it a name, but to save it, so you can then benefit from autosave. I didn’t do that and accidentally closed my browser tab and lost everything when I almost finished the app — Fair to say, that it took me more than 30 minutes when i built it the first time. This is when I came up with the idea of making it a challenge to complete a whole app in under 30 Minutes. I recorded my app making process and the video is about 18 mins. You can watch and share it here:
To make this app, we will need
- 6 Screens
- 3 galleries
- 2 Connectors
- 1 CDS entity
Let’s start with the
Common Data Service (CDS):
Make sure you understand: This is not an entire CDS tutorial, it’s just the way I started with it and made my app work.
Open make.powerapps.com, login and click SOLUTIONS → NEW SOLUTION
Give it a name AND create your own publisher; for reference see this article. Use this new publisher in your solution, click on CREATE.
Now select your solution, and click on NEW → ENTITY
- Create the fields you want to see and make sure to respect the data type of the field.
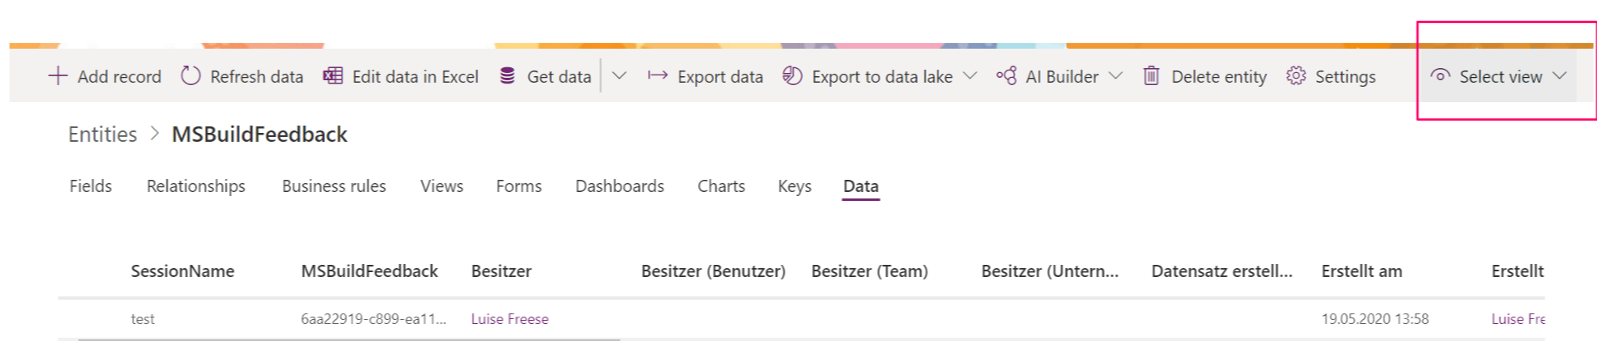
- You can add the first record manually on the DATA blade:

You will see that you won’t see all the fields you created before- don’t worry about that too early. Just add your first record “test” (or “#Unicorn”). You may now want to know where your fields are: Just define a new view in the upper right corner:
Now that we have our CDS entity it’s time to connect this entity with our Power App.
Click on the Data Sources icon on the left rail and connect to your entity.
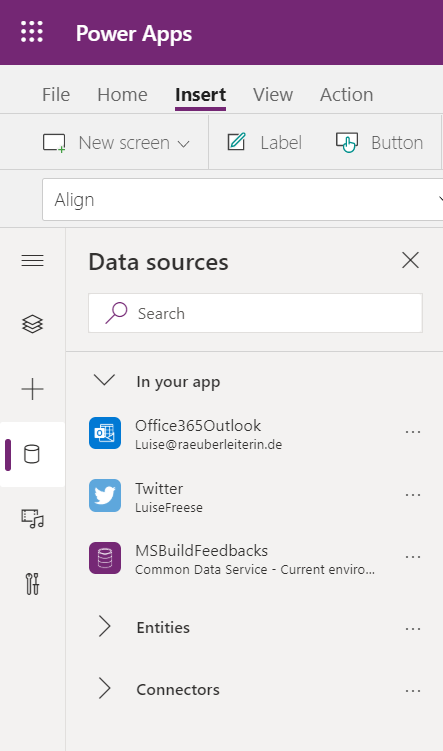
As you are already here, you can also connect to Twitter and Office 365 Outlook, we will use that later.
Sessions
As we want to nicely display all sessions we were interested in, we first need to have the session data. I downloaded the .ics files for all sessions and saved them in an Outlook Calendar called “Events”.
So this is how it works:
- Create a new screen and add a gallery to it- I chose ‘Title, Subtitle, and body’ as Layout
- Create a Dropdown Input with Items= Filter(Office365Outlook.CalendarGetTables().value,DisplayName =
Events)
without the filter you can actually use it as dropdown, it will show all your Outlook calendars. I set this visibility of this dropdown later to false, because we don’t need to see this in our app.
I chose that the Subject of my event should be the Title, the Body Preview should be the Subtitle and the Body should be Start / End Time.

Date /Time looked ugly, I didn’t want to repeat the date for the End Time and so I went for this approach- which is basically concatenating some texts and if formulas- You’d do the same in Excel: Hour(ThisItem.Start) & “:” & If( Minute(ThisItem.Start) = 0, “00”, Minute(ThisItem.Start) )& ” to ” & Hour(ThisItem.End) & “:” & If( Minute(ThisItem.End) = 0, “00”, Minute(ThisItem.End) ) & If( Hour(ThisItem.Start) <10, “zzz”, "" )
We already connected to Twitter, so we can now just repeat what we did for our sessions screen:
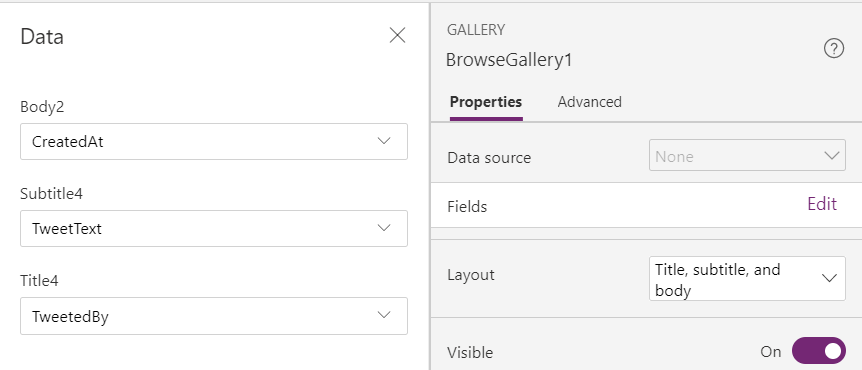
- Create a new screen, add a gallery. I again chose Title, Subtitle, and Body as the layout.
- Set Items = Twitter.SearchTweet(“#MSBuild”)
as we want all #MSBuild tweets.
- Choose which data you want to display in your fields:
- I want an icon in the gallery that should open this particular tweet. As a tweet URL has the Syntax:
https://www.twitter.com/USERNAME/status/TWEETID we just set the .onSelect property to:
Session Rating
- Create a new screen as a form
- Data Source is your CDS entity. I wanted to have one Dropdown field for the Session Name and 4 Number fields for session evaluation, displayed as stars.

Set this SessionName field to ALLOWED VALUES, and the allowed values property to the same value as the items property of the dropdown field:
Change the Data Value of the dropdown to SUBJECT (it’s Preview Body by default)
Change the Update property to DataCard.Value.Subject (important!)
Change the .onSelect property of the SubmitForm Button to
Make your app pretty
Beautiful apps are more engaging and it’s not as hard as you think to pretty up your app. Here are a few things that I did:
- choose a nice background picture. I know, we all have our go to resources for nice pictures, but if you don’r find anything you like on unsplash.com you can even open PowerPoint and click on INSERT → STOCK PHOTOS. You will find tons of hi-res photos 🙂
- There are at least three ways to define the color scheme of your app:
a) Choose a theme for your app that is in harmony with your background picture, so you don’t need to touch any single button to define your colors.
b) Create a collection with “your” colors on App Start and reference to them later, because you unfortunately can’t just write /upload your own CSS file.
c) You can also store your colors as variables:
I just picked a theme and it worked very well for me.
Choose icons for your navigation, use the ALIGN — DISTRIBUTE HORIZONTICALLY feature
Use the Navigate() function on the .onSelect property of your icons to navigate to the other screens
on each screen change the display mode of the icon that represents the screen to “disabled”- wouldn’t make sense to click them.
That’s it!
Feedback and what’s next?
If you like this blogpost / the video / my app, please clap and follow me on twitter and subscribe for my youtube channel. I think about doing a series called #LessCodeMorePower Community Calls, where I will demo my wins and learning of Power Platform including PowerApps, Power Automate, Power BI, CDS and Power Virtual Agents.If you like to join, just send me a message.

My name is
Luise Freese
You May Also Like
Exploring Microsoft Graph Toolkit as a non-developer -Part 5
Wow, we almost reached the end of season 1 of the #MSGraphToolkitLap — in which the Team of Microsoft Graph takes us seriously from zero to hero. If you didn’t read part 1, part 2, part 3 or part 4 of …
May the force be with me: My first Canvas App in Power Apps
Challenged and inspired by Pieter Veenstra’s Video about an app by and for kids with Power Apps I decided to finally make my first canvas app. The decision was not attempting to make something: Do or …

Exploring Microsoft Graph Toolkit as a non-Developer — Part 4
Continuing my learning journey with #MSGraphToolkitLap to make good use of the Graph Toolkit I read Cameron Dwyer’s blog about the power of the mgt-get. You can catch up here to read part 1, part 2 …