
How to use Power Virtual Agents to simplify IT and unf*ck User Experience
In this blog post I want to show you how you can use the whole Power of the Power Platform to improve user experience, narrow the traditional gap between IT and Business side of a company and simplify IT processes.
It won’t be my shortest blog post so you’d better grab some wine 🙂
Ready? Here we go!
Let’s build a thing!
Story
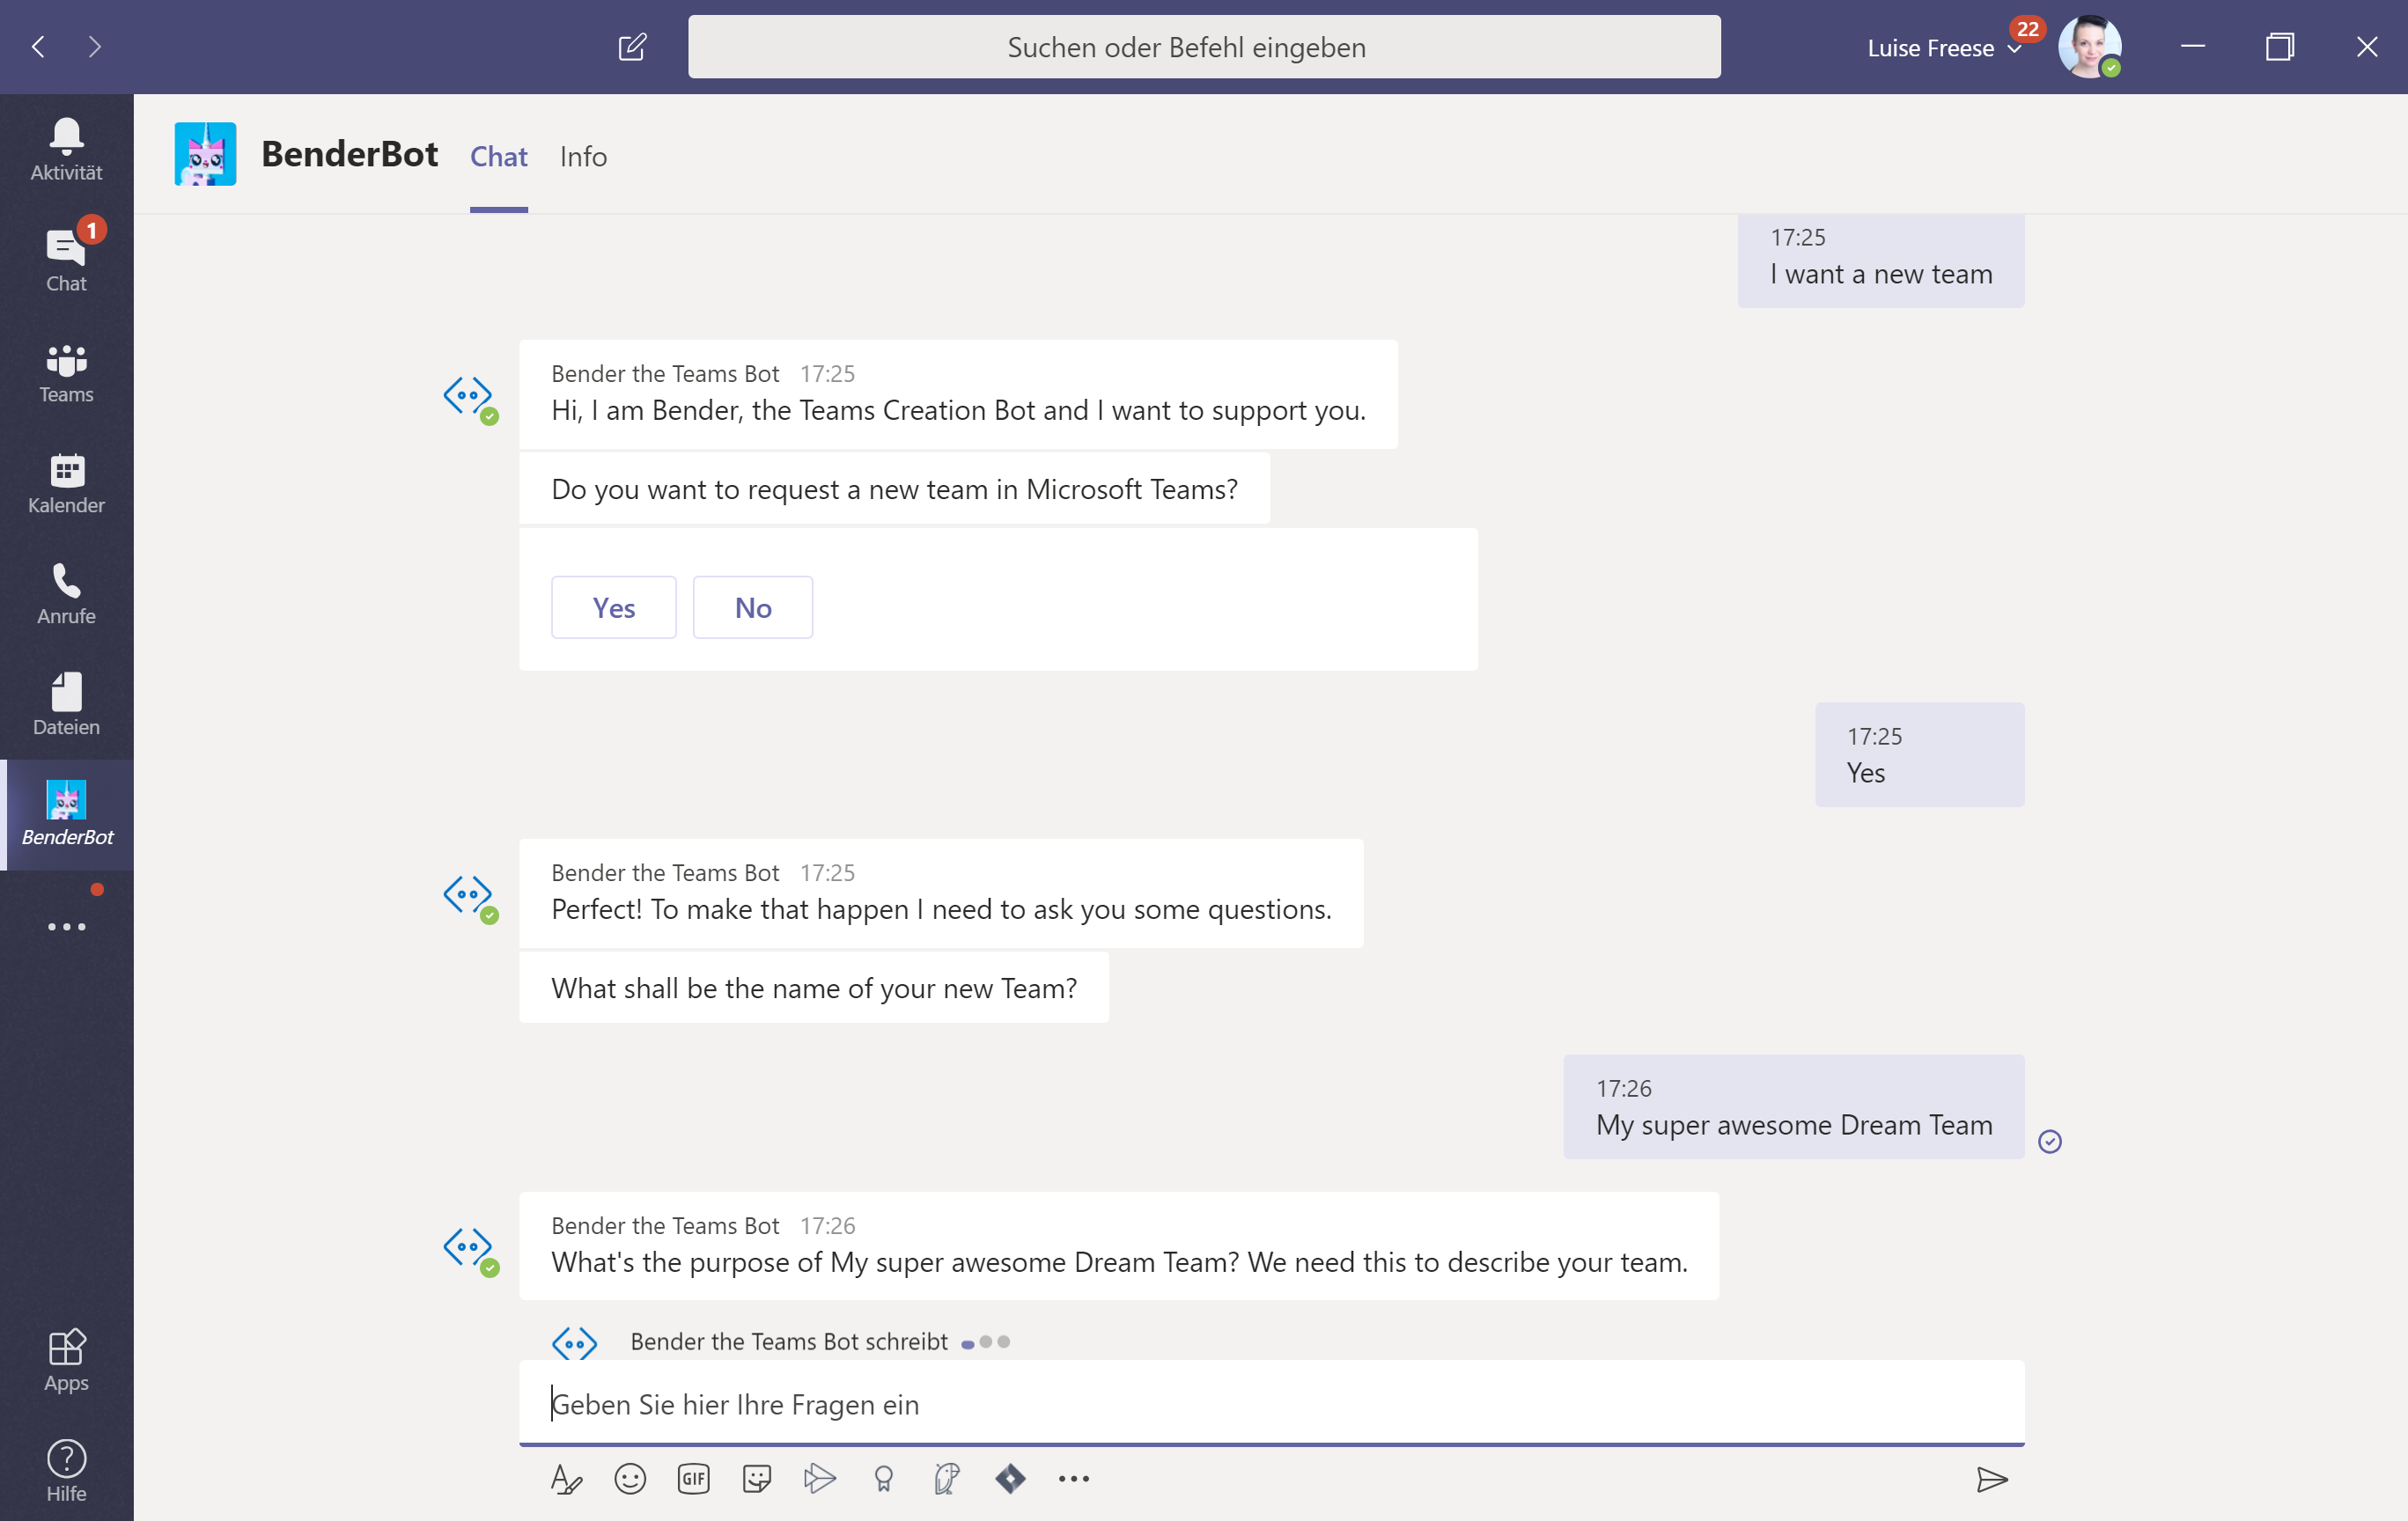
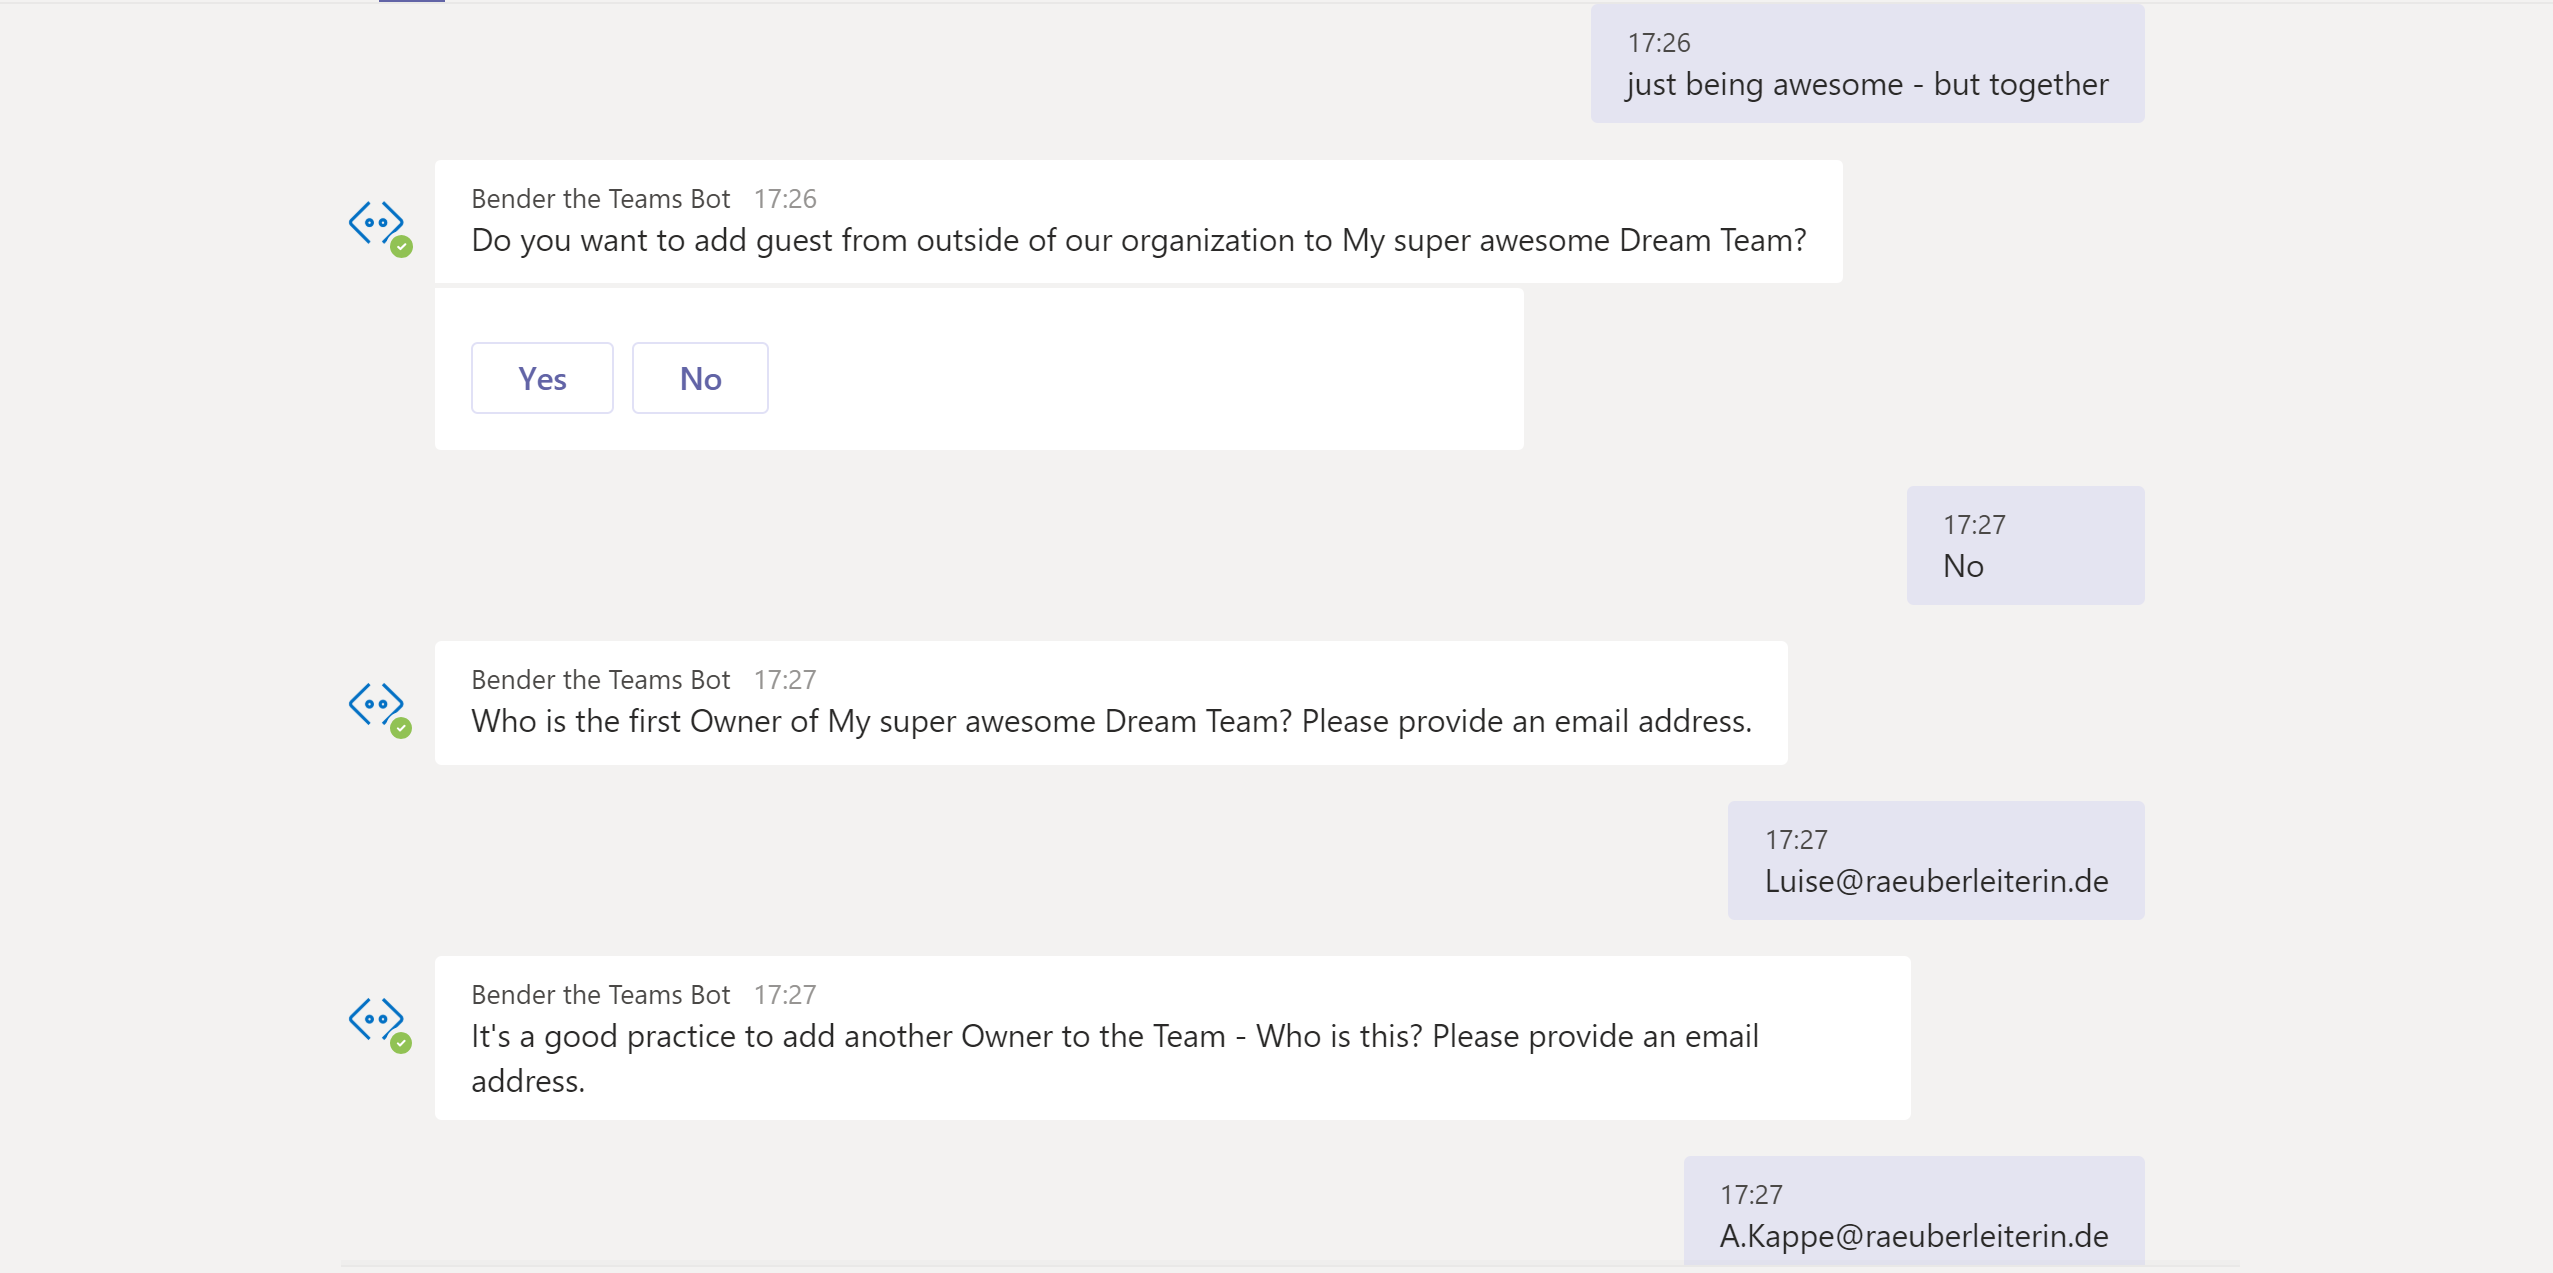
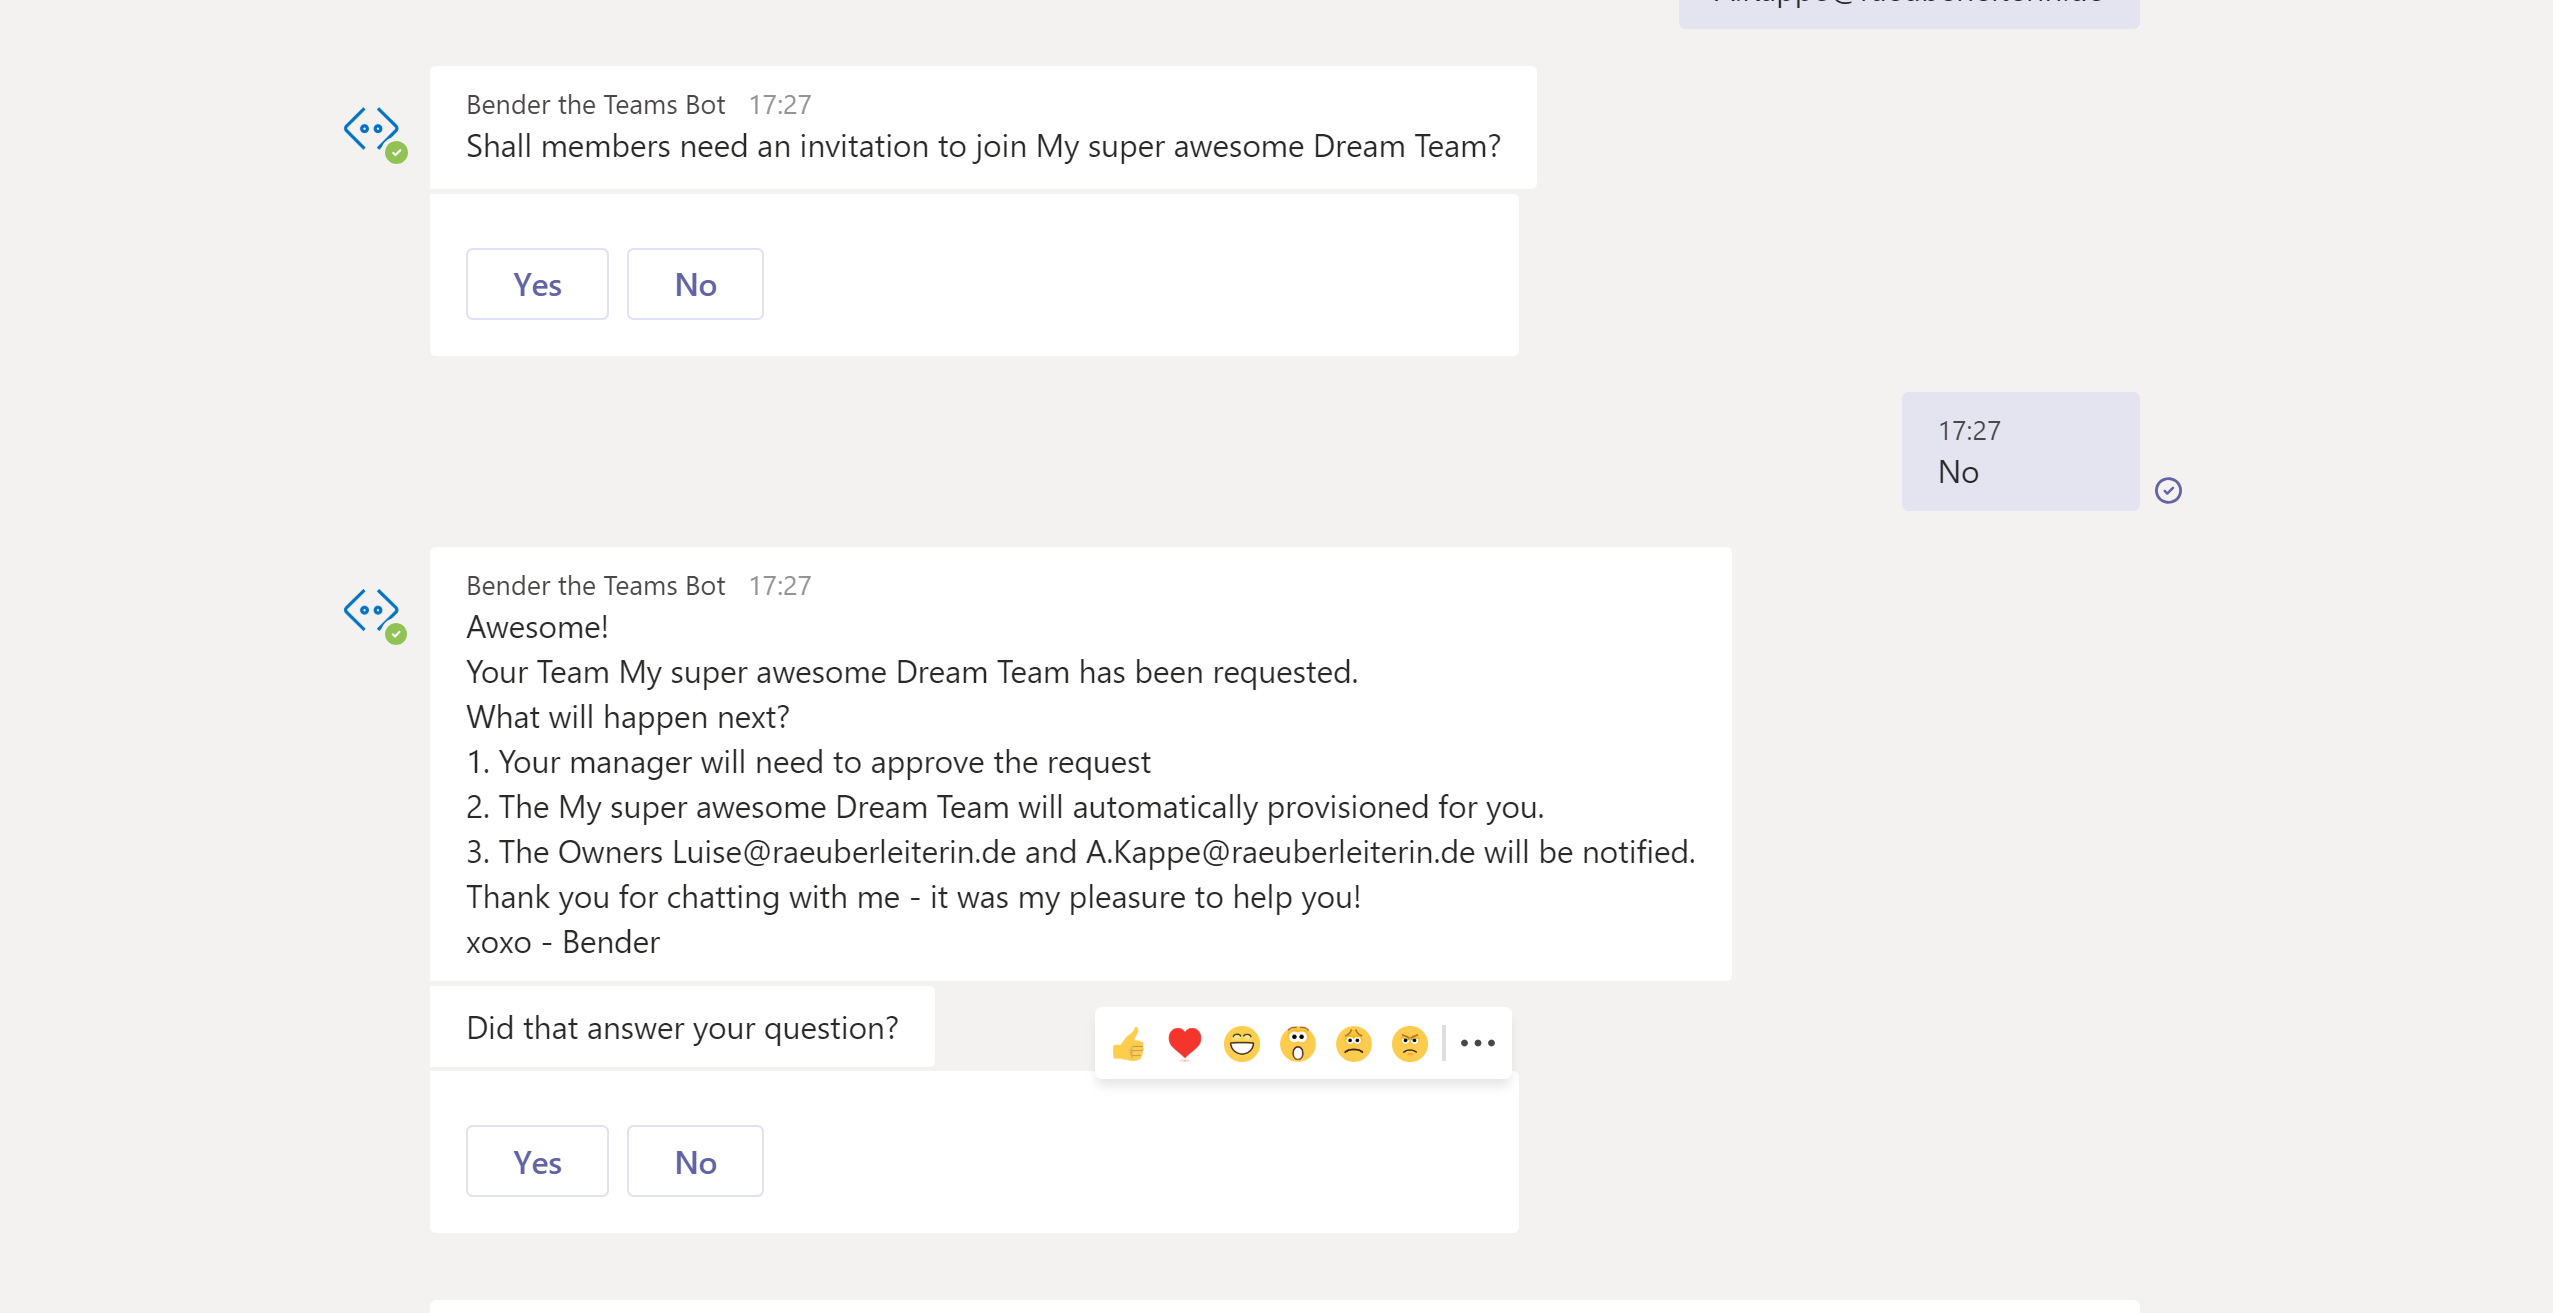
Users, who want to request new team in Microsoft Teams can easily interact with a Chat Bot in Microsoft Teams. They will be guided through the whole process.
After an approval by a manager the team will be created automatically and the owners will be informed.
 ## Process
- Power Virtual Agent asks questions about:
- Team Name
- Team Description
- Guest Status
- First and second owner
- Visibility
Power Automate will pick up the inputs in our FIRST FLOW and create items for each team request in a SharePoint list
Our SECOND FLOW in Power Automate will be triggered by a new list item. It will run an approval and provision the Team after that by making use of Microsoft Graph. Owners and Approvers will be informed in Teams.
 # Power Virtual Agent — part 1
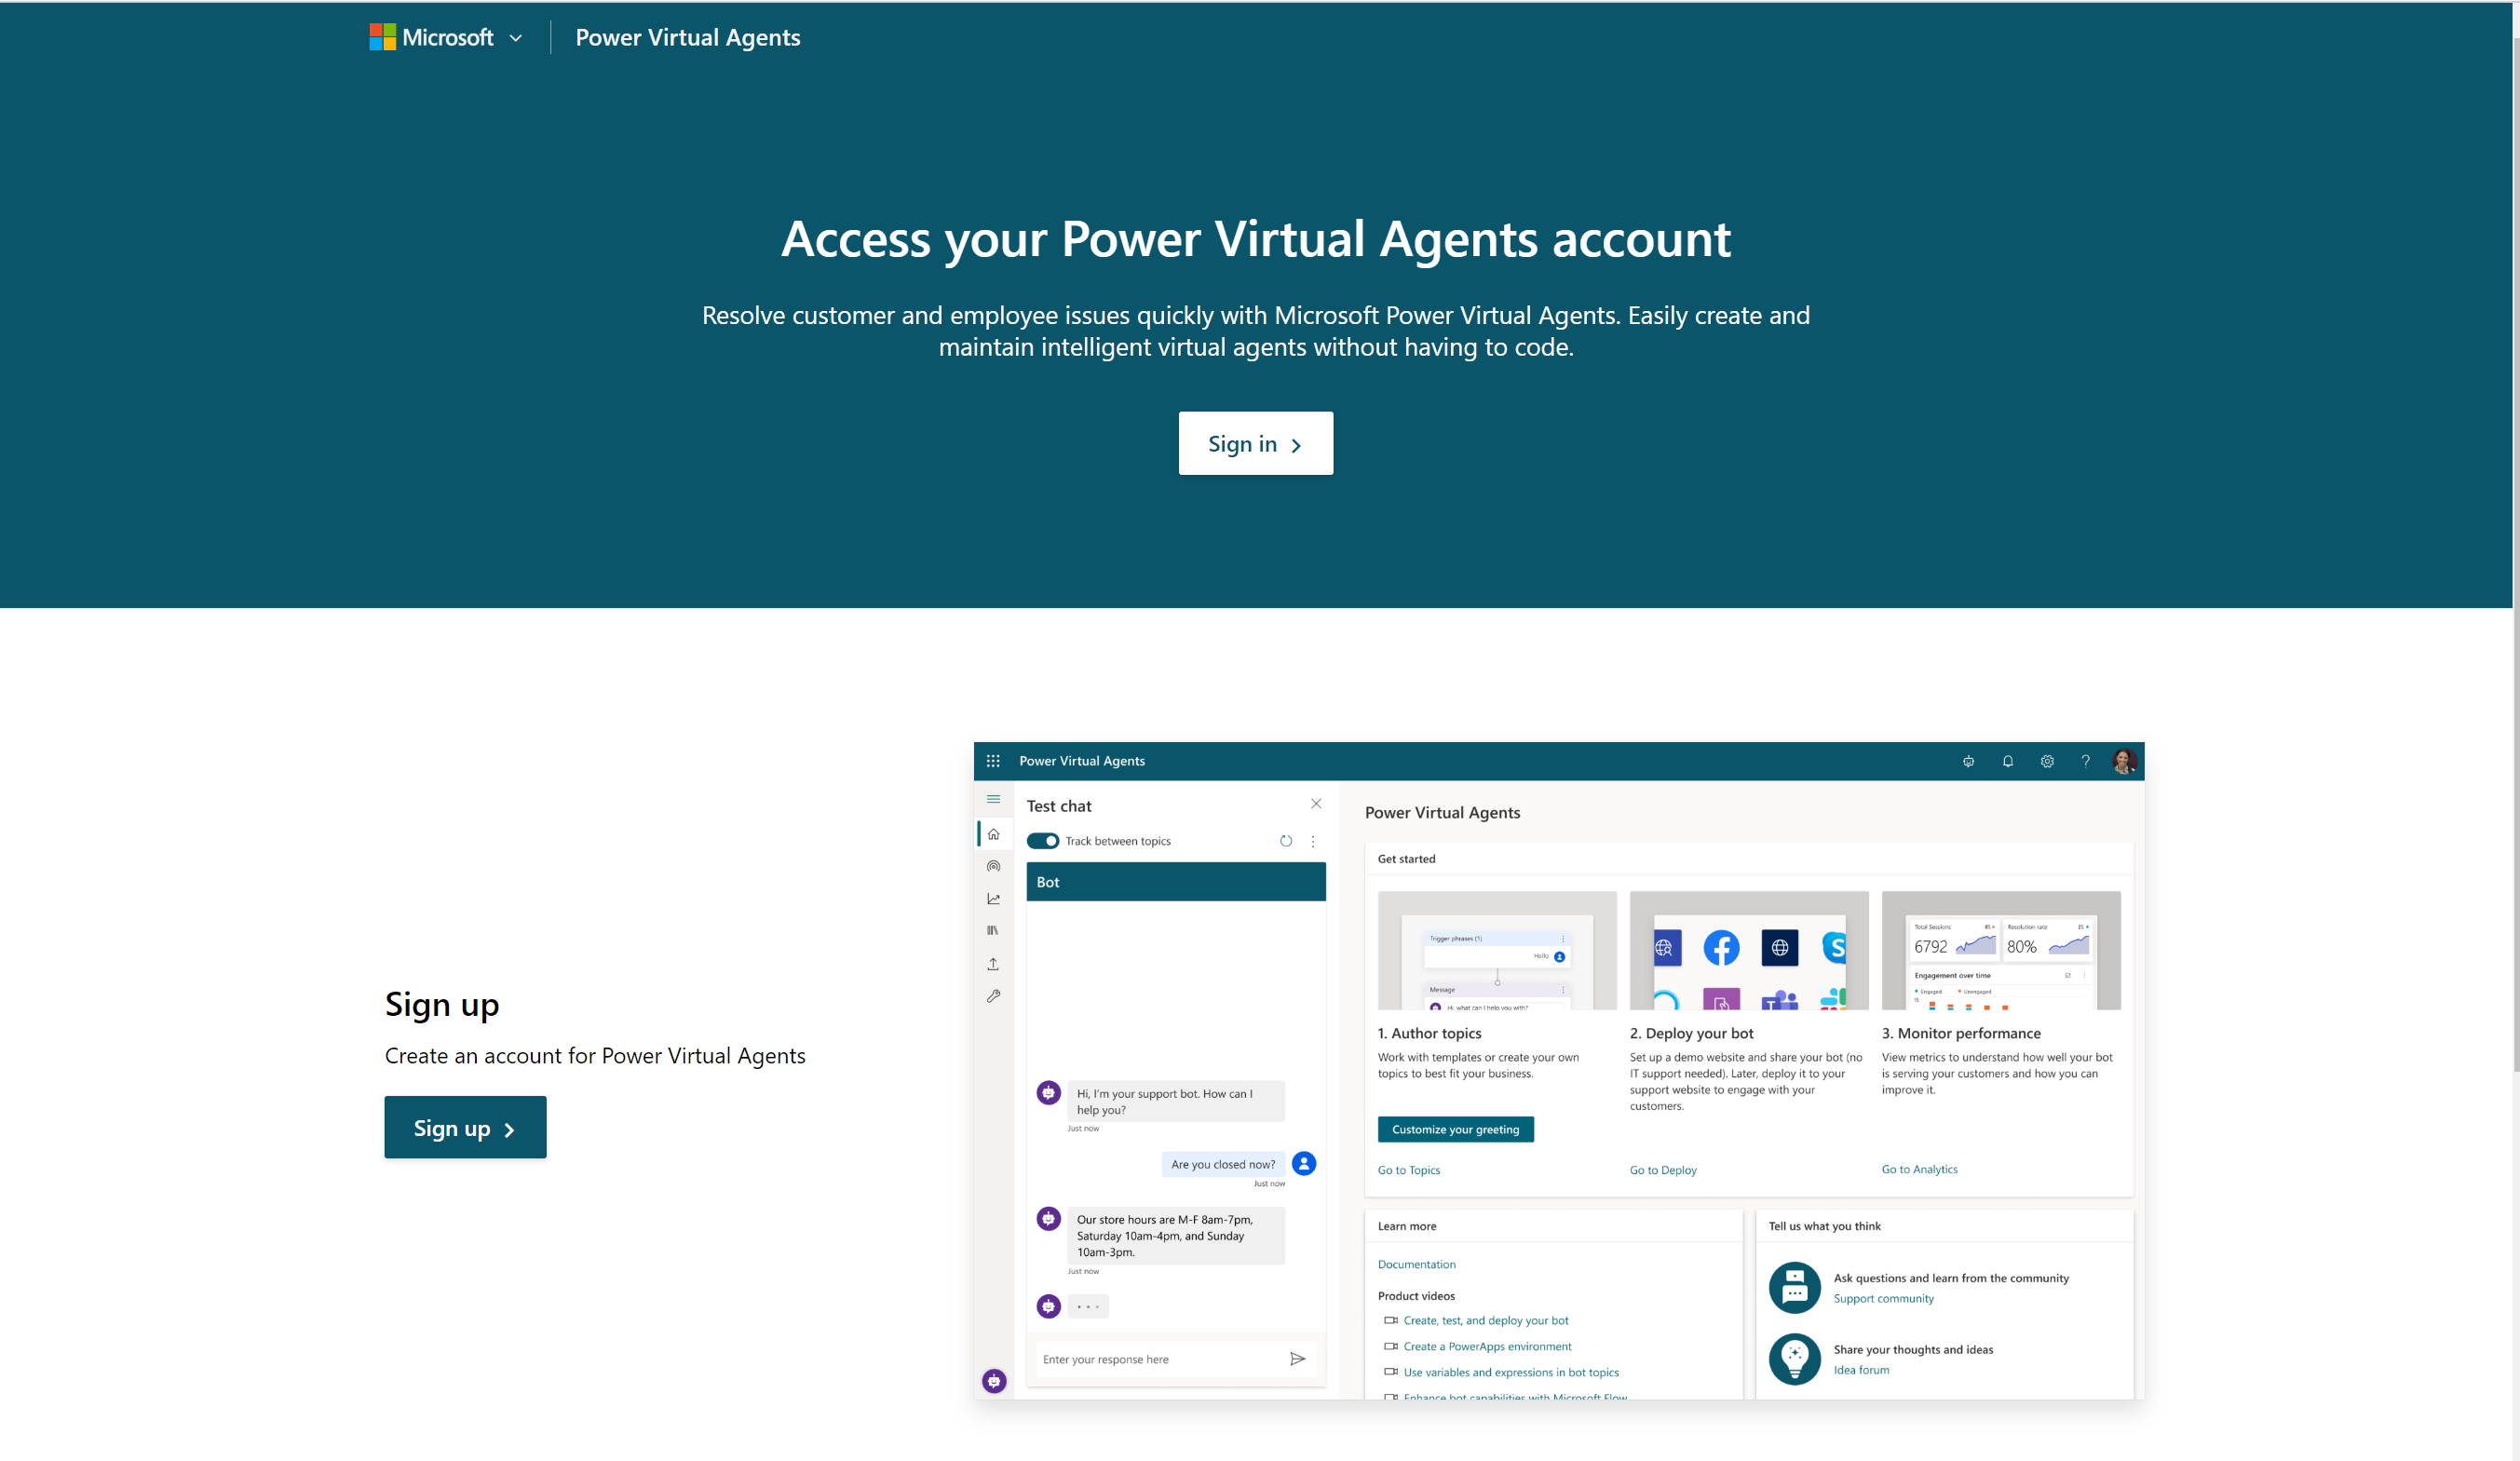
- Go to https://powerva.microsoft.com and Sign up or sign in, if you already signed up
 2. Click on the Bot Panel which you will find in the upper right corner
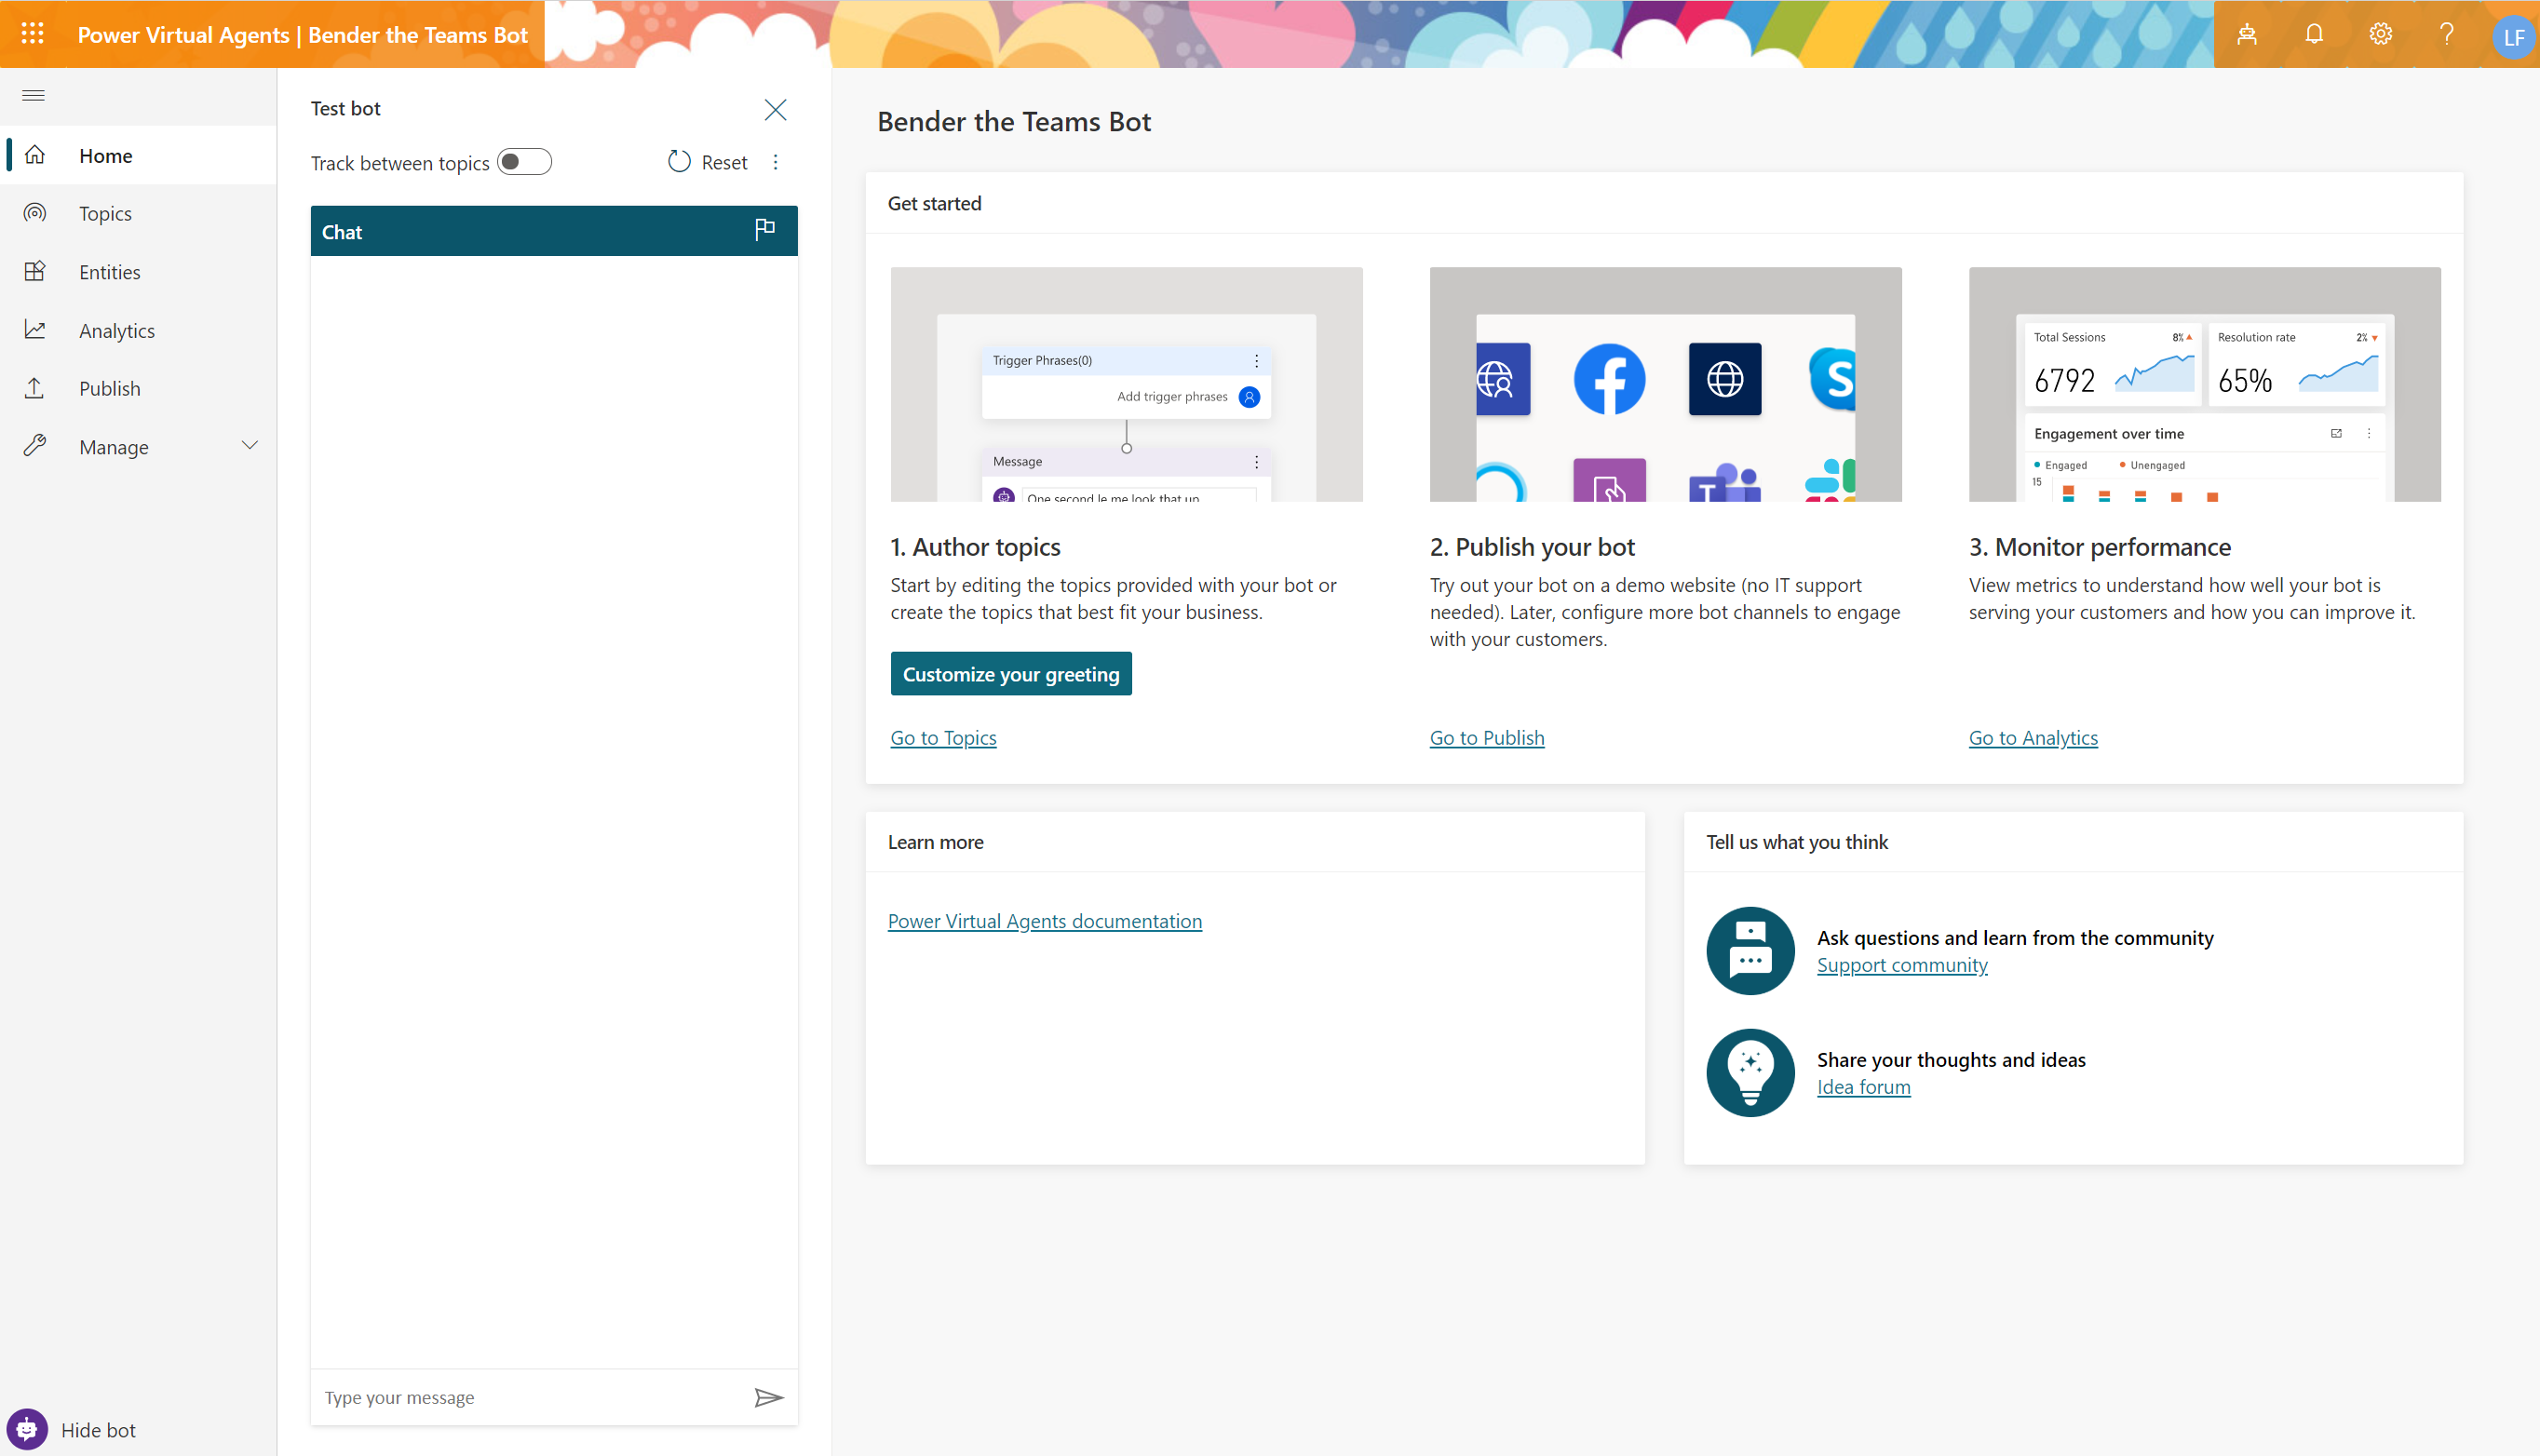
 (don’t judge me for the rainbow design) and create a new Bot, type in a name and click CREATE. It is normal that this can take up a minute or so — don’t worry!
- Your screen should look like this now:
 You can now just click on TOPICS in your navigation.
- You will see some pre-defined topics and you can actually try them out with the TEST BOT feature:
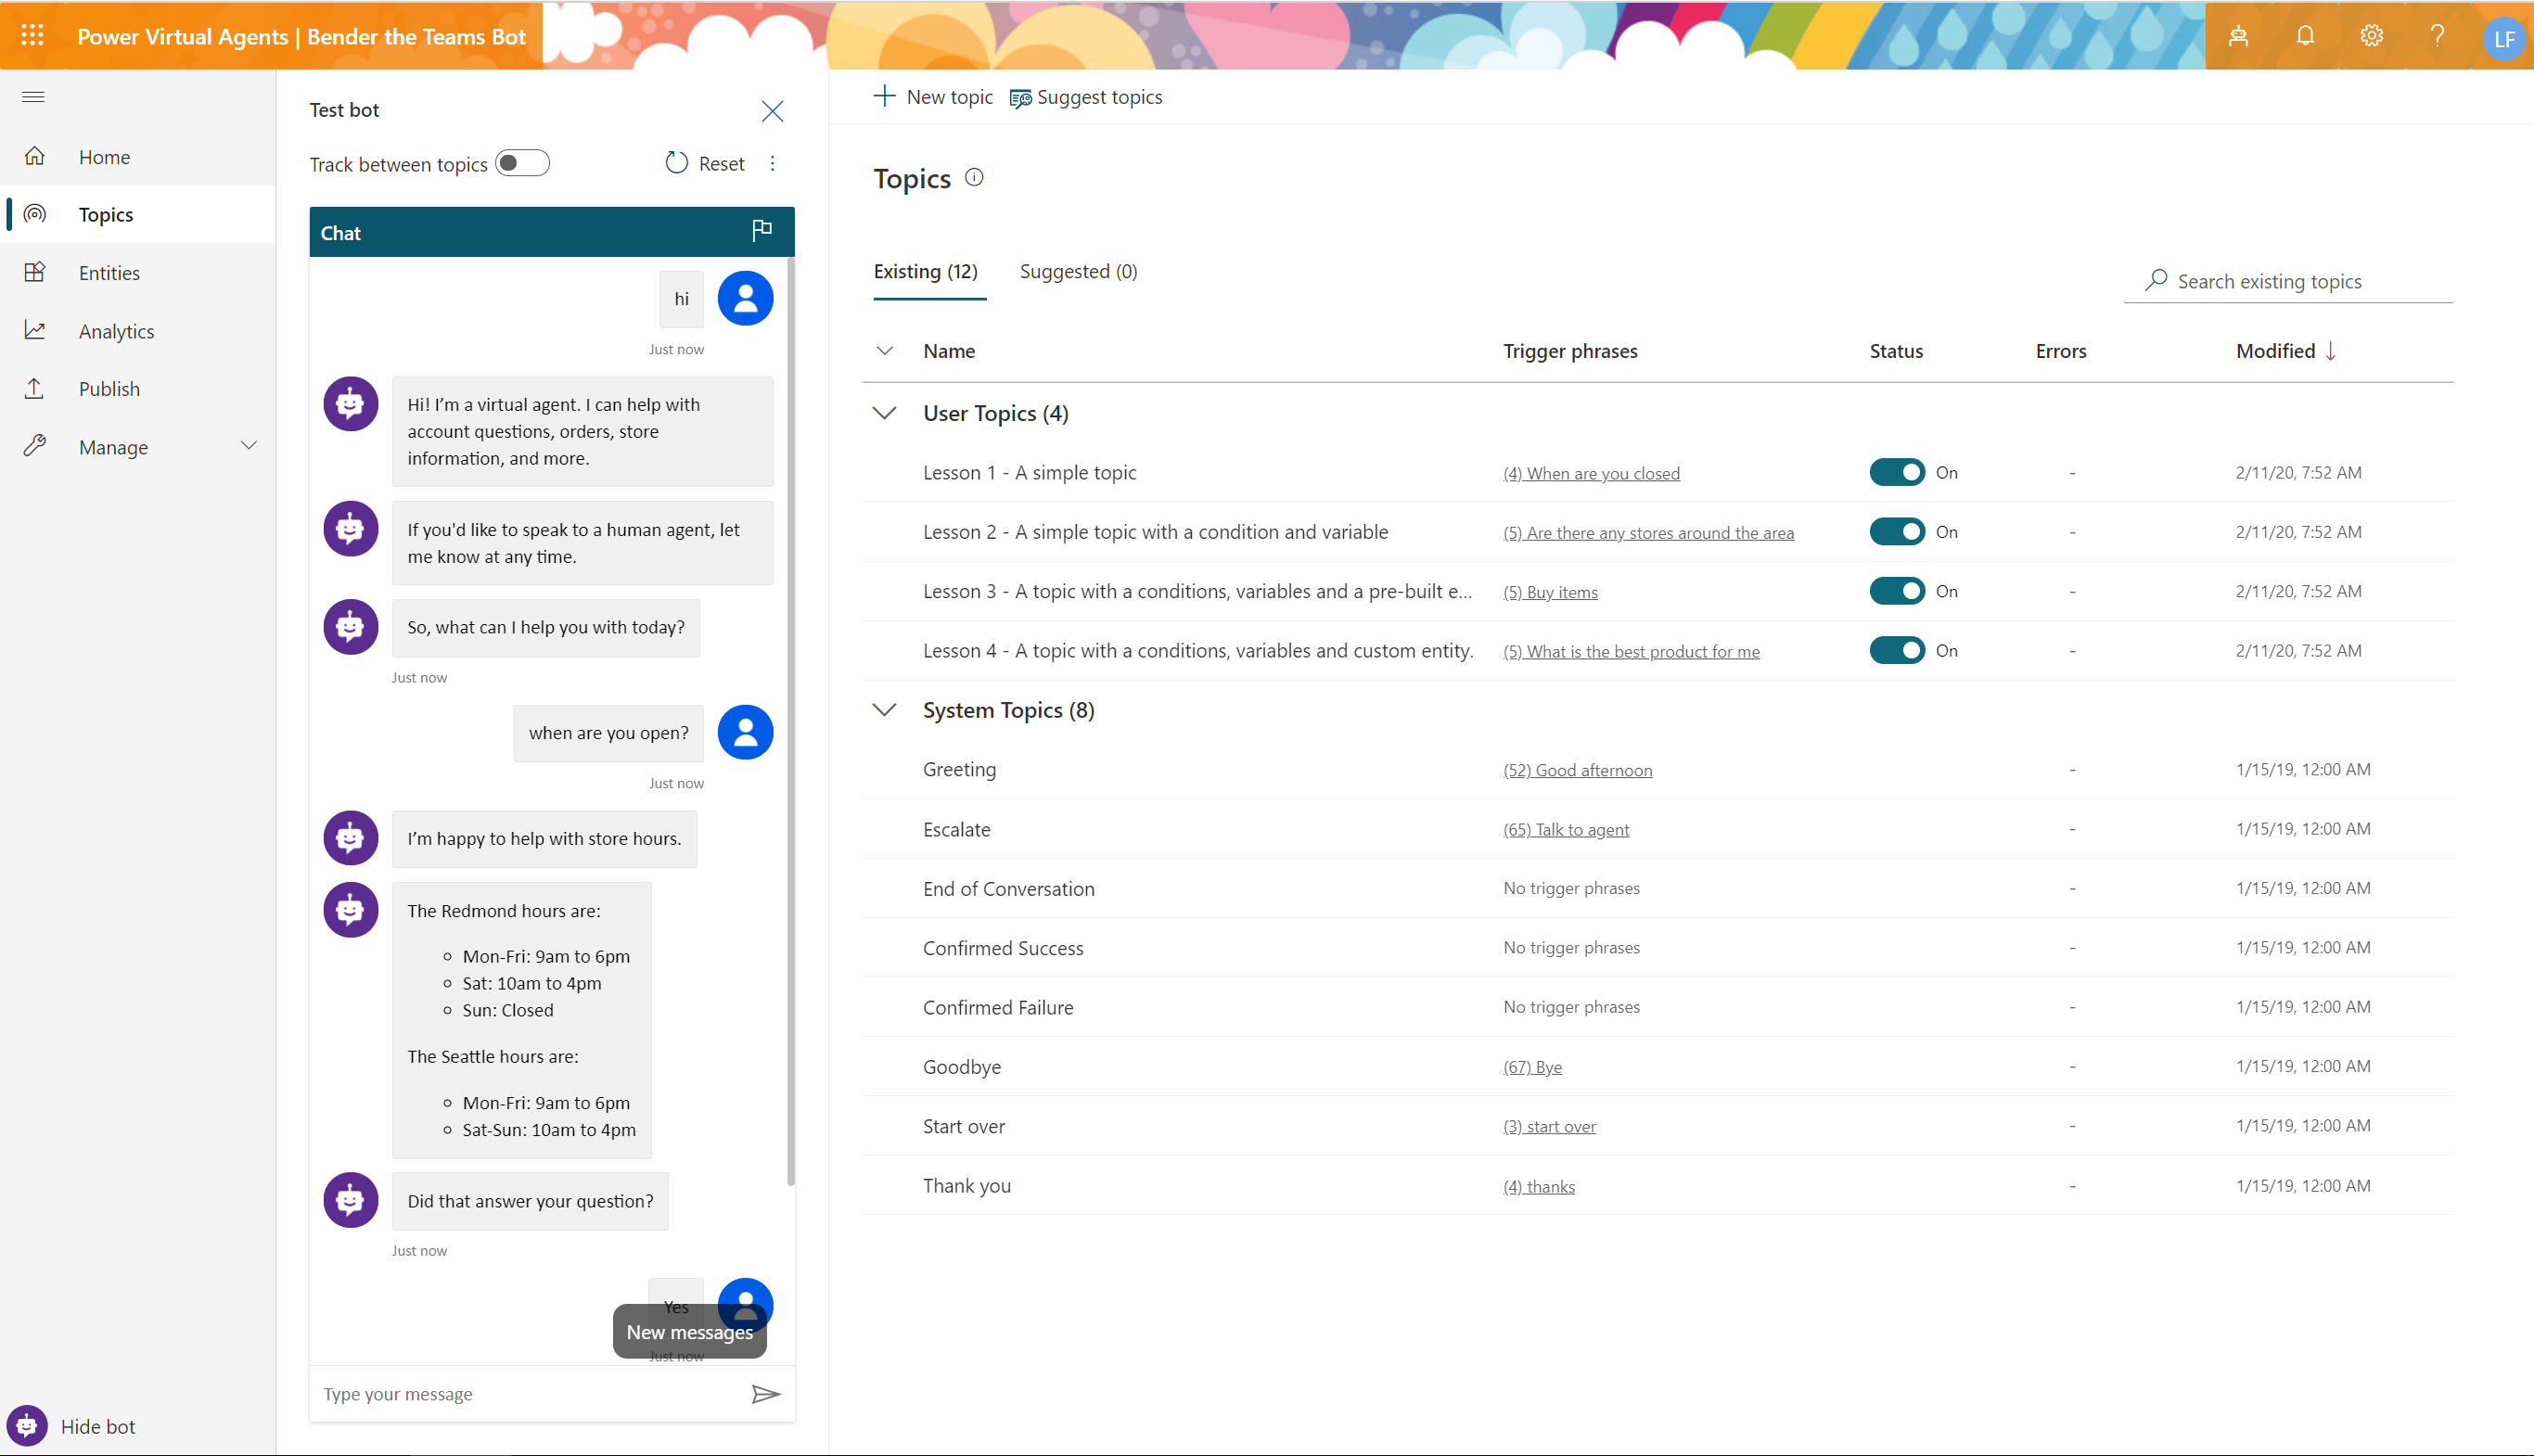
When you are done with tat, you may reset the Test Bot by clicking RESET.
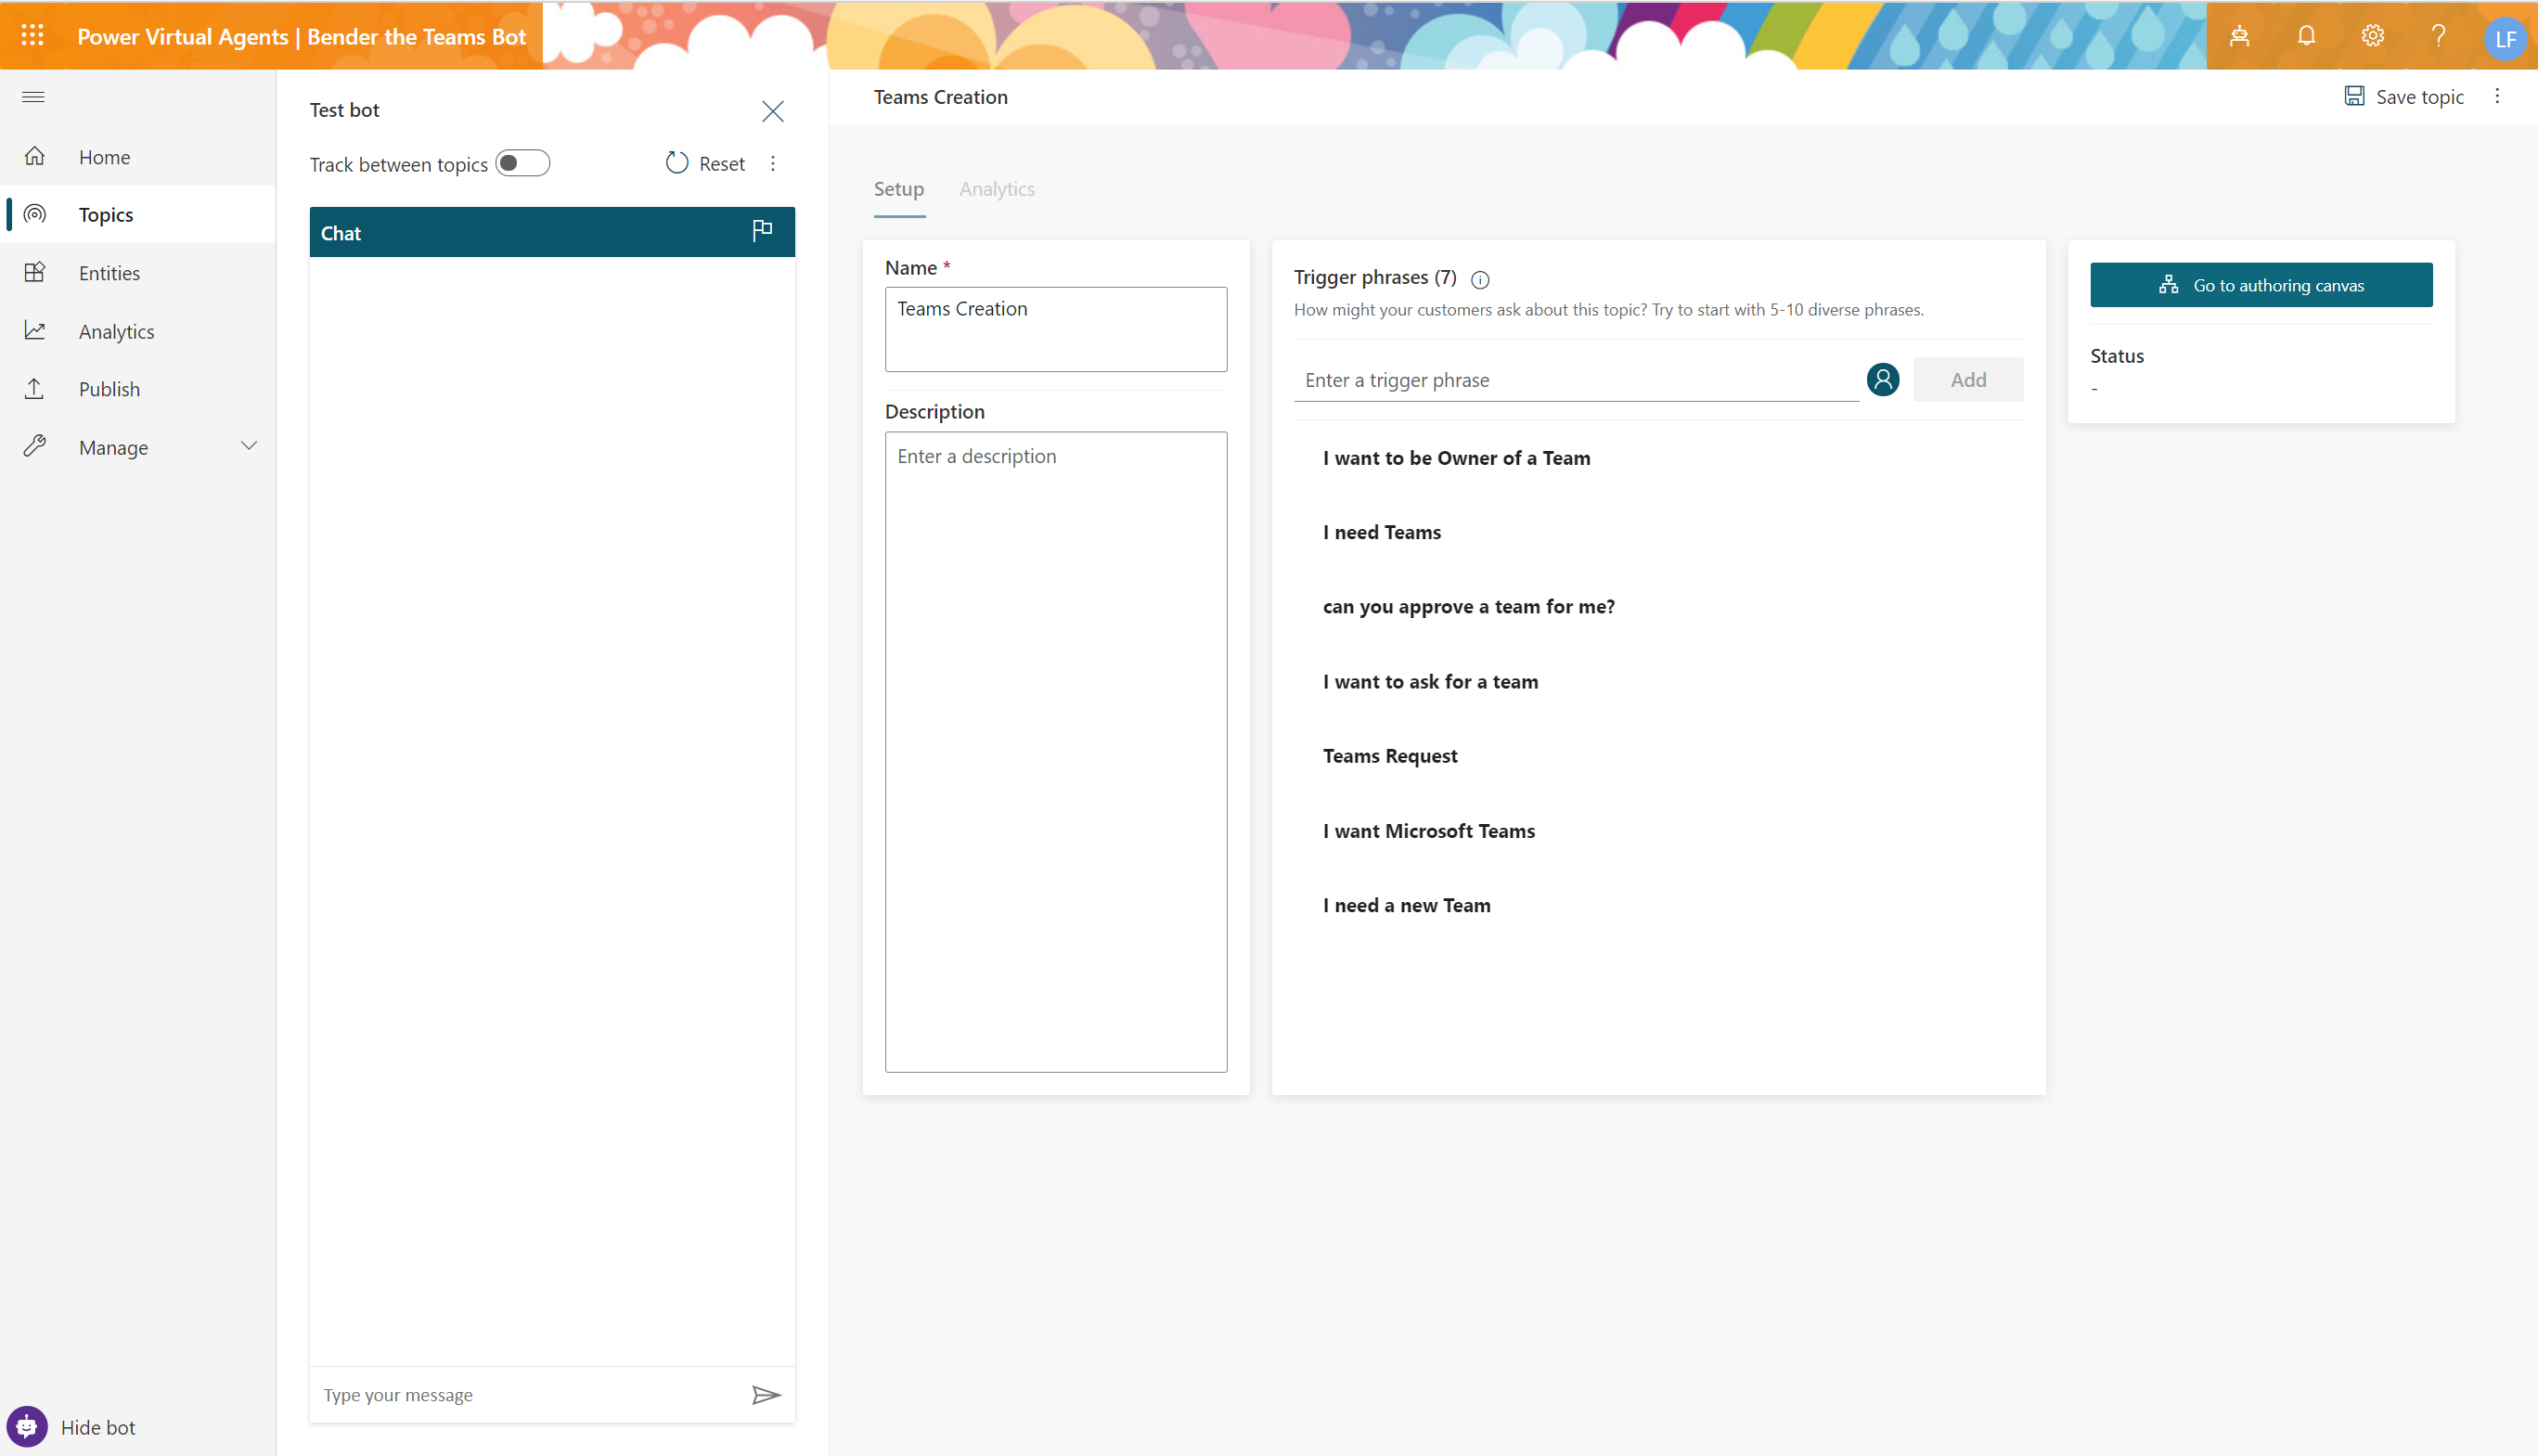
- Now that you played around with that, it’s time to create your own topic. Click + NEW TOPIC, give your topic a name and enter some trigger phrases. These trigger phrases will wake up the bot.
- Click GO TO AUTHORING CANVAS where you will outline the process:

You can now add and edit actions like you may know this from Power Automate.
So just edit the first MESSAGE and create a new QUESTION.
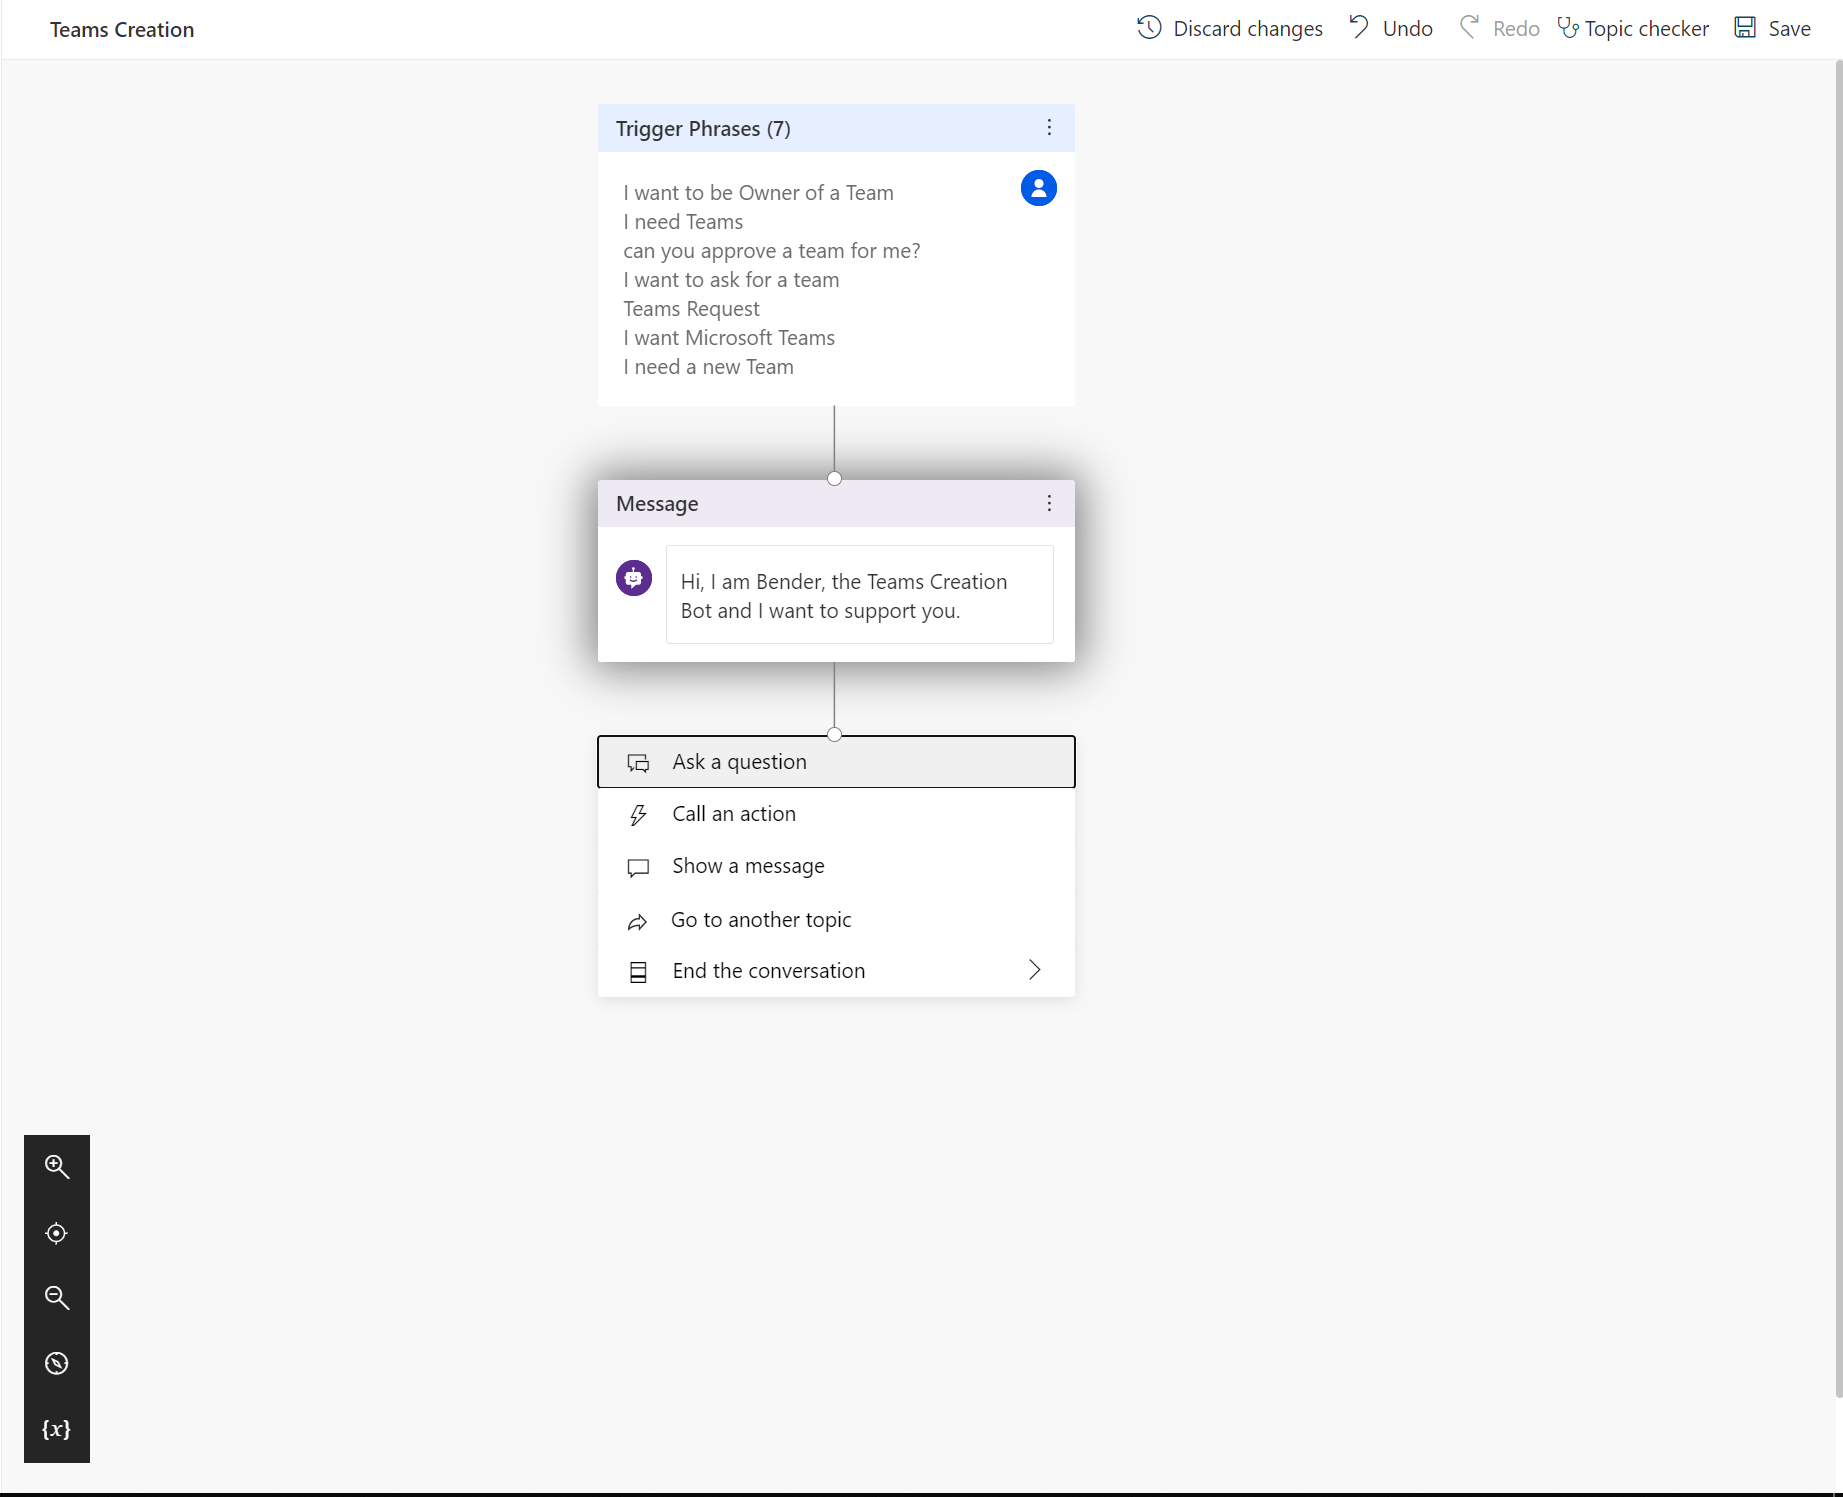
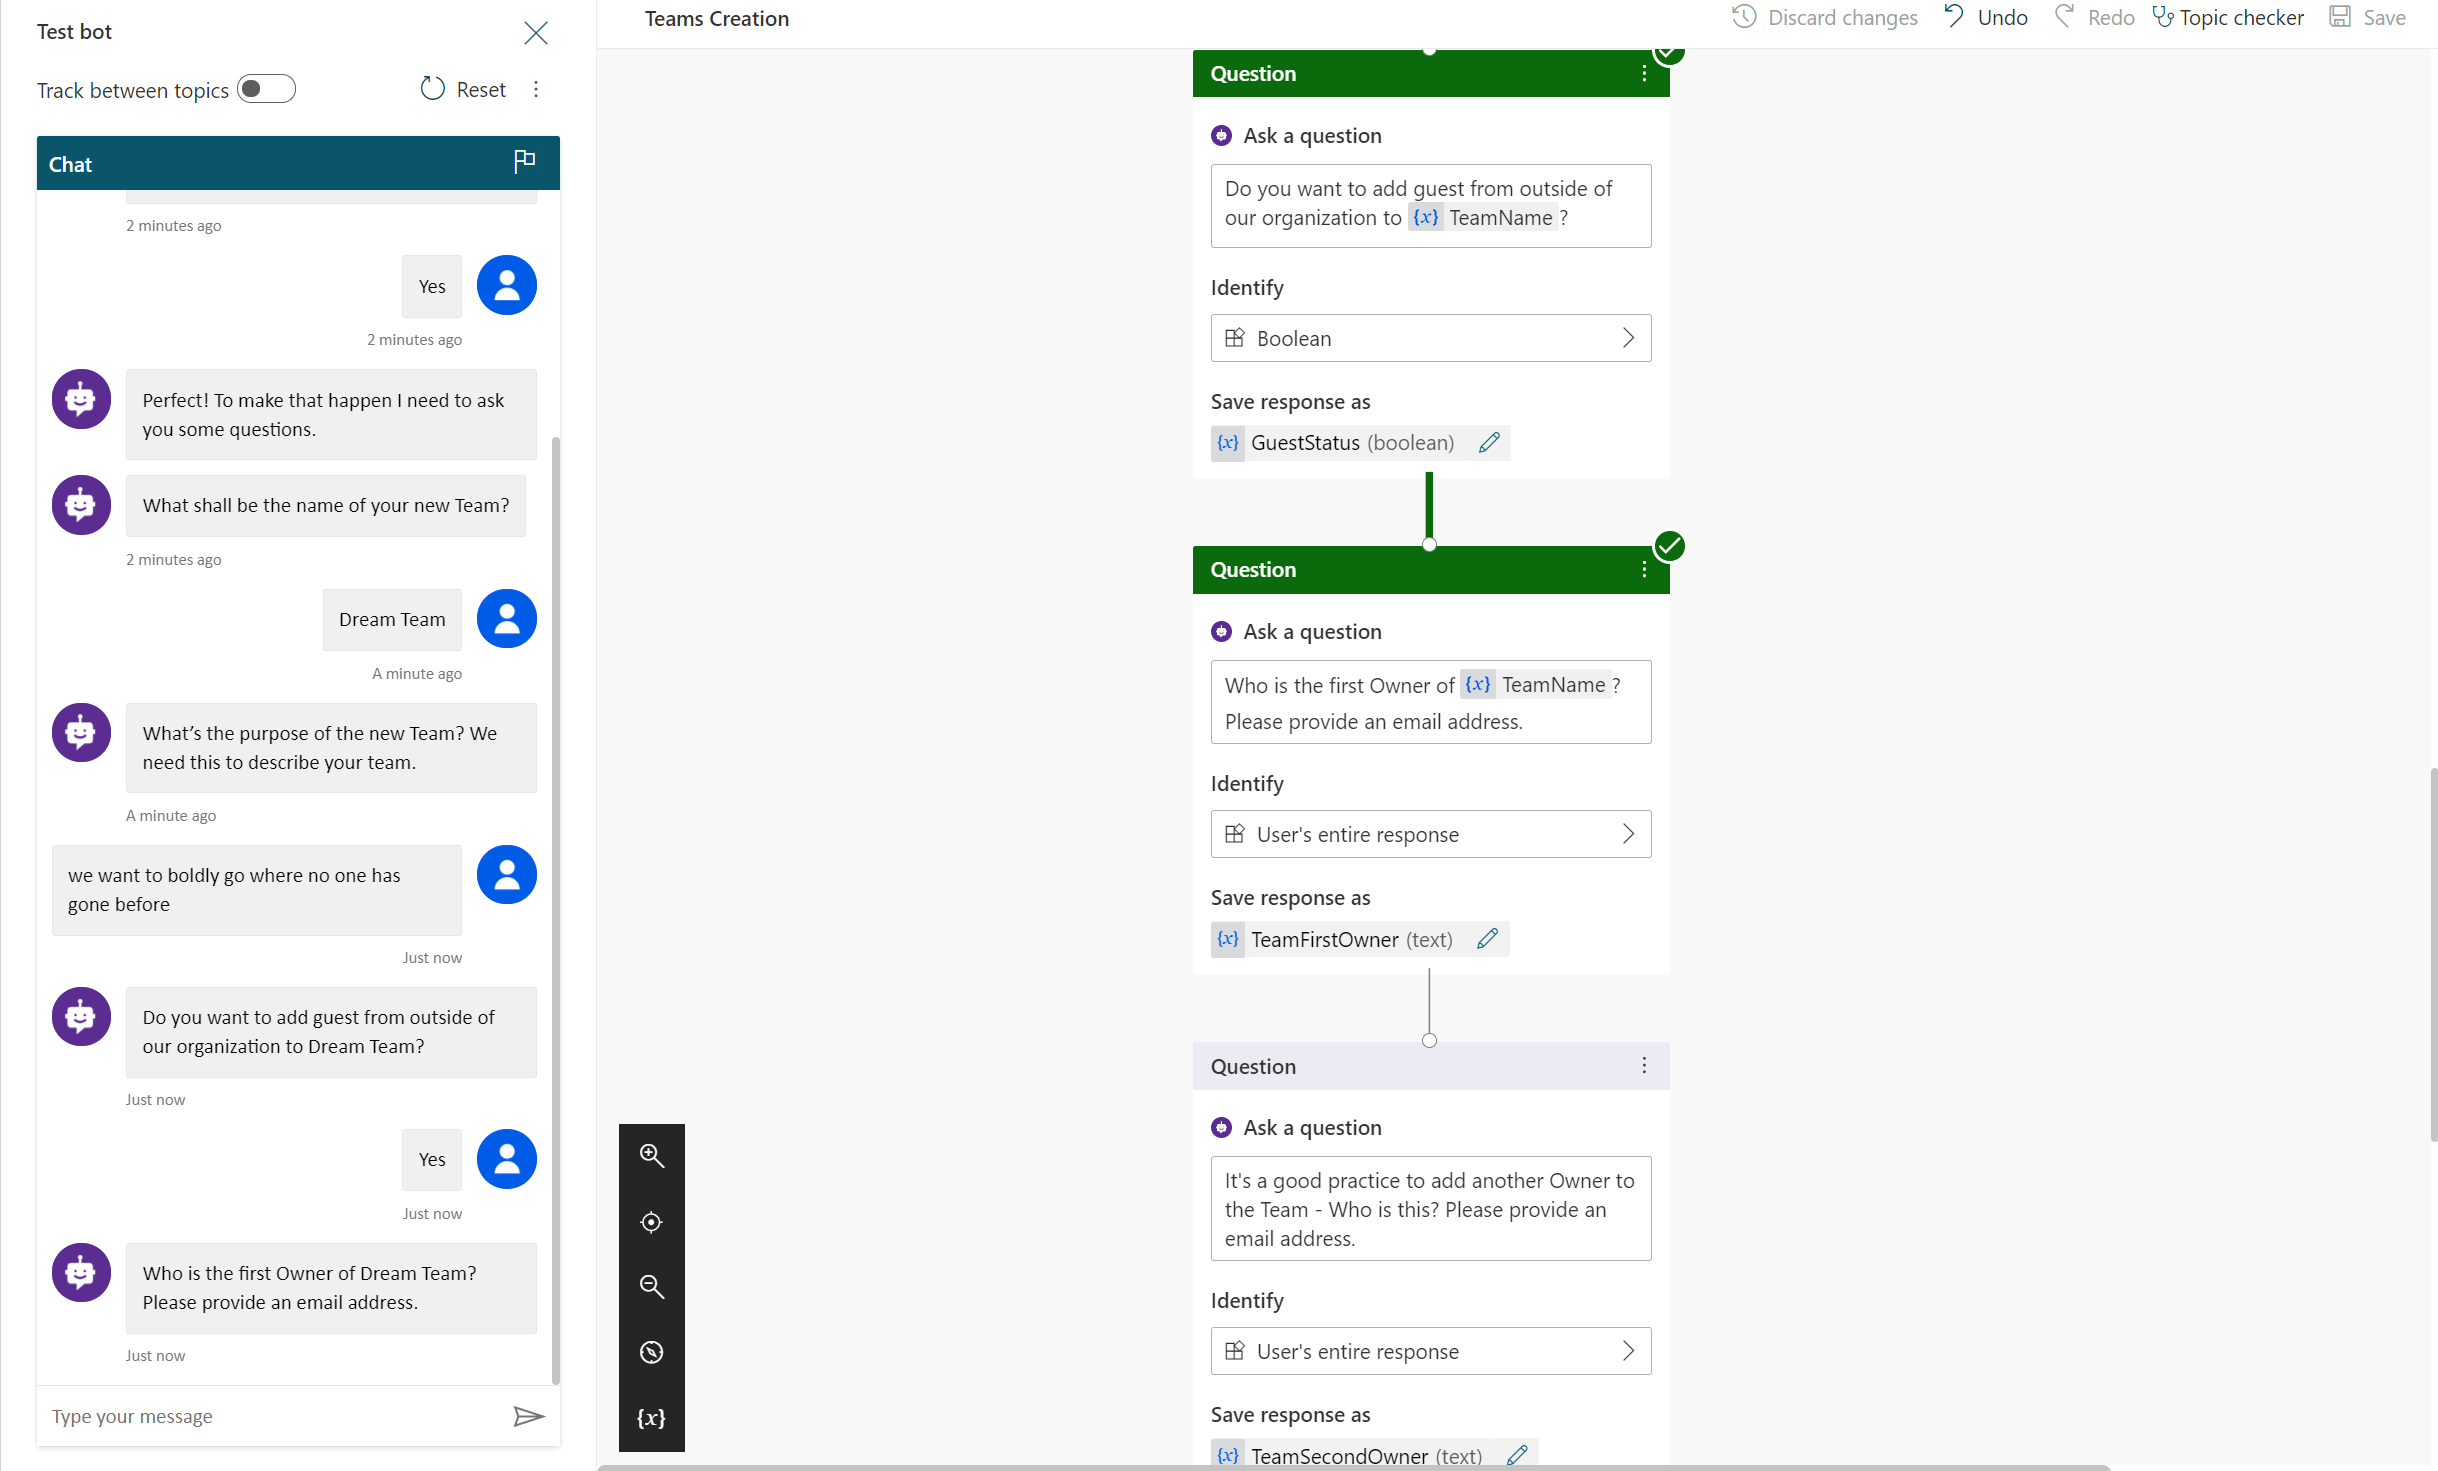
It is very important to check if the Chat Bot and the user are on the same page, therefore we want the user to confirm that he wants to request a new team in Microsoft Teams. As the answer to that question should be YES or NO its a good idea to identify this as BOOLEAN:
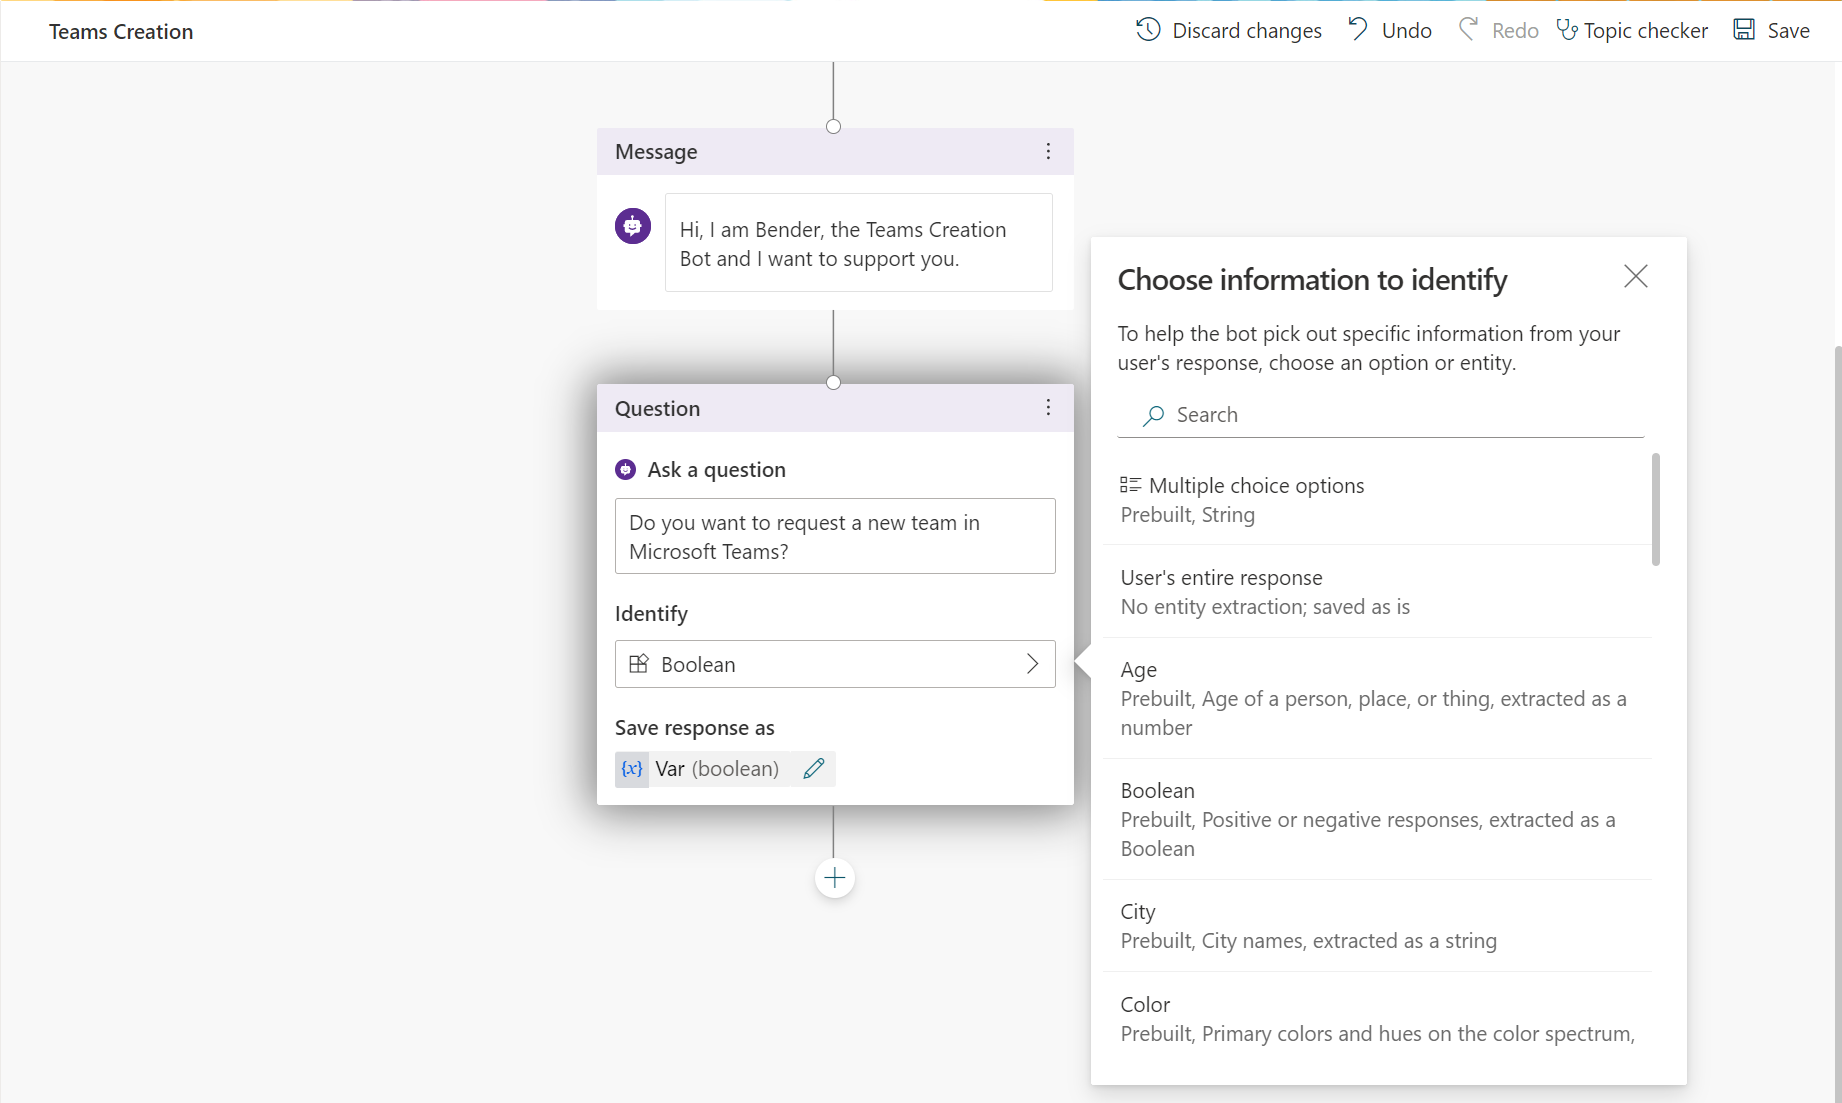
and actually name the variable.

Now we want to add a condition and some messages depending on the outcome:
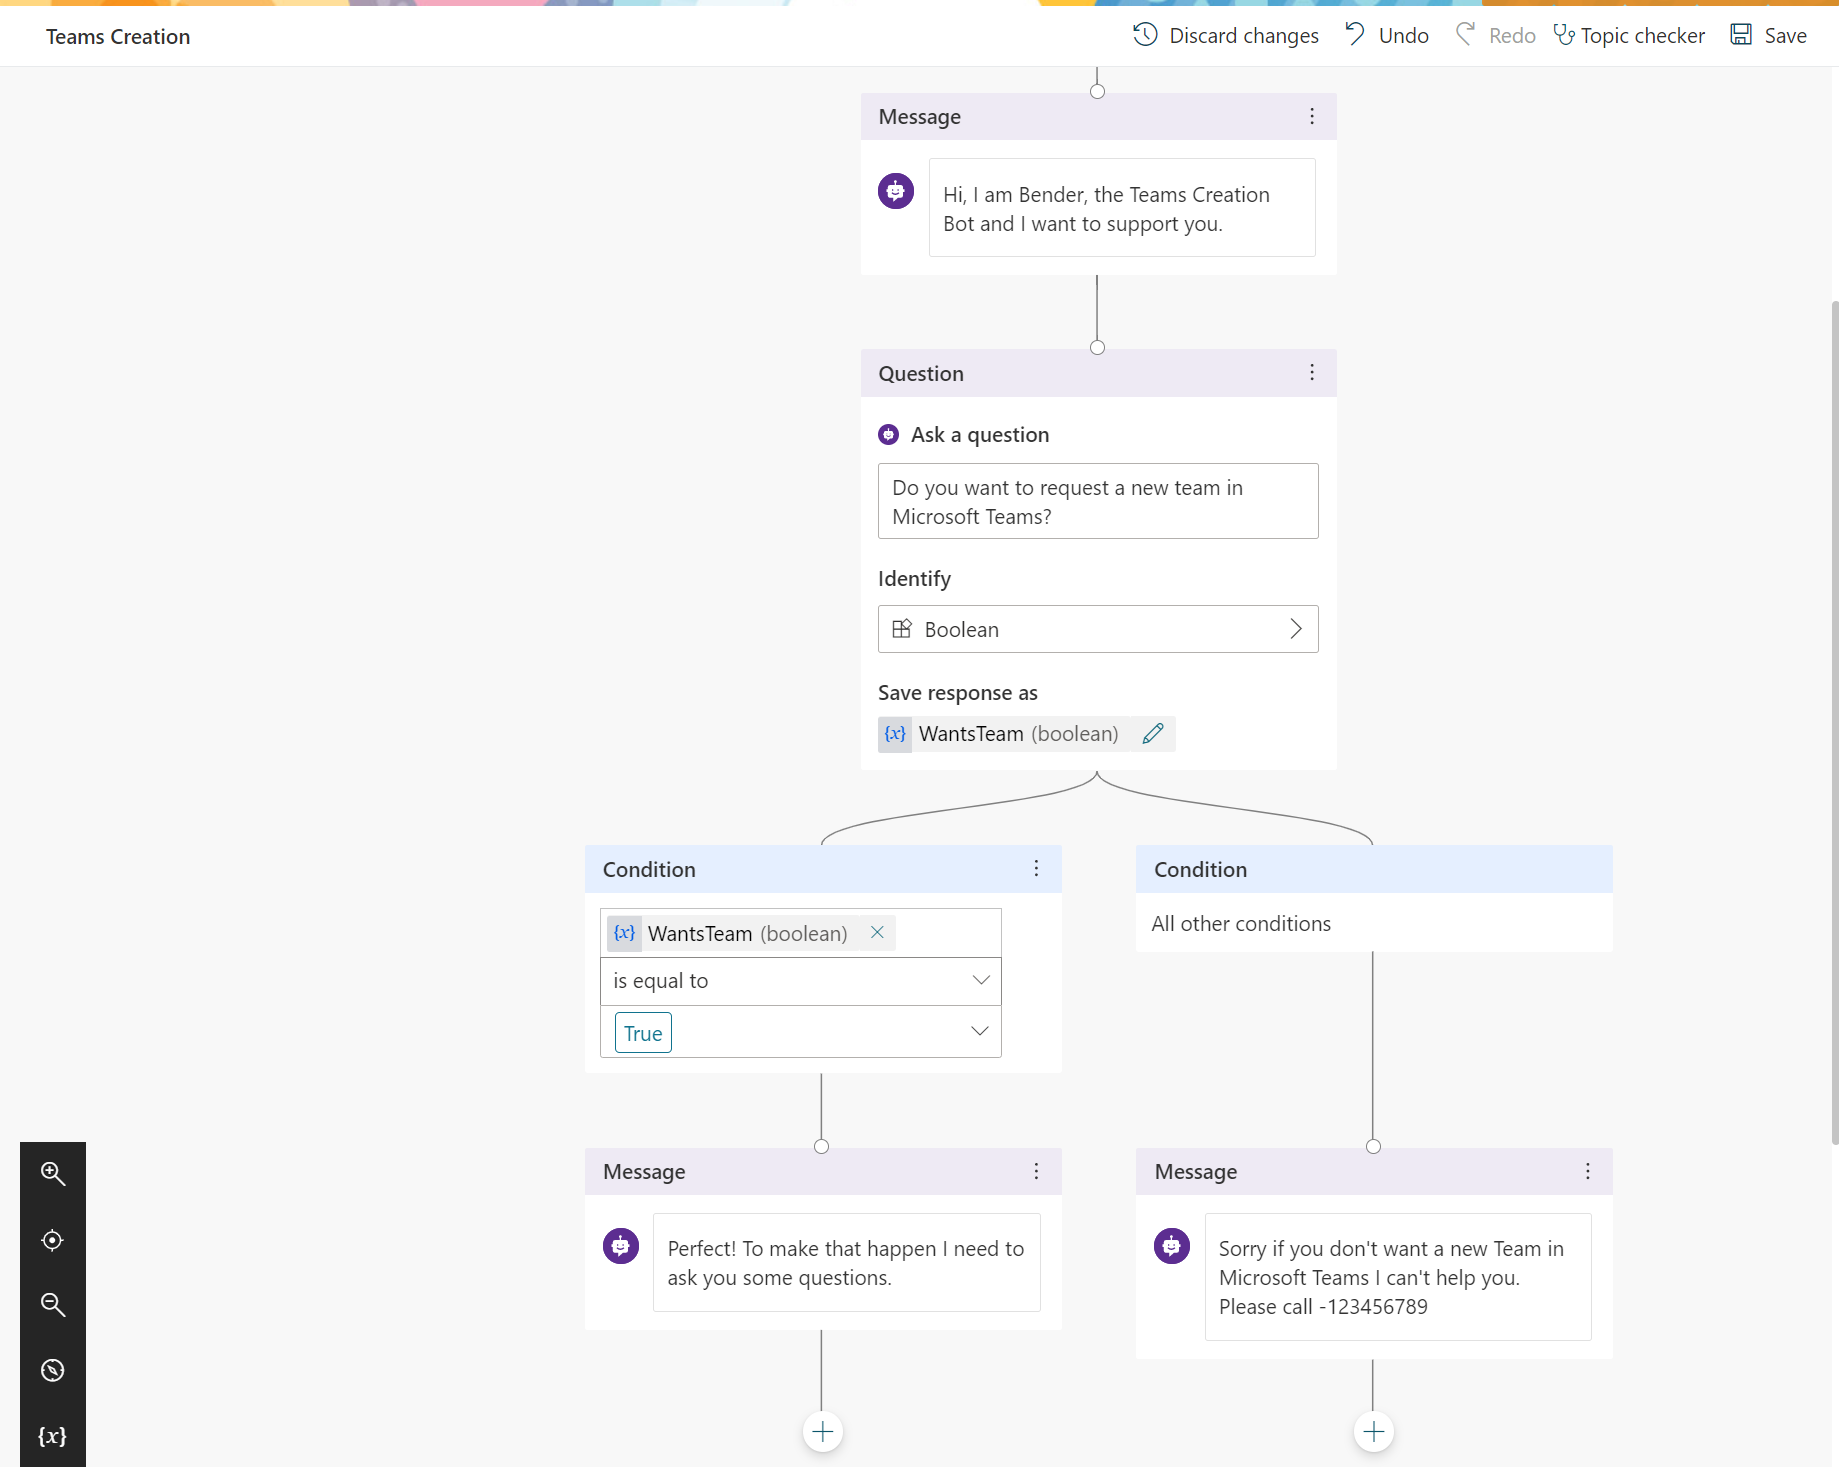
From now on, we will continue in the IF TRUE branch.
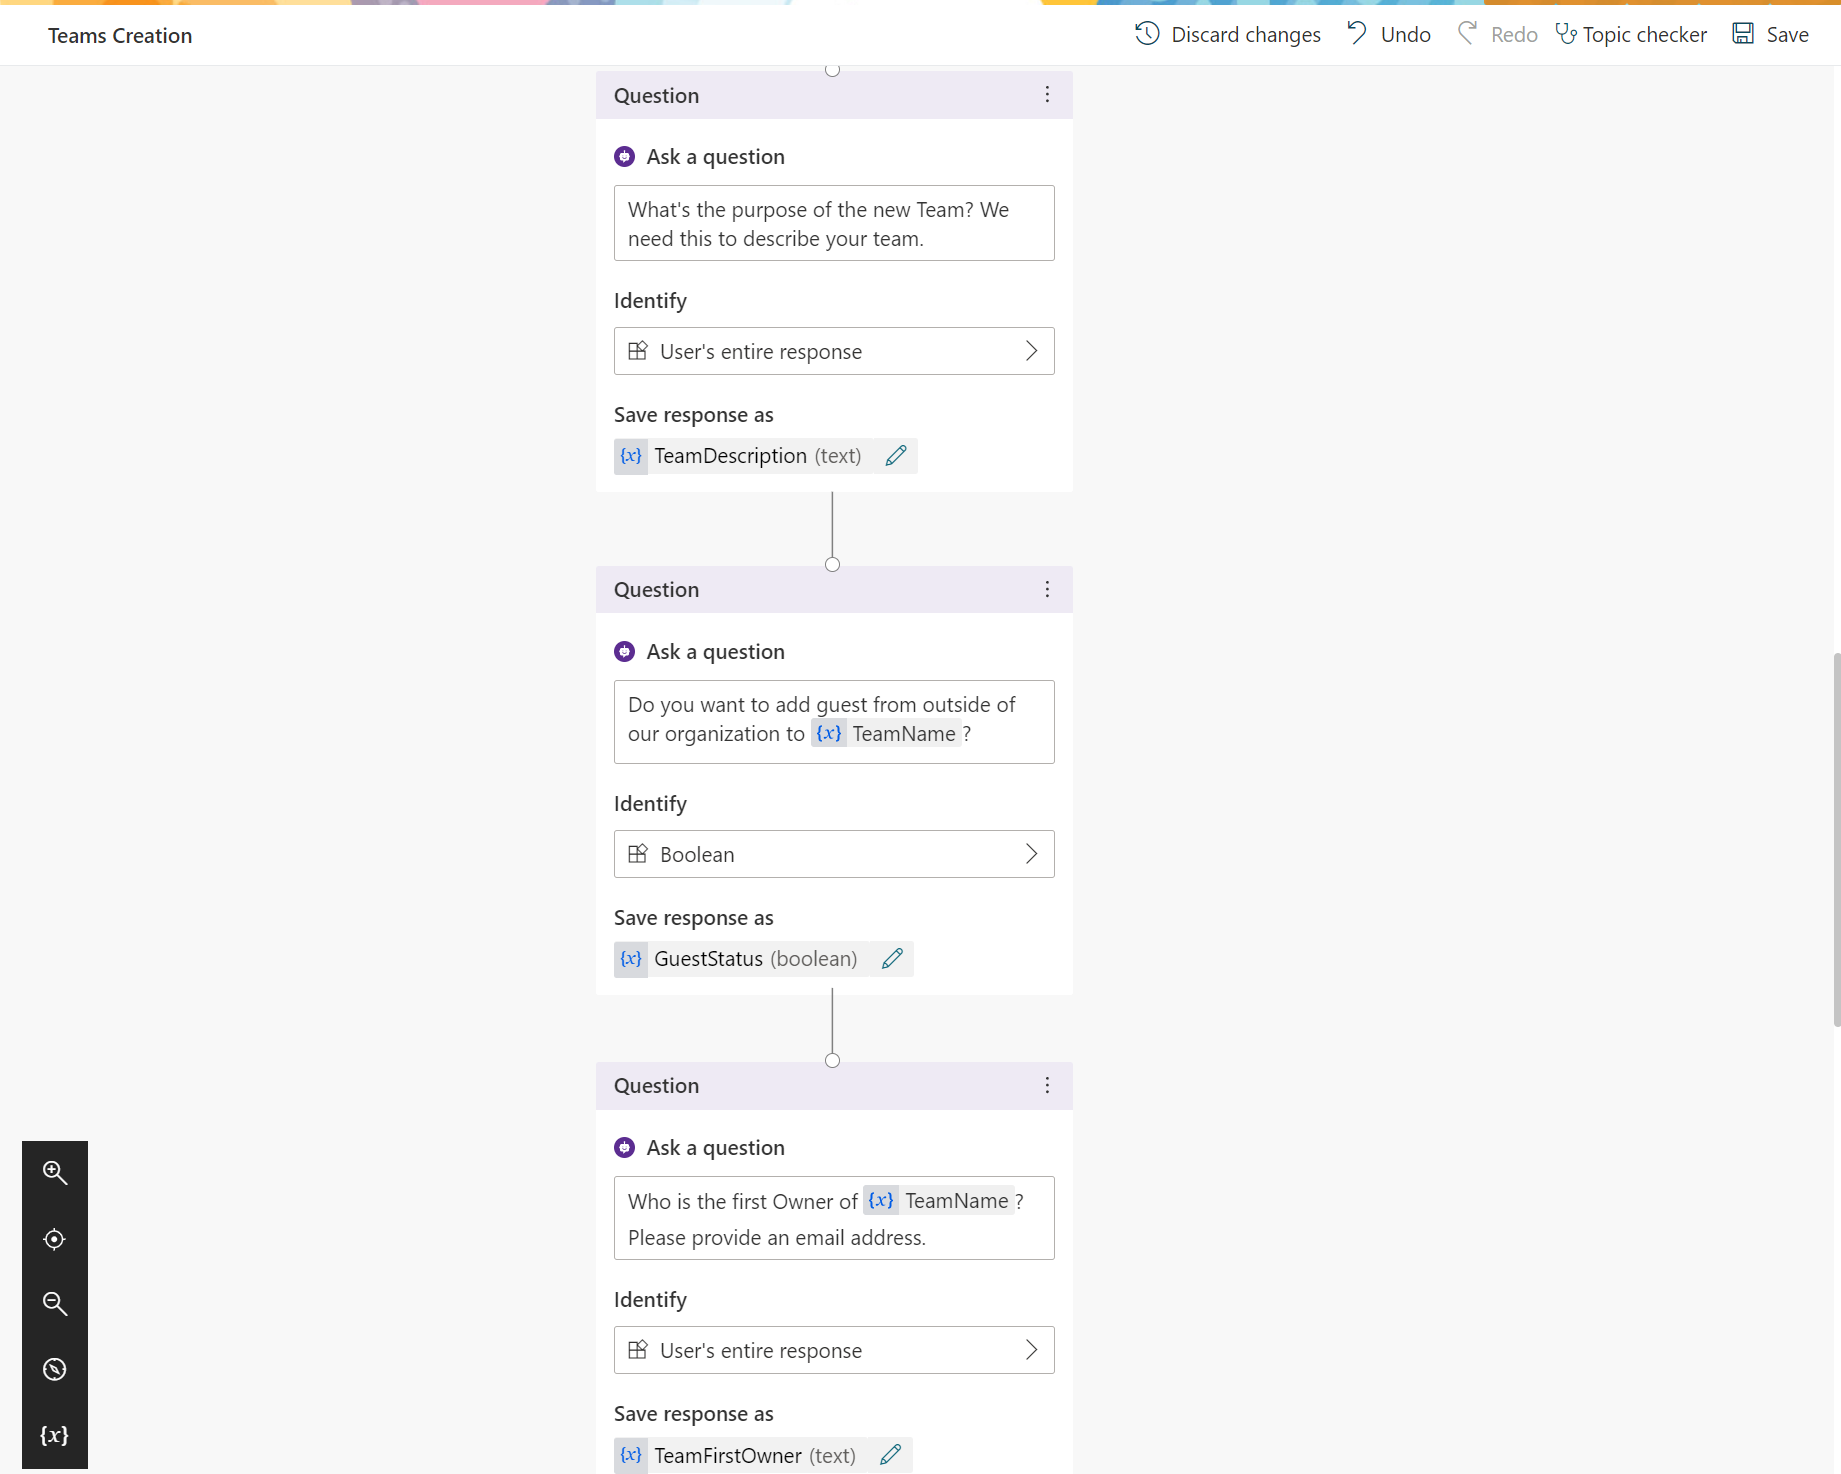
Start with asking for the Team Name, identify the answer as User’s entire response (which is a string) and name your variable.

Ask the other questions as stated above as well,
please keep in mind,
- that questions, which can be answered with a YES or a NO are always BOOLEAN,
- questions which can be answered with predefined responses are CHOICE (we don’t use them in this scenario) and
- only if we want the user just to type a text it’s USER’S ENTIRE RESPONSE
So finally, this should look like this:
you can actually test the bot right now. To do that, please SAVE (upper right corner)
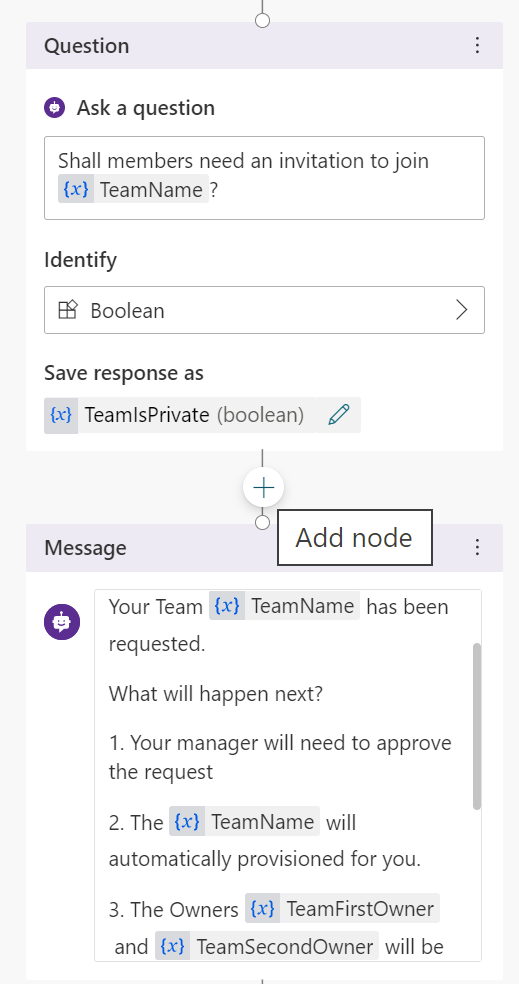
As you can see, this works pretty fine. Please now add an additional message to your topic, summarizing the chat:

After that, end the conversation with a survey if you like to — but it’s not required.
Now add a new node (those cards!) between the last question and the summarizing message by clicking the + Icon:
Click on CREATE A FLOW. We want to take action on the inputs that our users made in the chat. Luckily, Microsoft already made a nice template for us.
Power Automate, First Flow
A new tab in your browser opens with the POWER VIRTUAL AGENTS TEMPLATE:
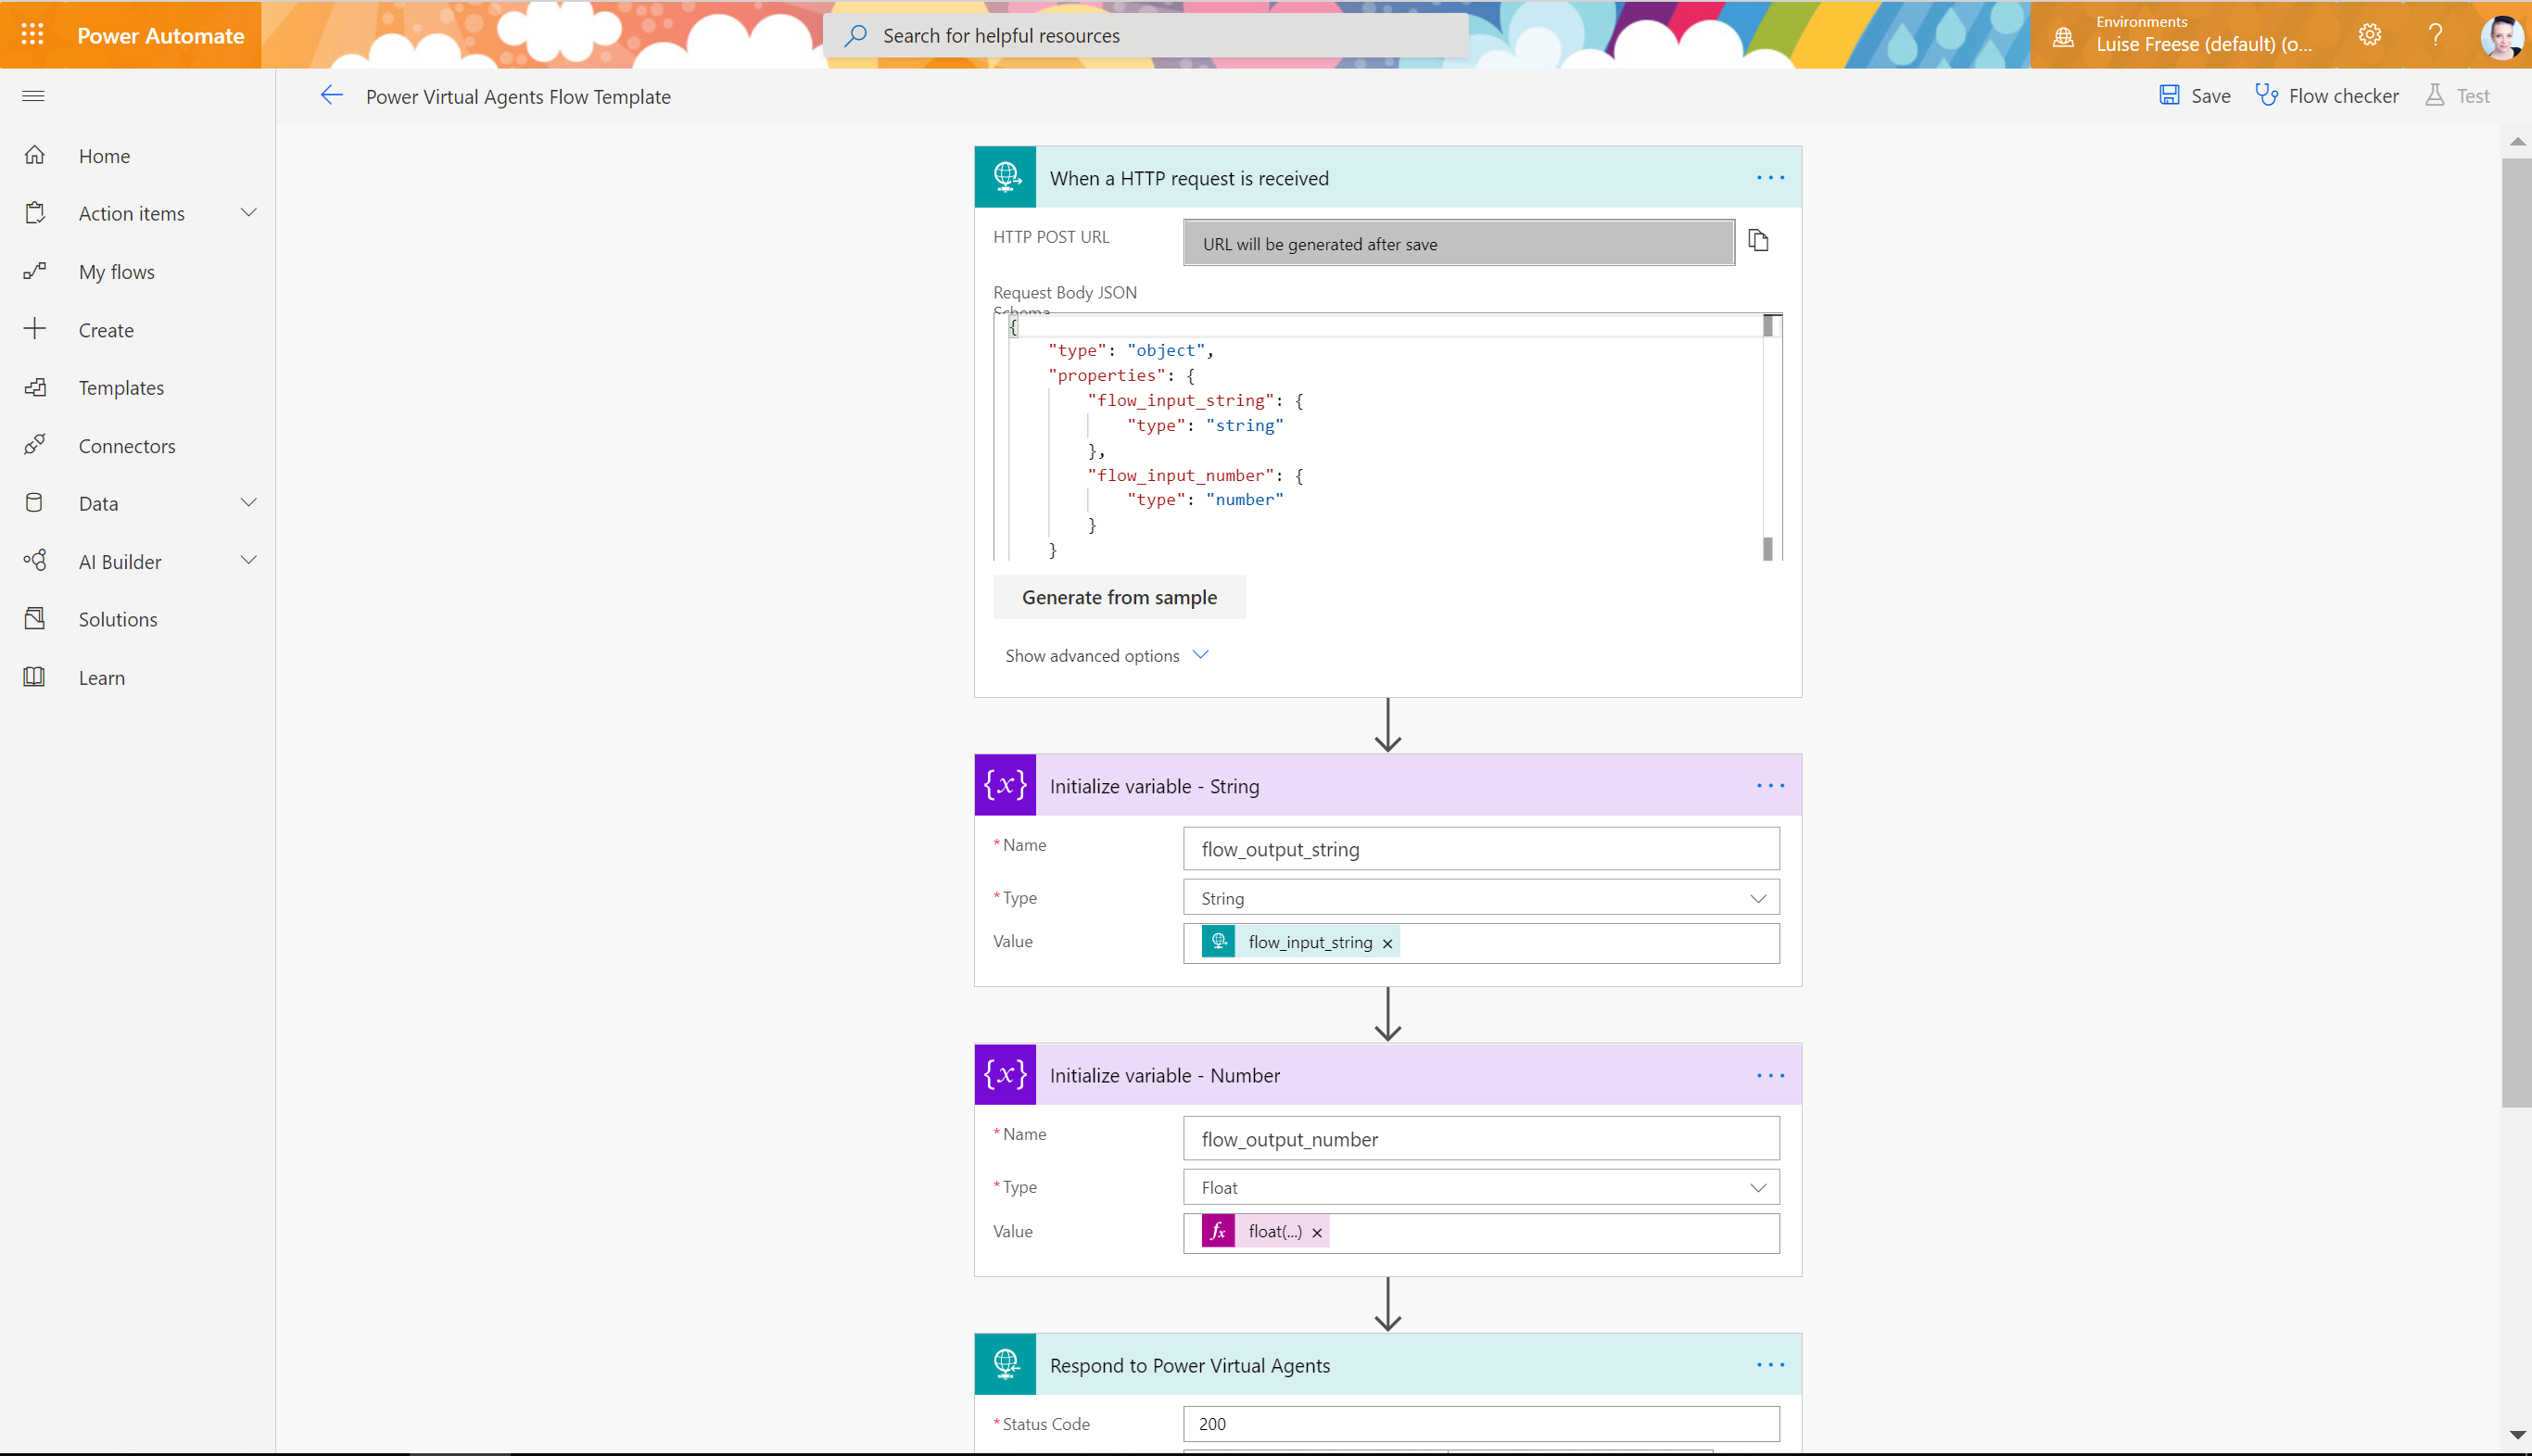
We need to make some changes to the JSON objects and to the variables — but I will guide you through!
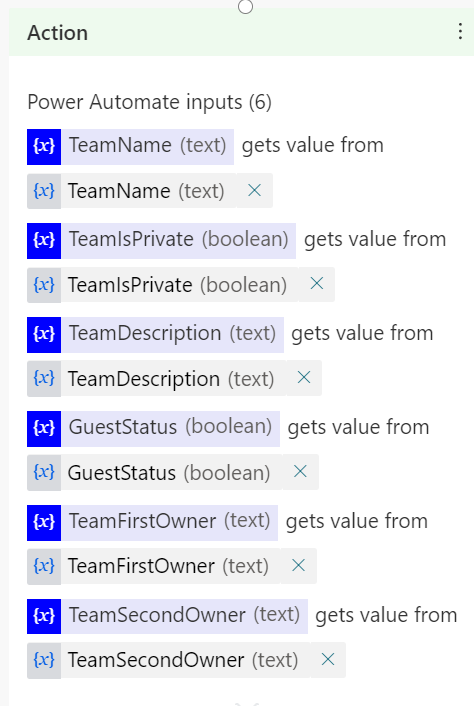
- In the Trigger WHEN A HTTP REQUEST IS RECEIVED we need to add all variables from the chatbot so we can work with that.
The variables for TeamName, Description, First and Second Owner need to be type string, the variables for Visibility and Guest Status need to be boolean.
So here is the JSON:
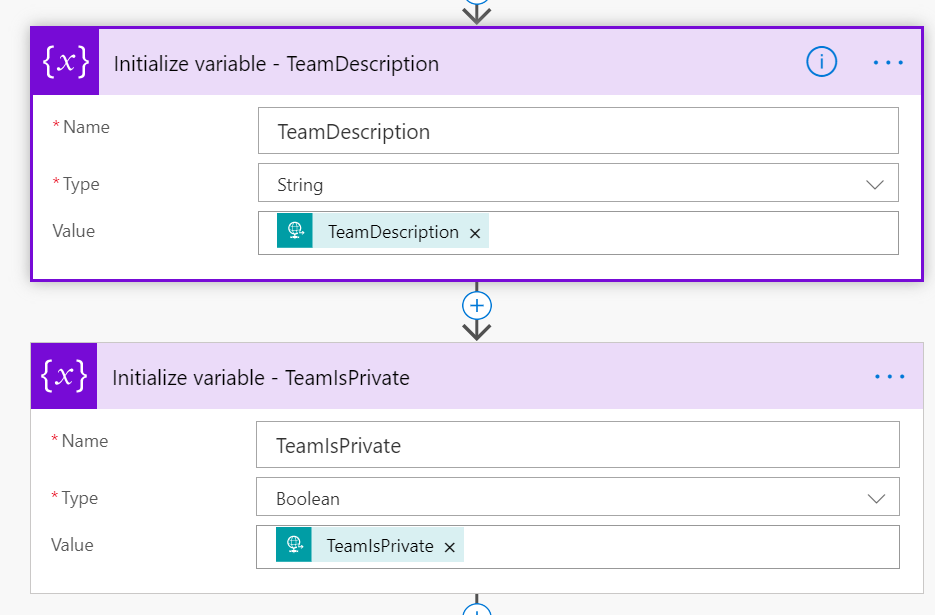
- Now we need to edit the first INITIALIZE VARIABLE action and insert the right Value from the Dynamic Content:
As we have no numbers in our JSON code, we can just delete the next action: INITIALIZE VARIABLE — Number
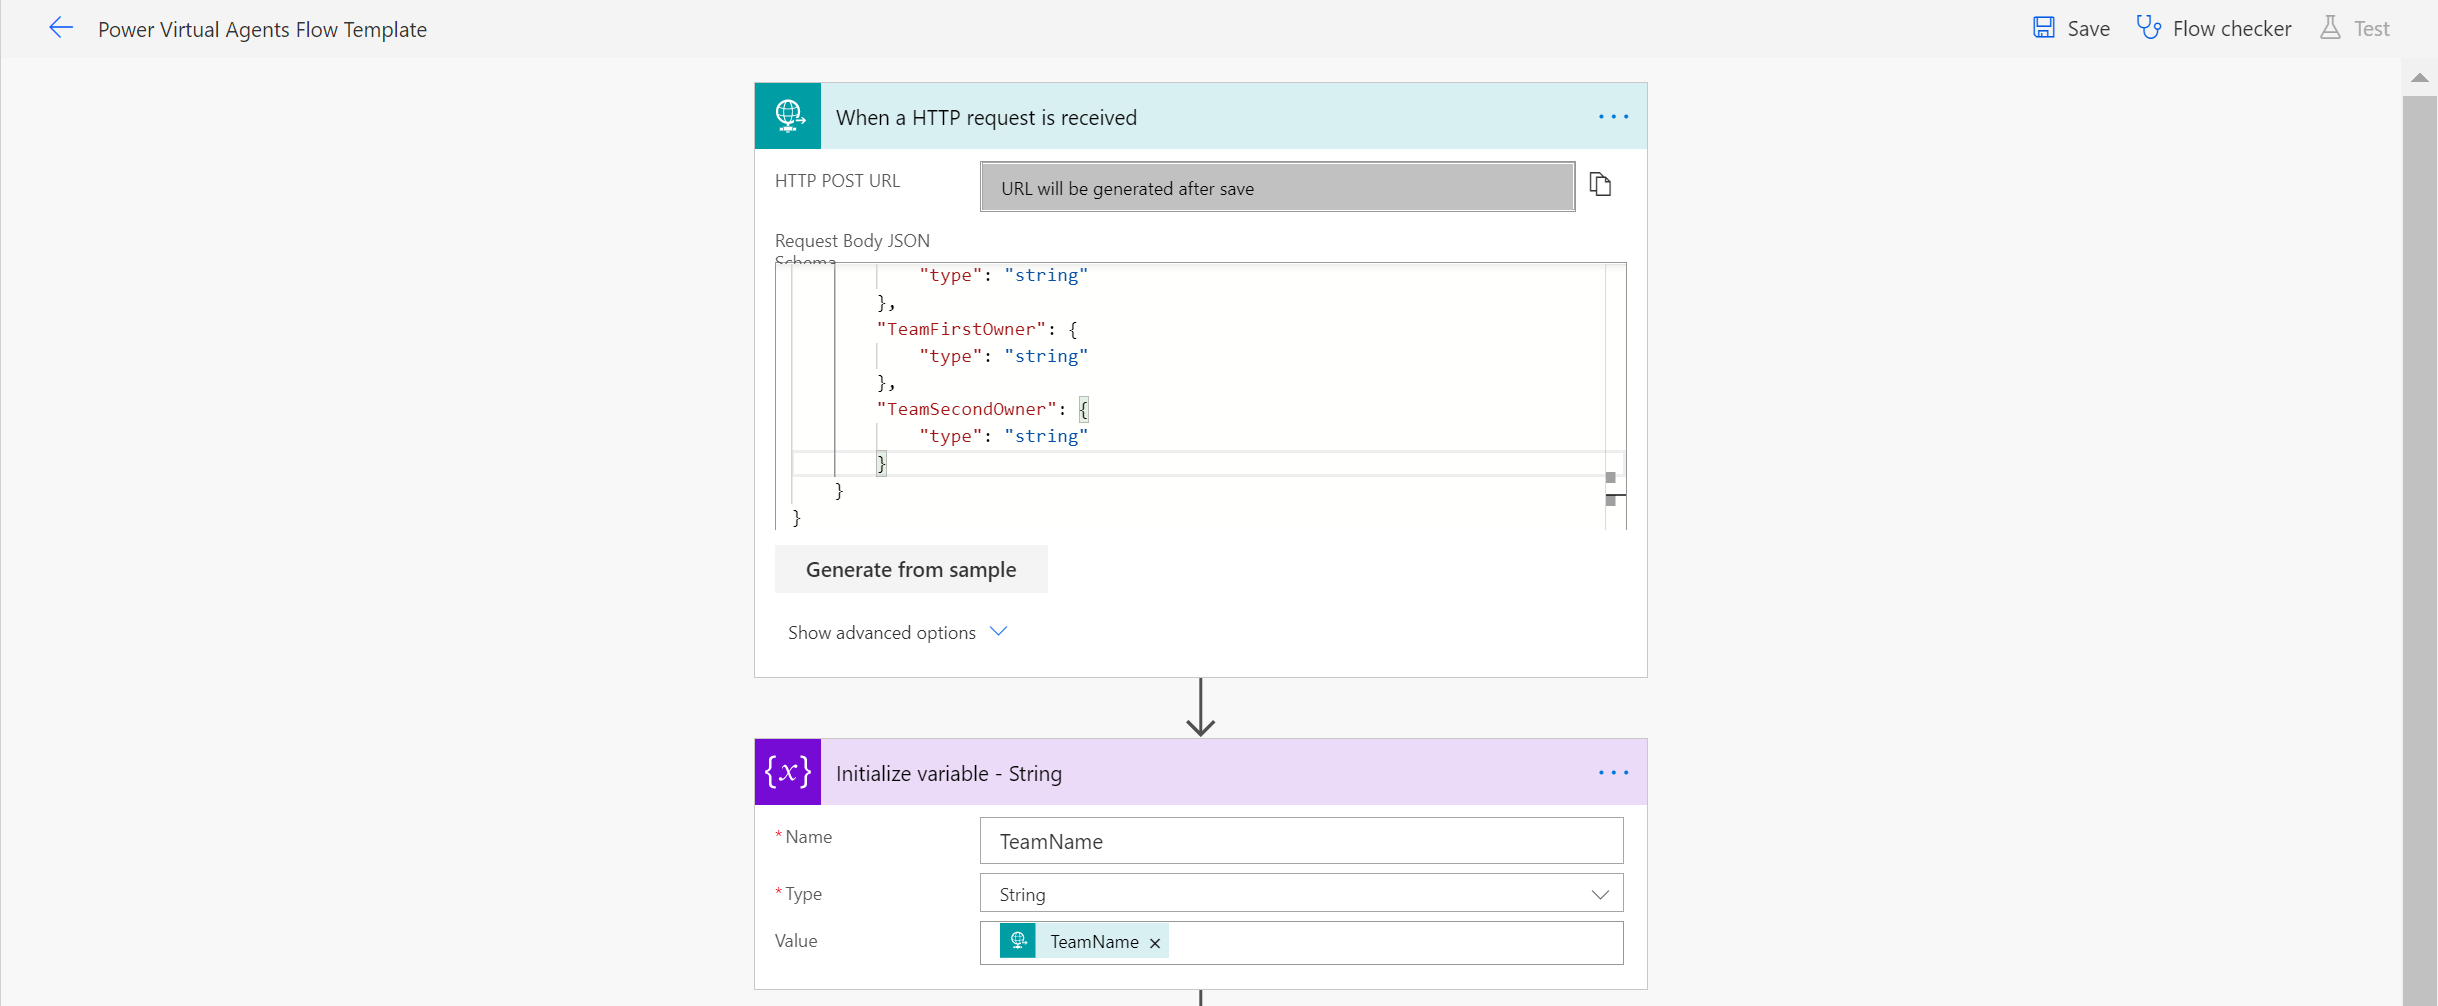
We need to add for each variable (which represents a question that the chatbot asked) an INITIALIZE VARIABLE action. You can simplify this by just using the COPY TO MY CLIPBOARD feature:
(Click the … Icon on the action you want to cope, click COPY to my Clipboard, Click the + icon to insert another action, select MY CLIPBOARD,select the action from the clipboard).
Please note, that the yes/no questions in the PVA should be reflected as type boolean in flow.
- Please do yourself a favor and rename your actions.
Seriously. Do this now.
We need to edit the RESPOND TO PVA:

Please make sure you also click on SHOW ADVANCED options and insert the following JSON:
- To log all request, we use a SharePoint list. Create a new list and add columns which represent our variables plus columns for STATUS and COMMENTS

- Add a CREATE ITEM action to the flow — simply insert our variables into the fields.

Save your changes and give your flow a better name.
Now we need to add the flow we just created in the PVA Autoring Canvas. To make it appear in the CALL AN ACTION list we need to
move our flow to the SOLUTIONS tab in Power Automate:
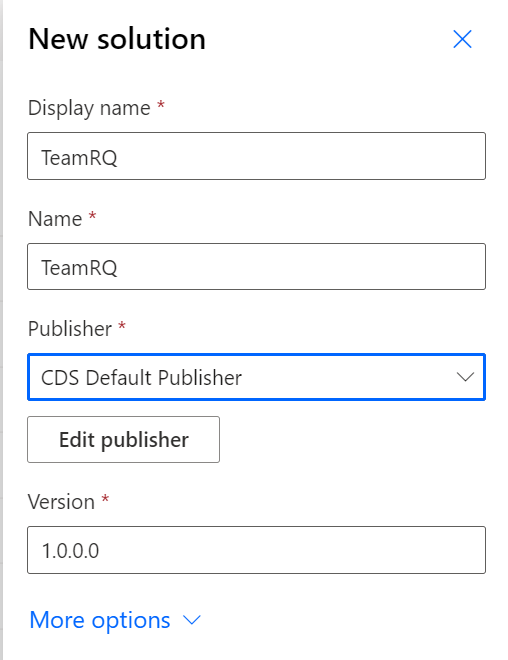
- Click SOLUTIONS, then NEW SOLUTION
- give your solution a name, select CDS DEFAULT PUBLISHER and click CREATE:
- Now click on the name of your new solution and then on ADD EXISTING, then select FLOW
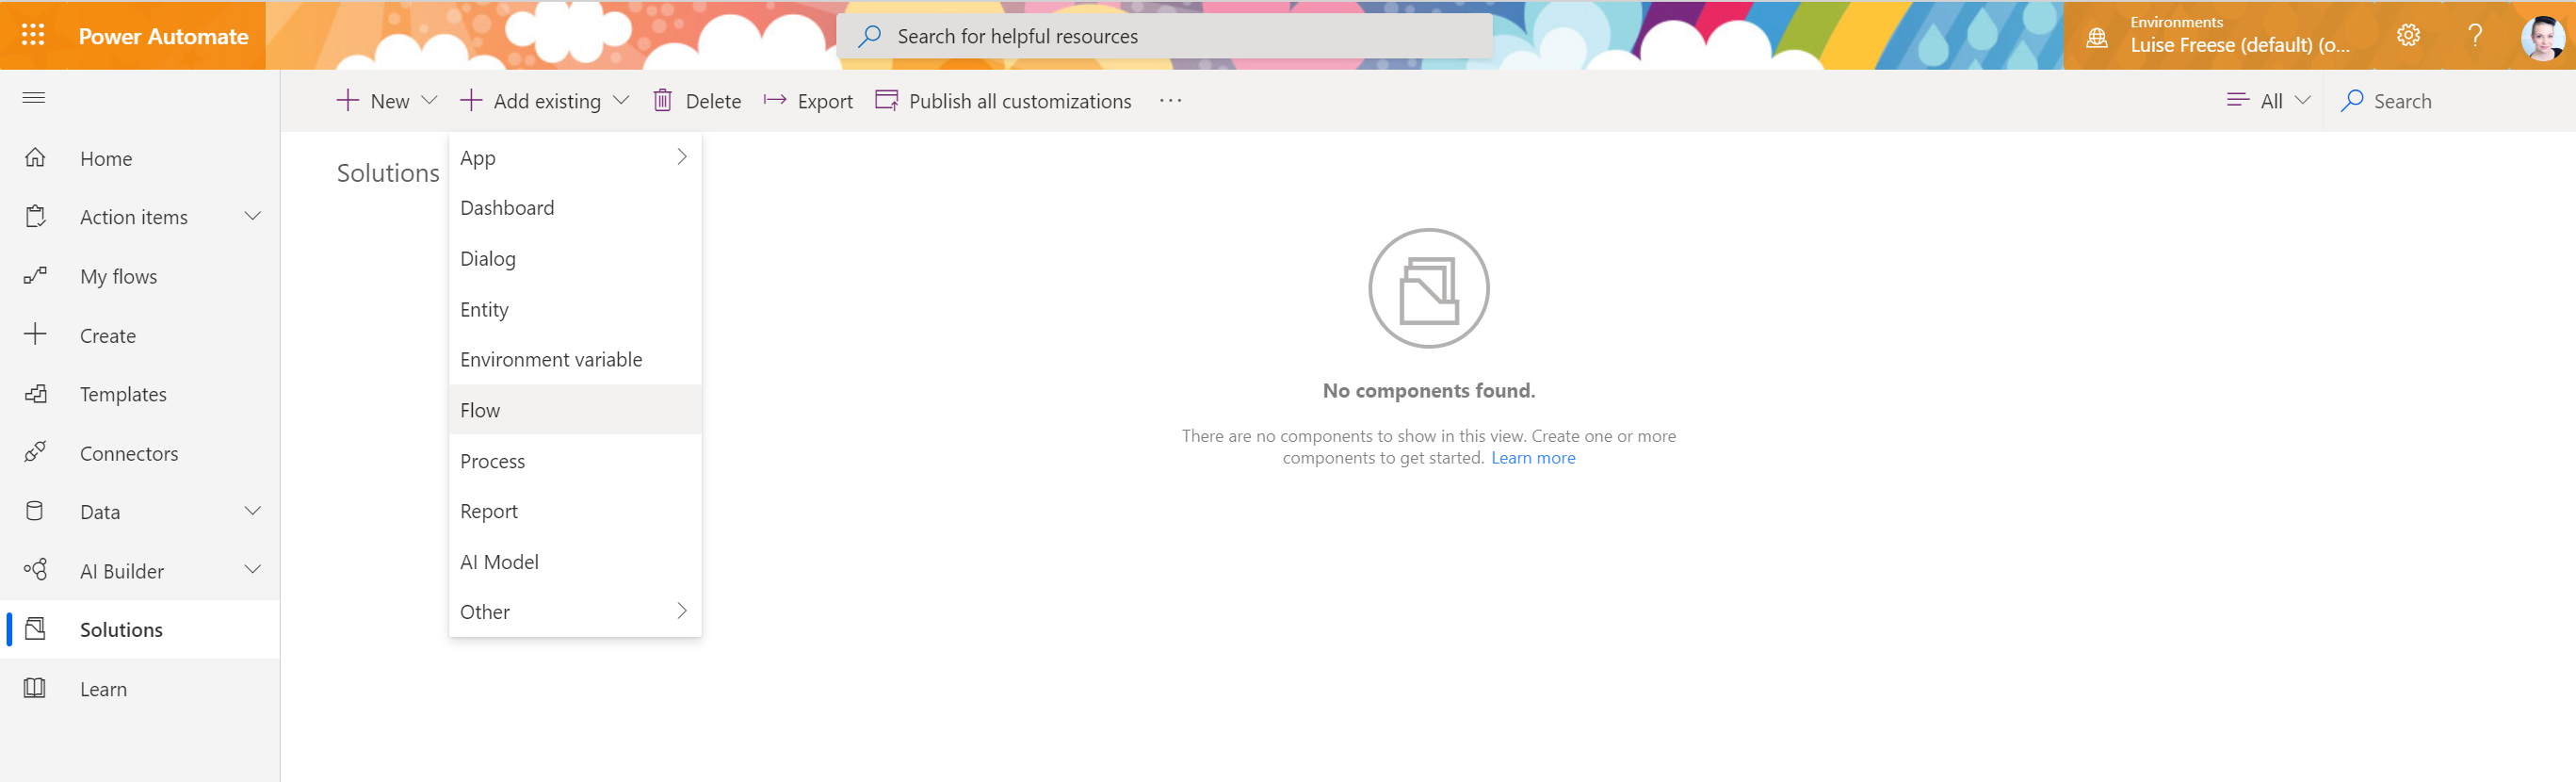
- Select the flow from OUTSIDE SOLUTIONS and click ADD.
Special Thanks here to Tomasz Poszytek who made a more detailed tutorial on that.
Power Virtual Agents — part 2
- Now go back to the Authoring Canvas of PVA , insert the call an action node between the last question and the final message. Your flow should now appear here:
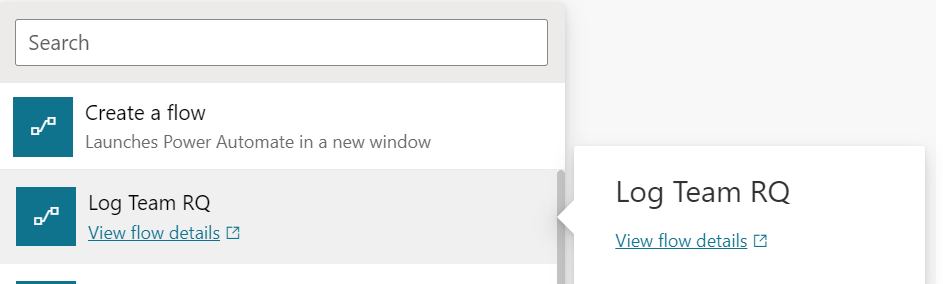
- Select your flow this will create another node:
Again, fill out the fields.
You can test your Bot/flow experience using the test bot, which will trigger the flow and create SP list items. Once everything works here, its time to continue with the second flow.
Power Automate, Second Flow
Purpose of this second flow is to provision the team after an approval, notifying owners and managers about what’s going on and updating our SP list. As there is no action “Create a Team” in Power Automate, we need to provision the team by an http request to Microsoft Graph. Challenge: To be able to authenticate, wen need to first
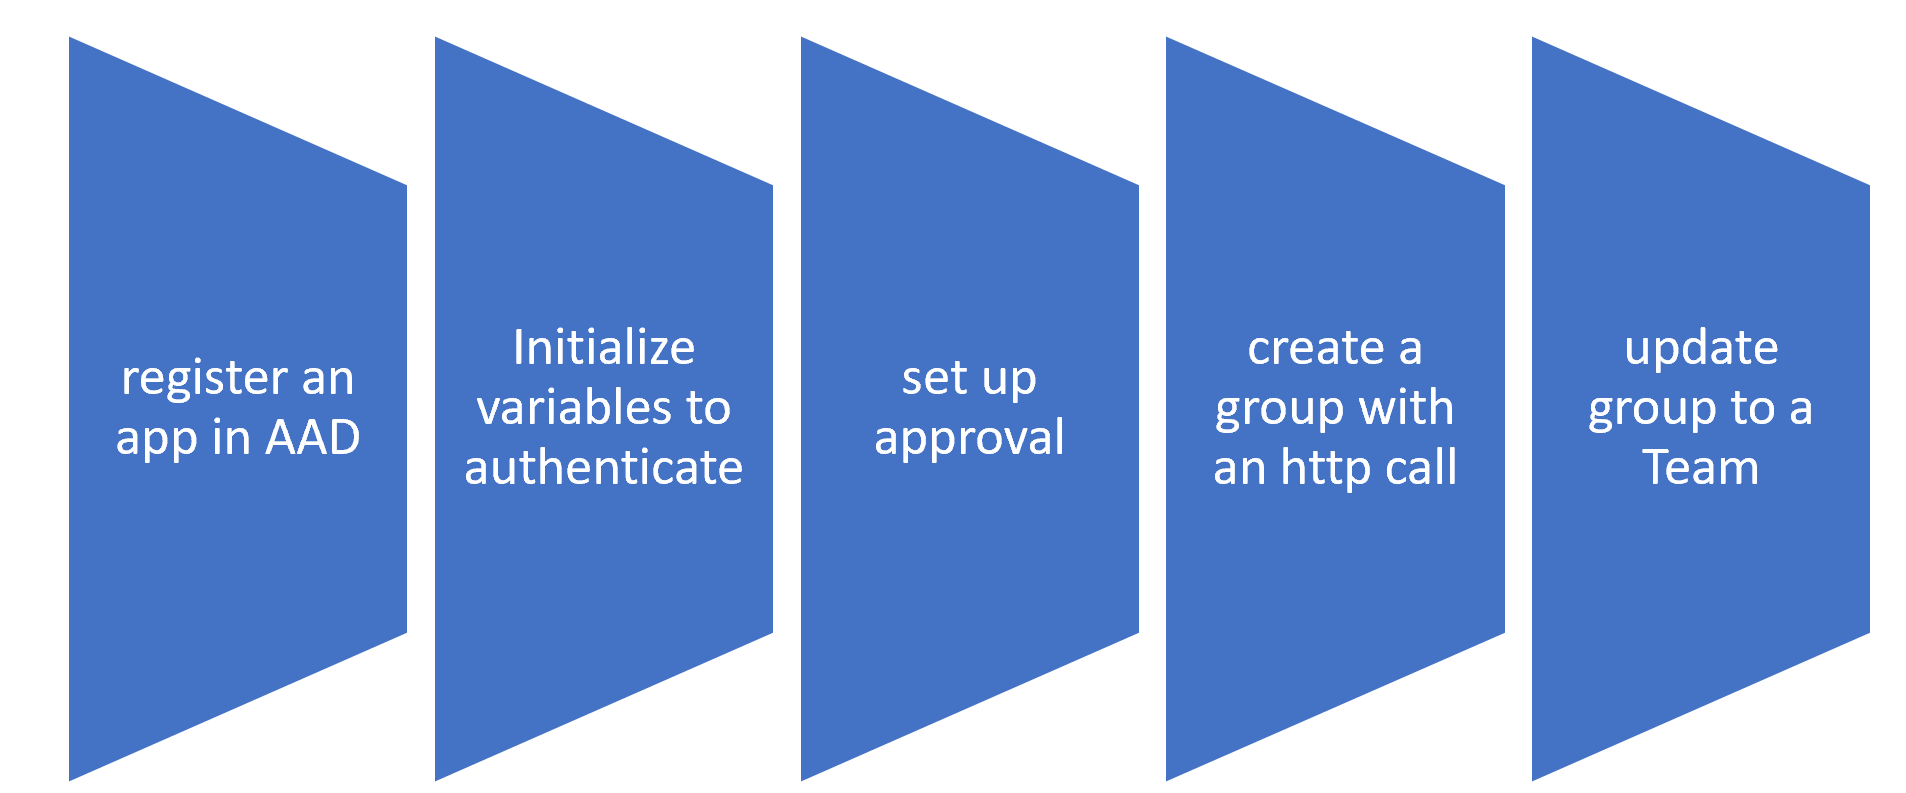
register an application in Azure Active Directory
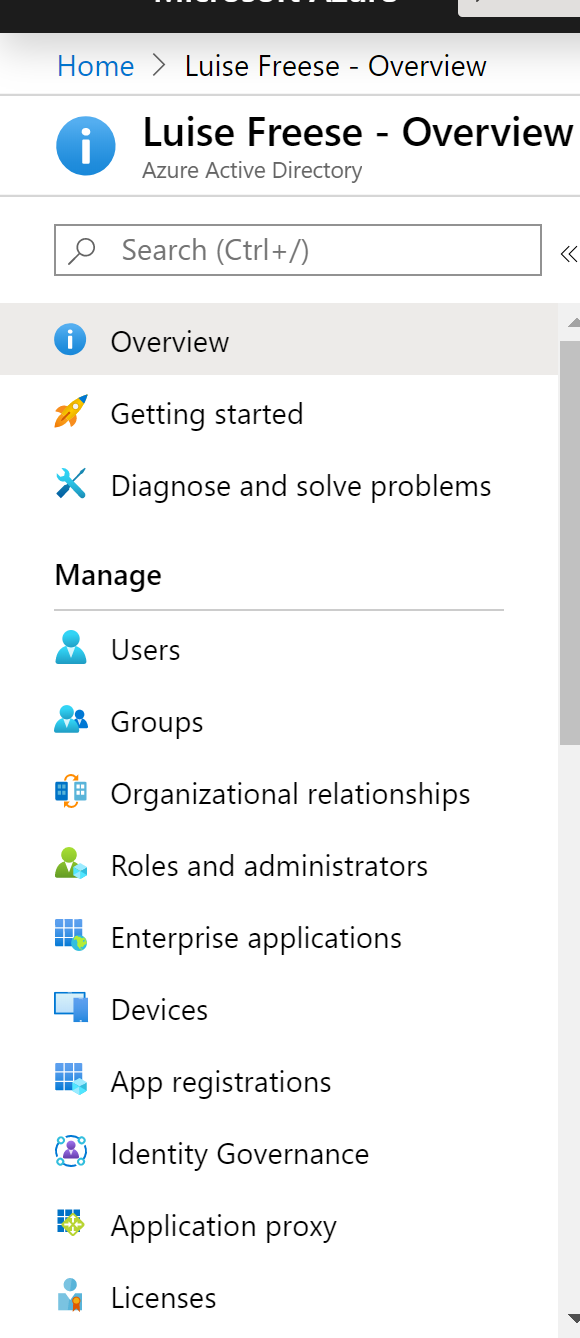
- go to https://portal.azure.com, click on Azure Active Directory, then App Registrations. It helps, if you are your own global admin or at least know her very well 🙂
- Next task is to create a new application. Give it a name and notice, that you can already see
- your app ID
- your tenant ID
We will use that later. First we need to setup some permissions and an App Secret.
- Click on API PERMISSIONS, then ADD PERMISSIONS, then MICROSOFT GRAPH and select APPLICATION PERMISSION
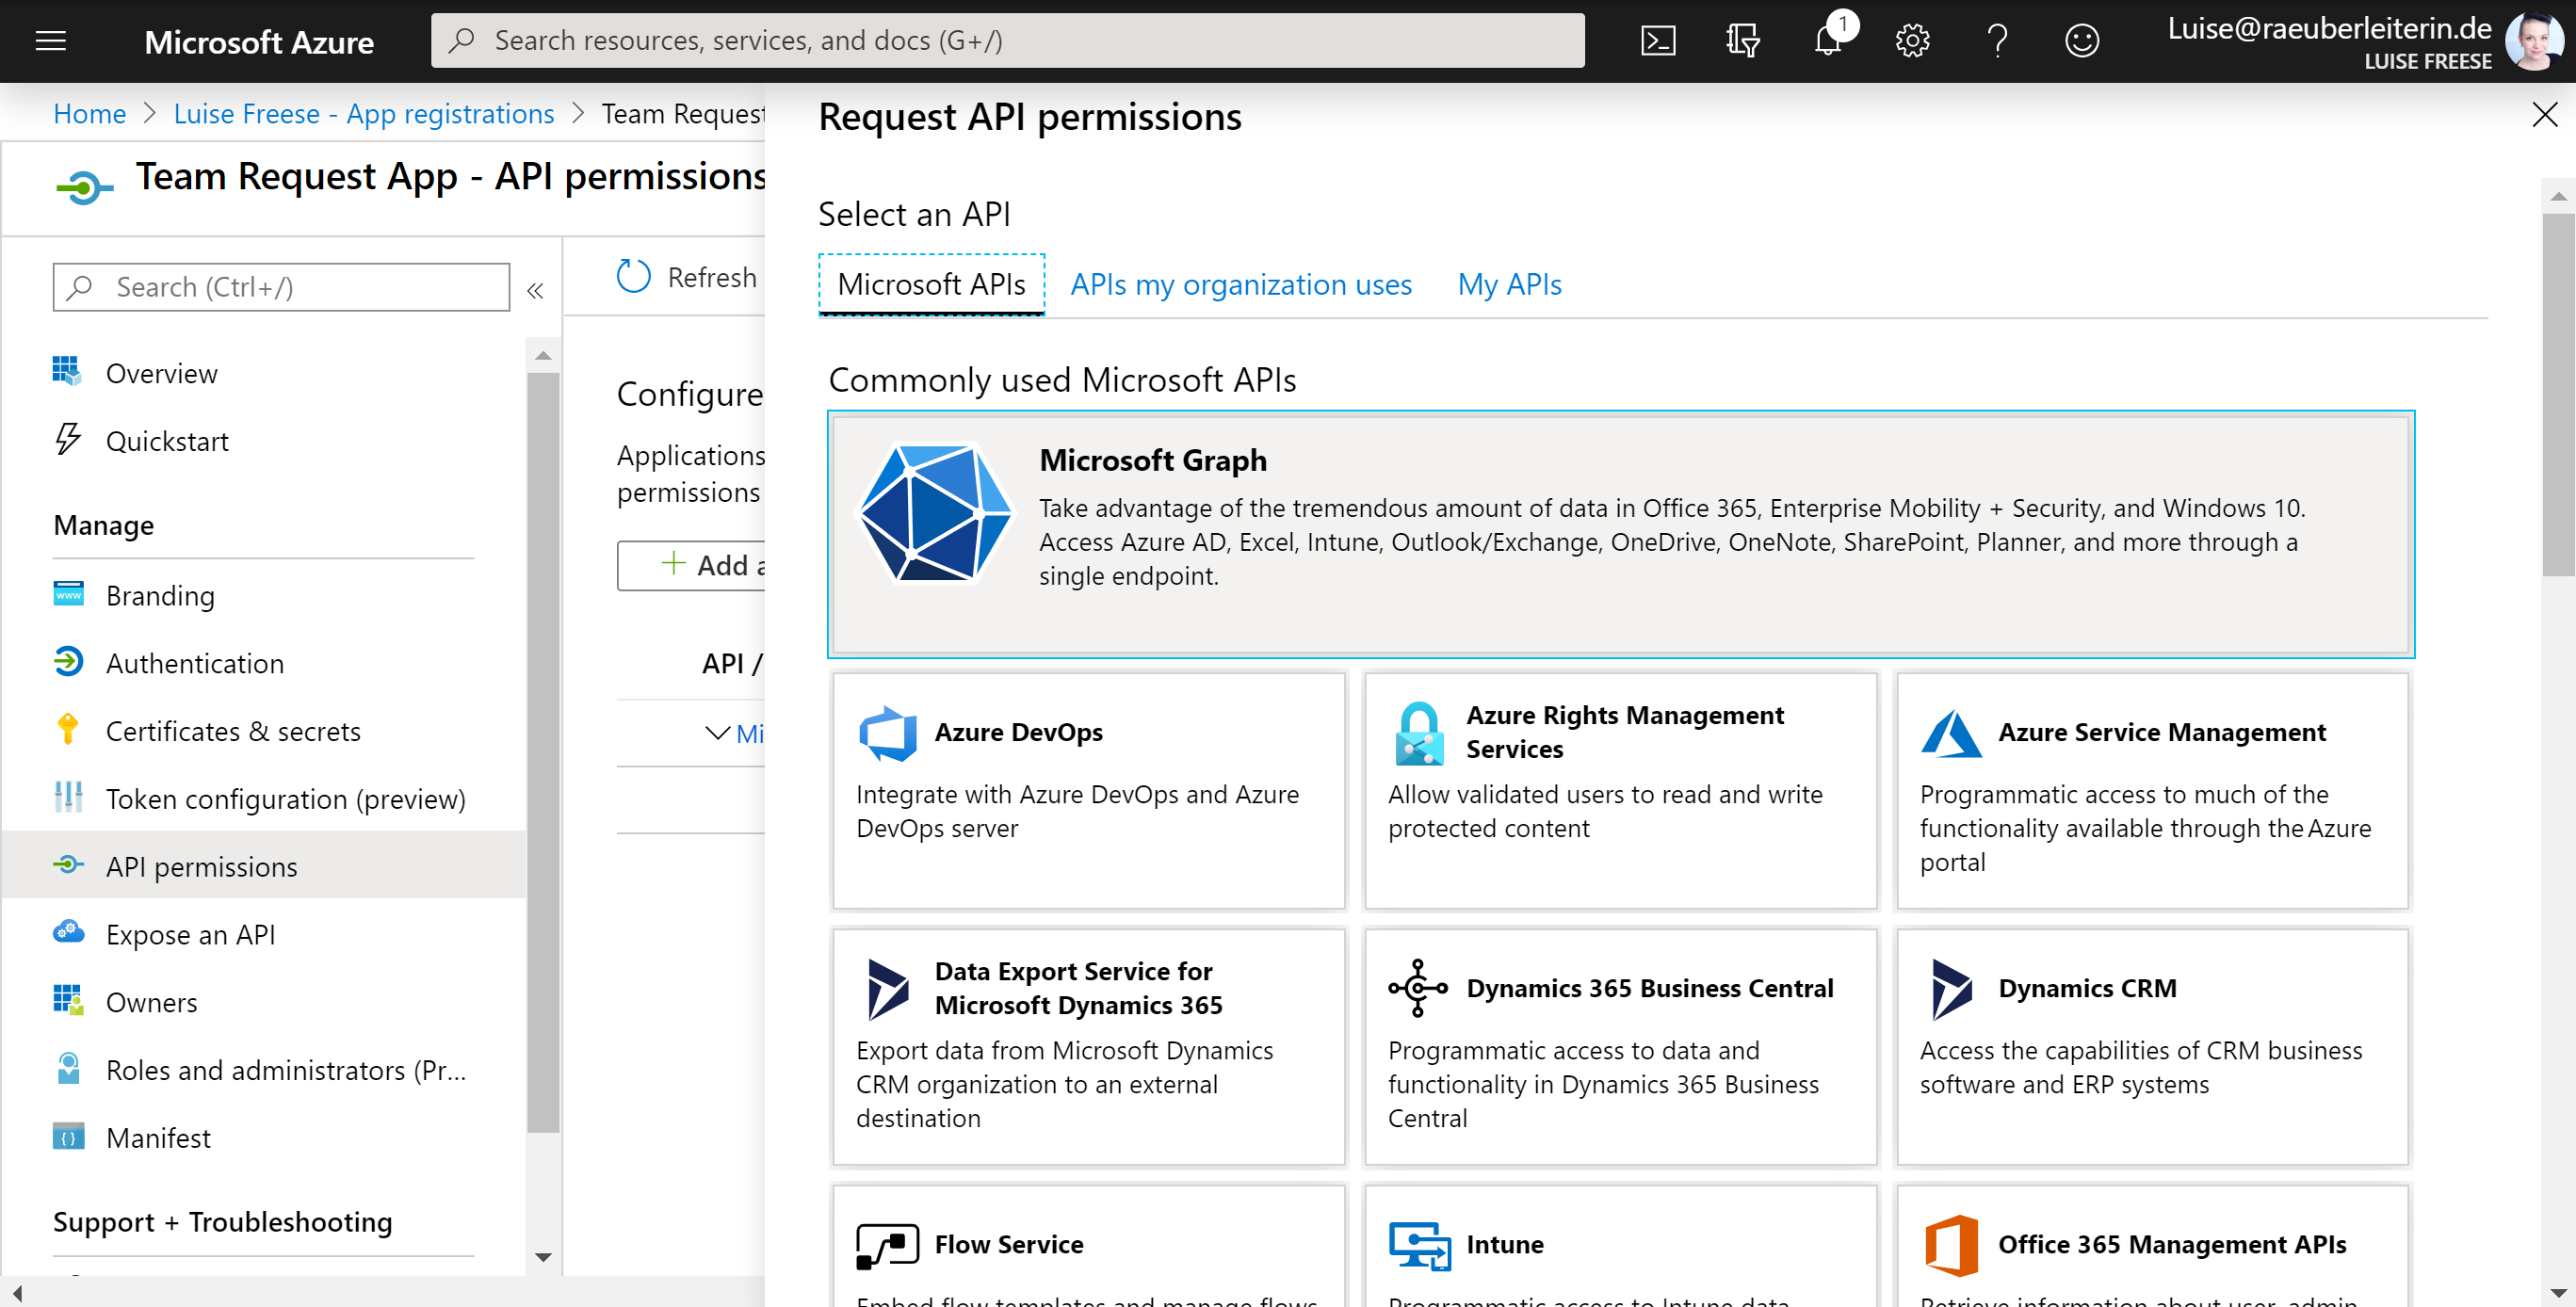
- Add permissions for Directory, User and Groups (ReadWriteAll)
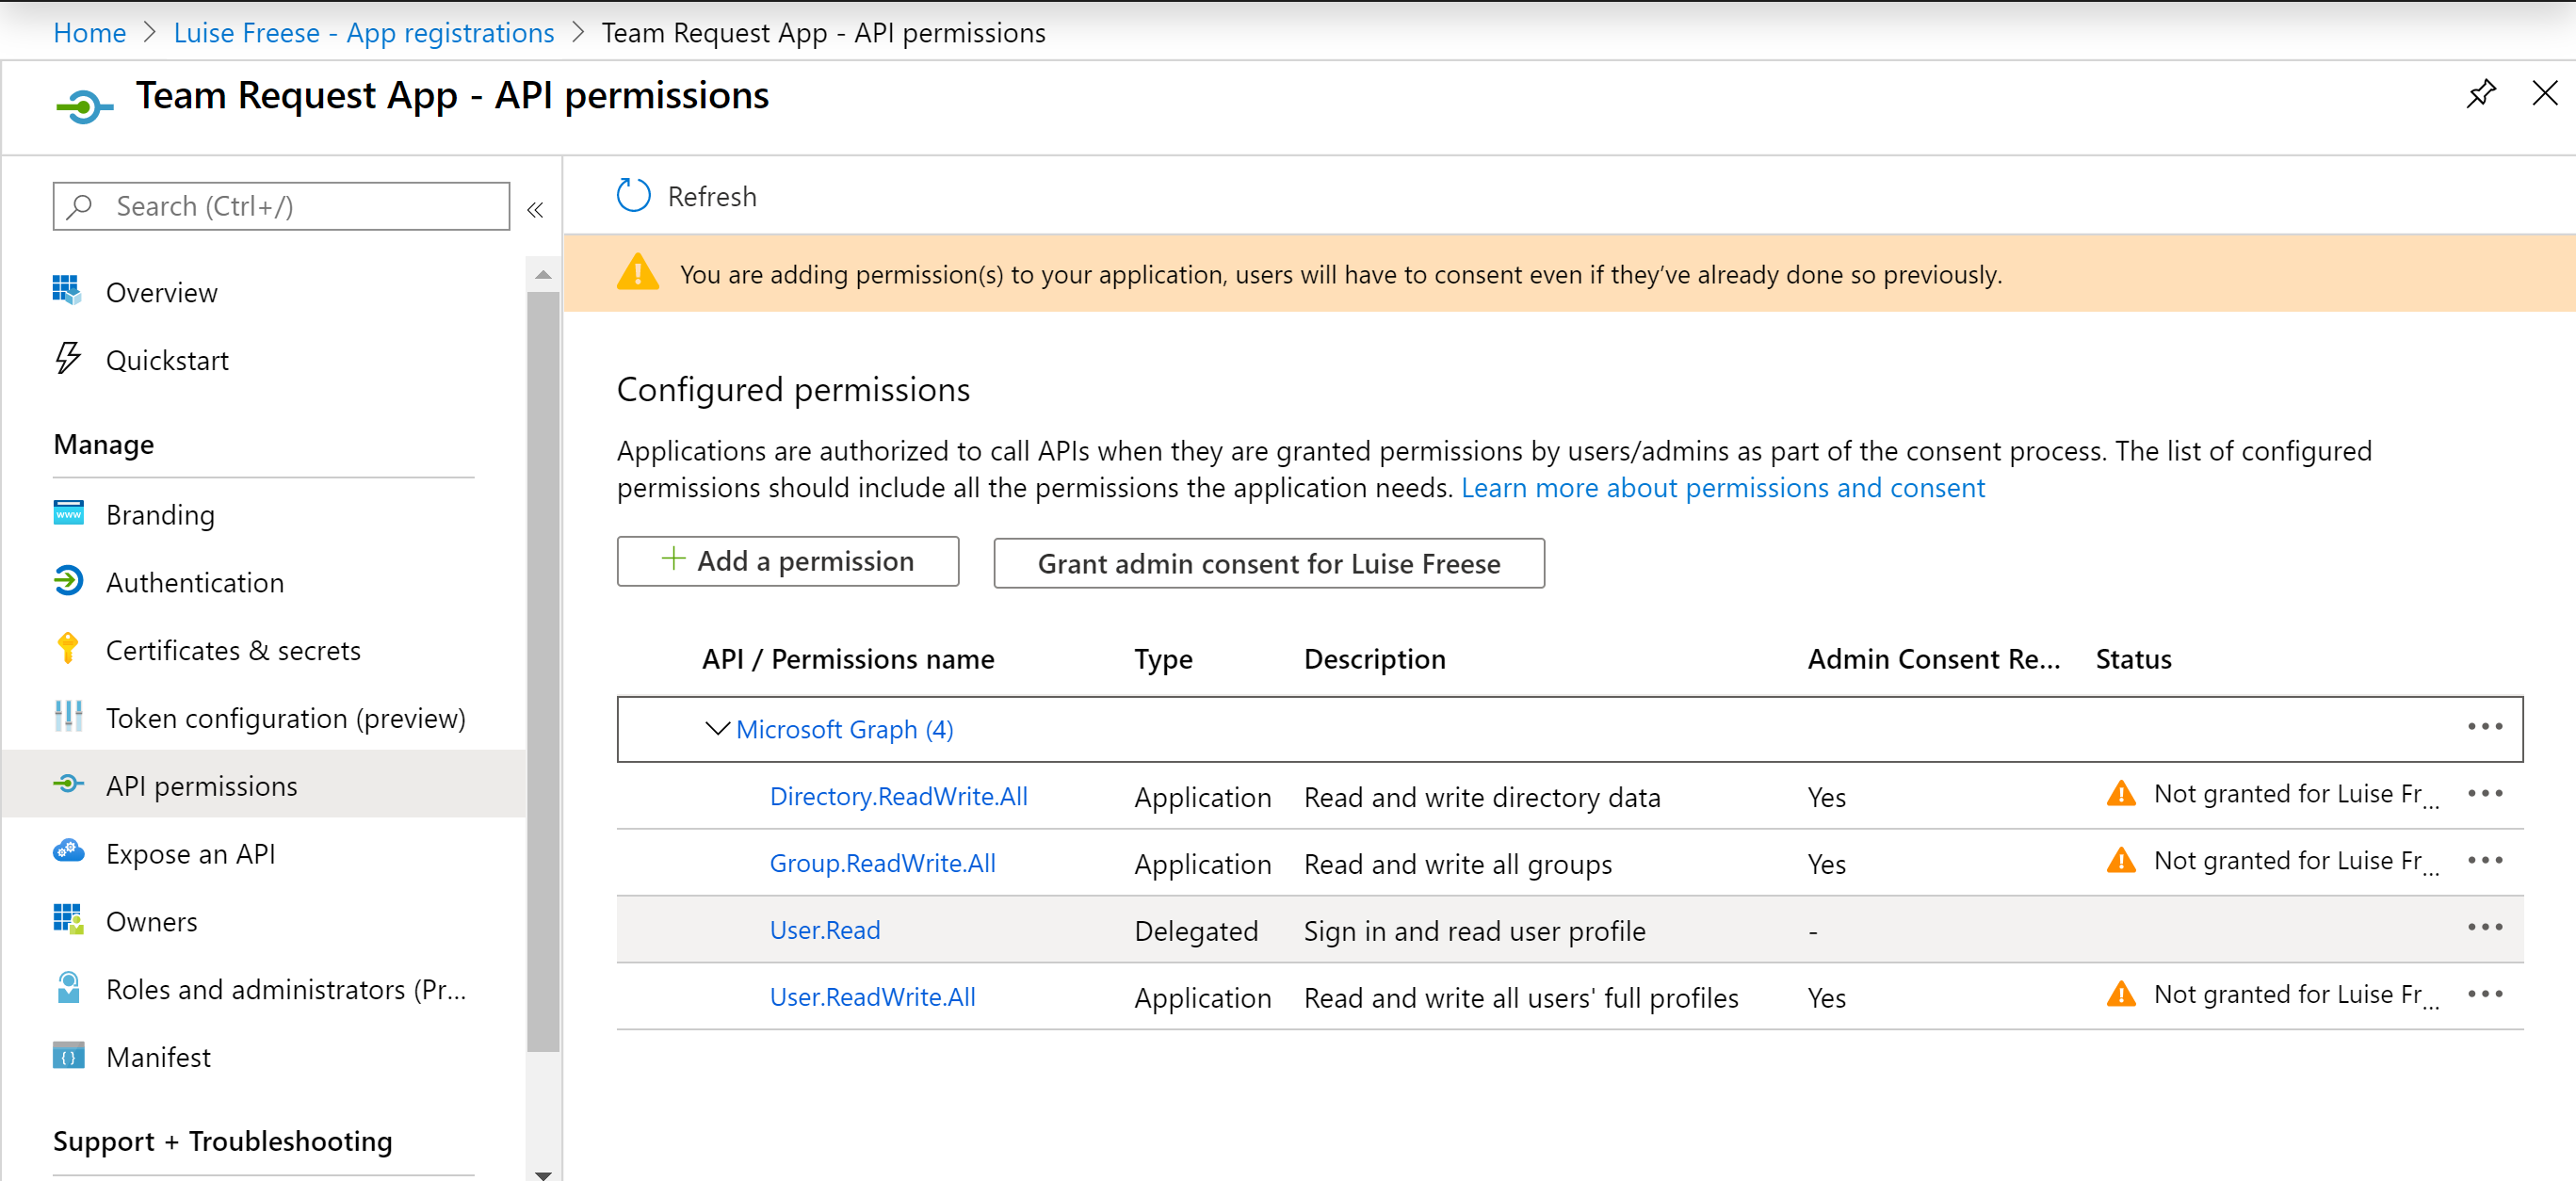
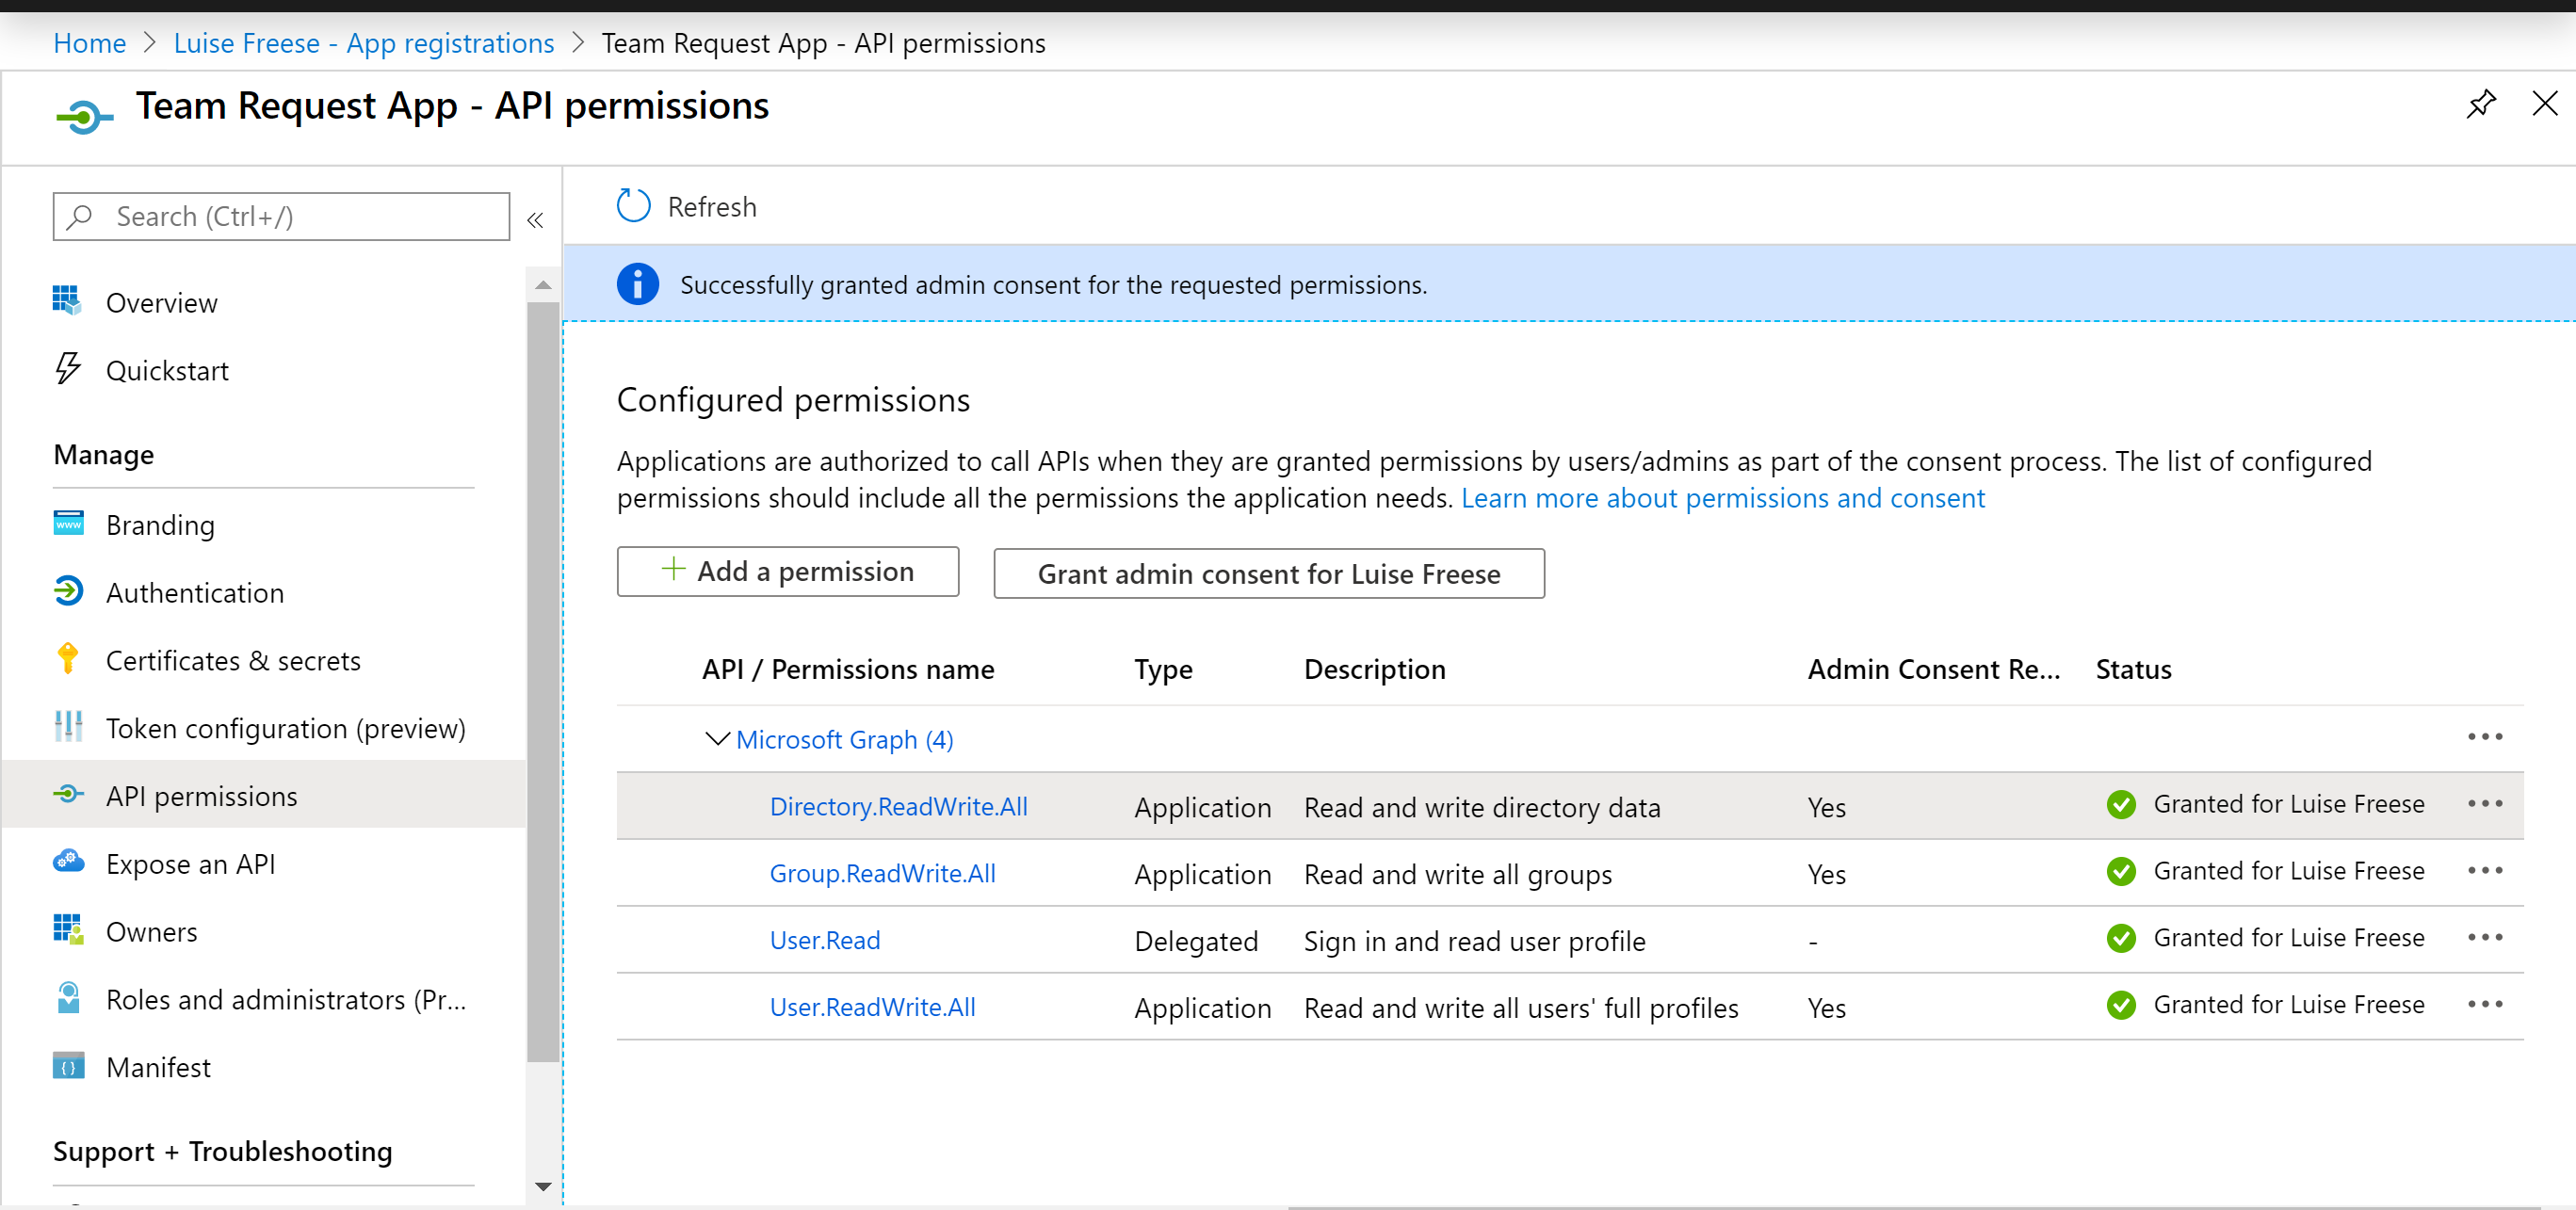
and grand admin consent:
- Now click on CERTIFICATES & SECRETS and add a Client Secret

Copy the Client secret IMMEDIATELY! You don’t have any chance later to access this!

Congrats! Now that you registered the app in Azure AD, we go back to Power Automate:
- Create a new flow, whose trigger is the a new list item in SharePoint. Select our list we created before.
- initialize string-variables for Tenant ID, App ID, App Secret with the values we already have (Remember when registering the app in AAD?).
I even initialized one for the URL of Microsoft Graph because while testing I was too lazy to type 🙂 Also initialize another empty variable (string) for Group ID.

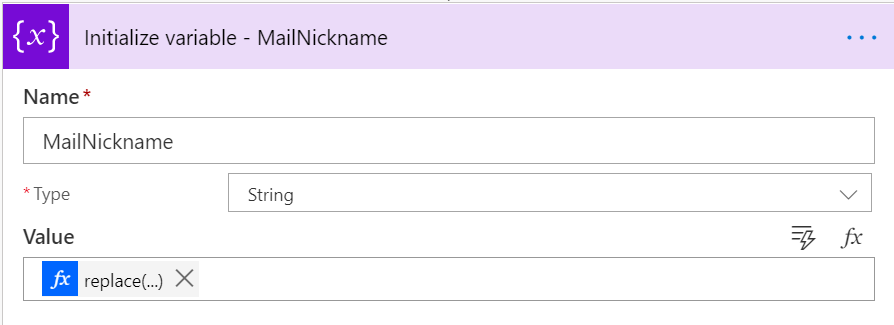
- We will need a variable for MailNickname as well — here we just use a little expression to get rid of spaces (we will need that later!):
replace(triggerBody()?[‘Title’],’ ’,’’)
- Now we need to get the Owner ID this will be our first HTTP request:
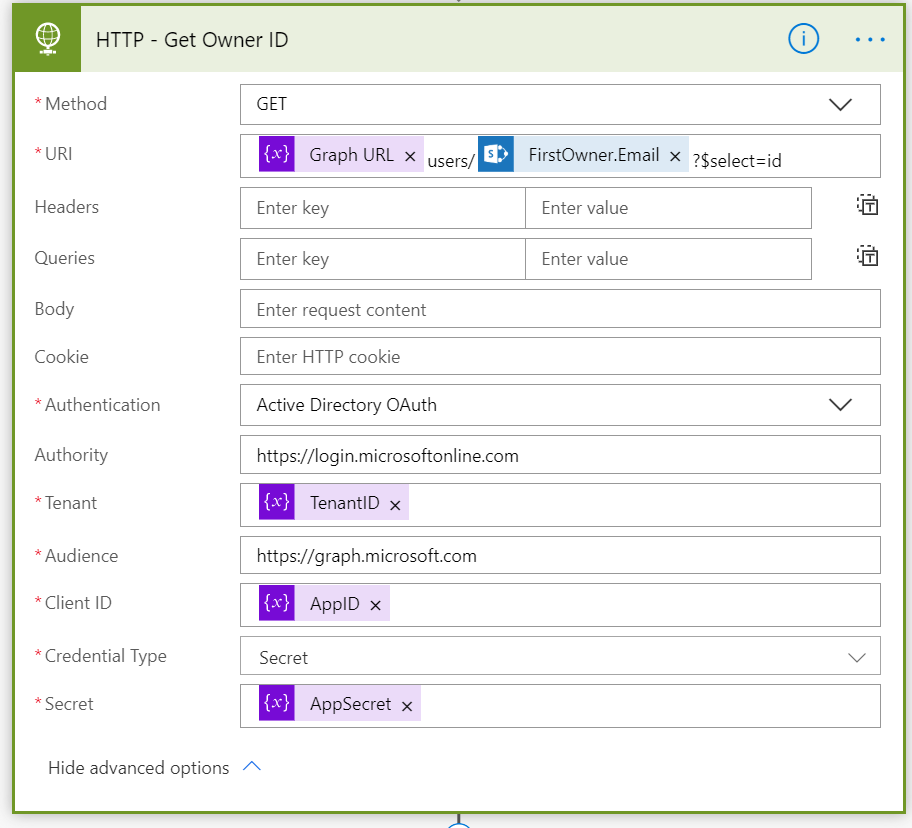
Please make sure to expand advanced options! These are mandatory because we need to authenticate. Put the variables into the fields as shown above.
- To ensure a nice approval, we want to get the user’s manager from Active Directory. We use the OFFICE PROFILE — GET MANAGER action for that:

- Now we create an approval, that shall post a fancy Adaptive Card to the manager
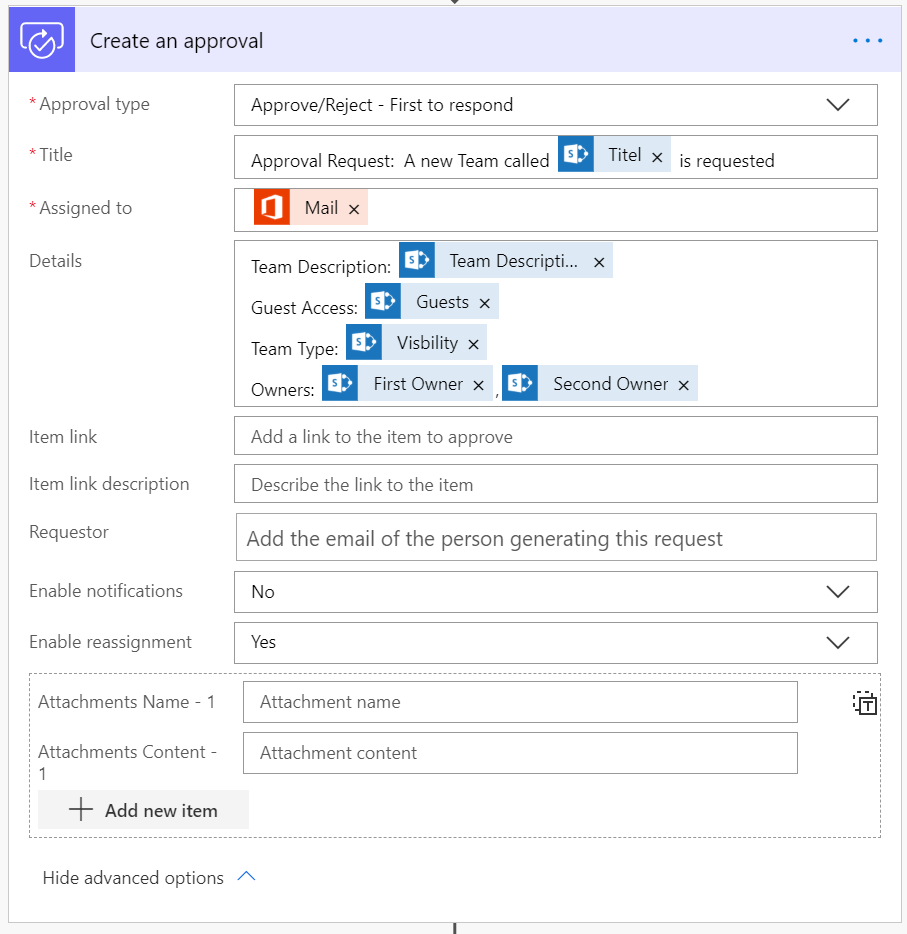
Enable Notifications needs to be a NO, otherwise we just create emails and we want the adaptive card!
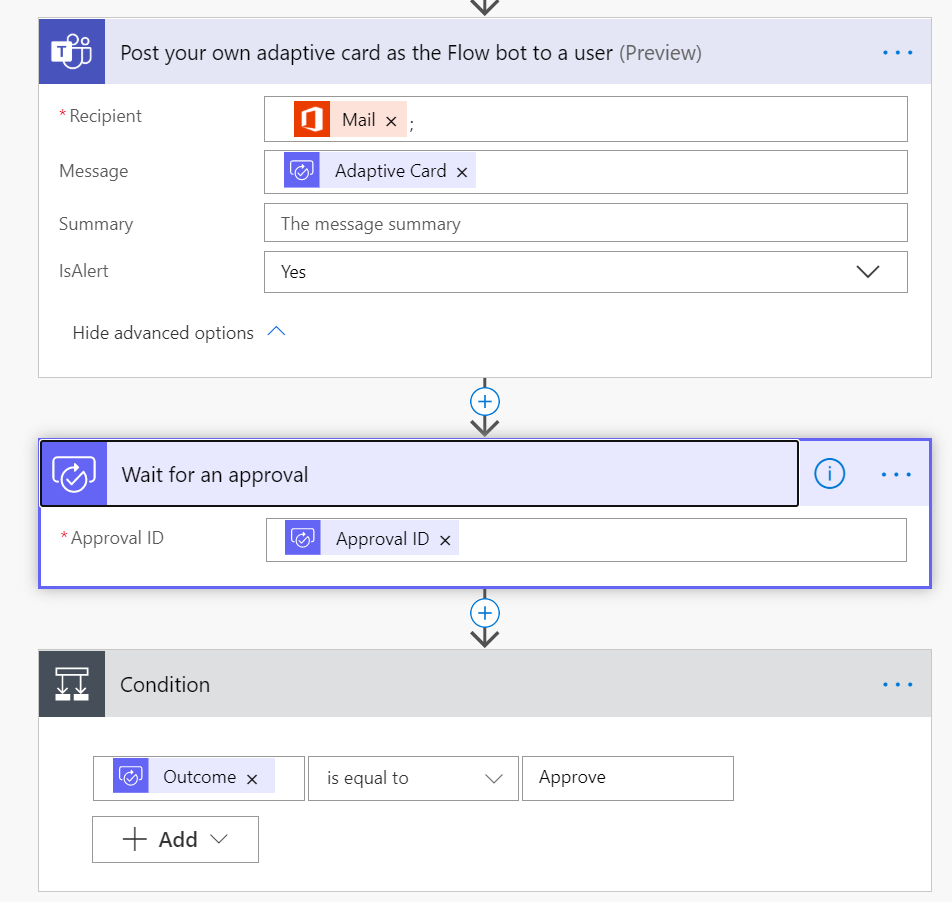
- Now choose the TEAMS action POST YOUR OWN ADAPTIVE CARD AS THE FLOW BOT TO A USER
Use the manager’s email address for the recipient field and the ADAPTIVE CARD itself for the message.
Now add an action called WAIT FOR AN APPROVAL and just insert the APPROVAL ID.
Depending on the Outcome of the Approval (Approved or rejected) we want different actions to follow. Therefore we ad a CONDITION.
- We will now focus on the IF YES branch (so if the Team is approved. Our SharePoint list shall be updated with the Values for Approval Outcome and Approval Comments

Once we added the Responses Comments, an APPLY TO EACH will appear. Don’t worry about that.
- Now it’s time to create an Office 365 Group with an HTTP request. Add an action and make sure you authenticate properly in the advanced settings:

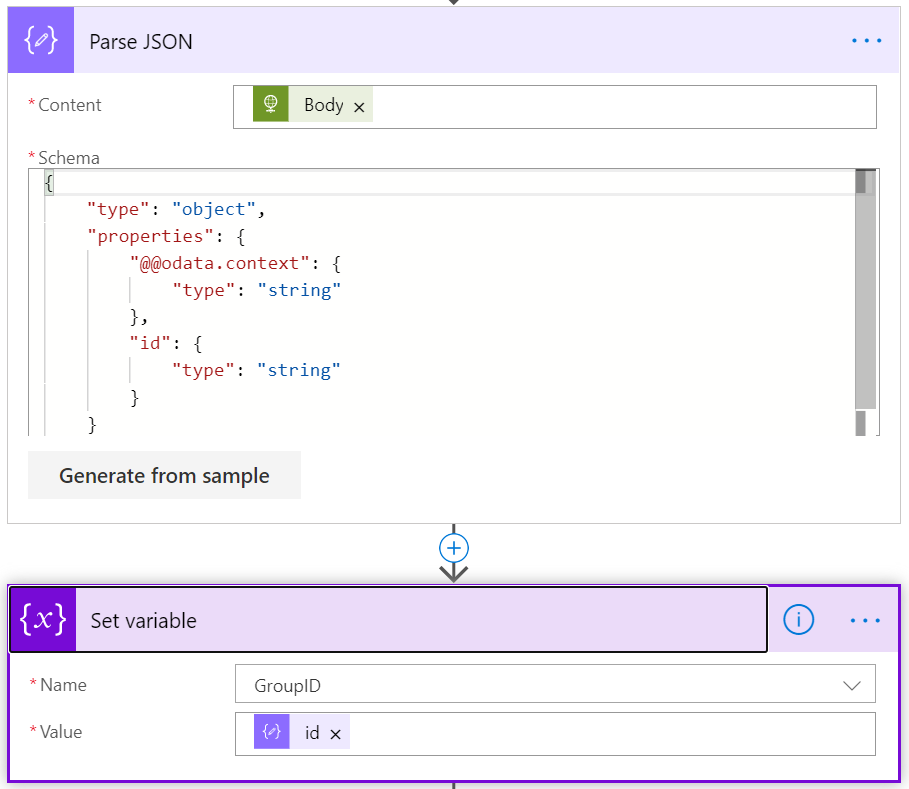
- Now we need to update the Office 365 Group to a Team. We will need the Group ID for that. Remember? We already initialized a Group ID. We now just set the value. We do this with a simple Parse JSON action:
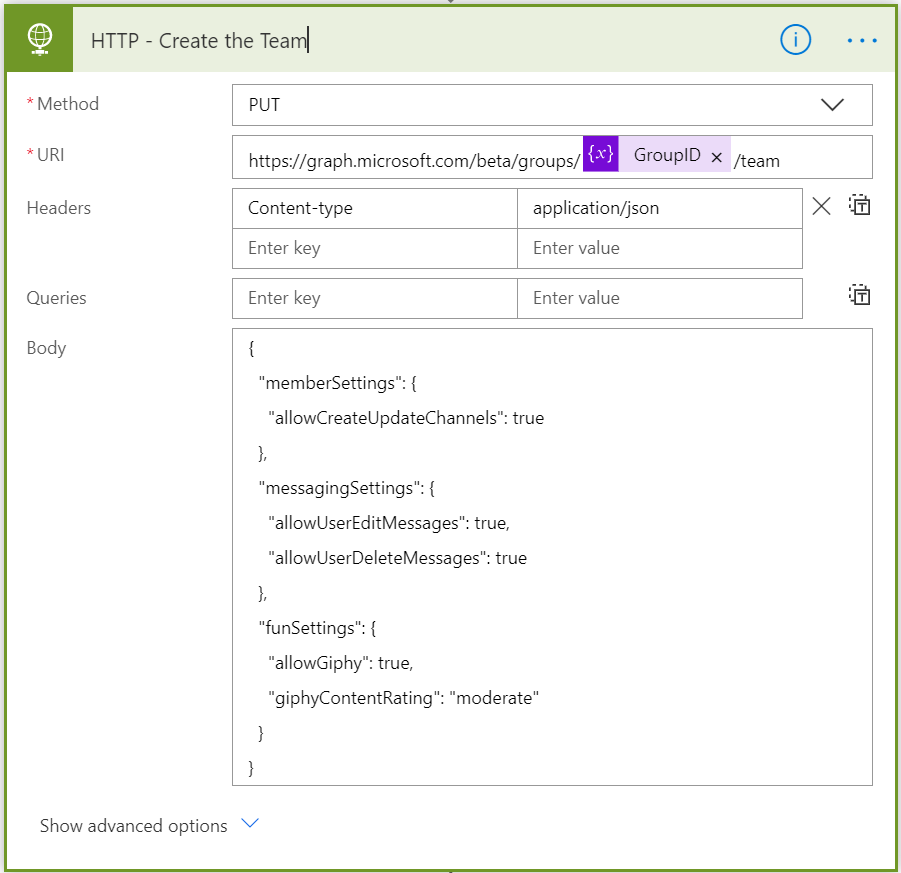
- Use a PUT method in the next HTTP Request as the Group already exists and authenticate again in advanced settings.
- As the next step update the SP list:

- Now we want to send some notifications in Teams to the new proud owners and we can do this again by an adaptive card. To create one, simply go to https://adaptivecards.io/designer and use the Visual Designer to get valid JSON which you can use in the flow:

I explained this in more detail in my blog post about Adaptive Cards for Beginners. Simply copy the Code, insert it into a POST YOUR OWN ADAPTIVE CARD AS A BOT TO A USER and replace Placeholders with variables:
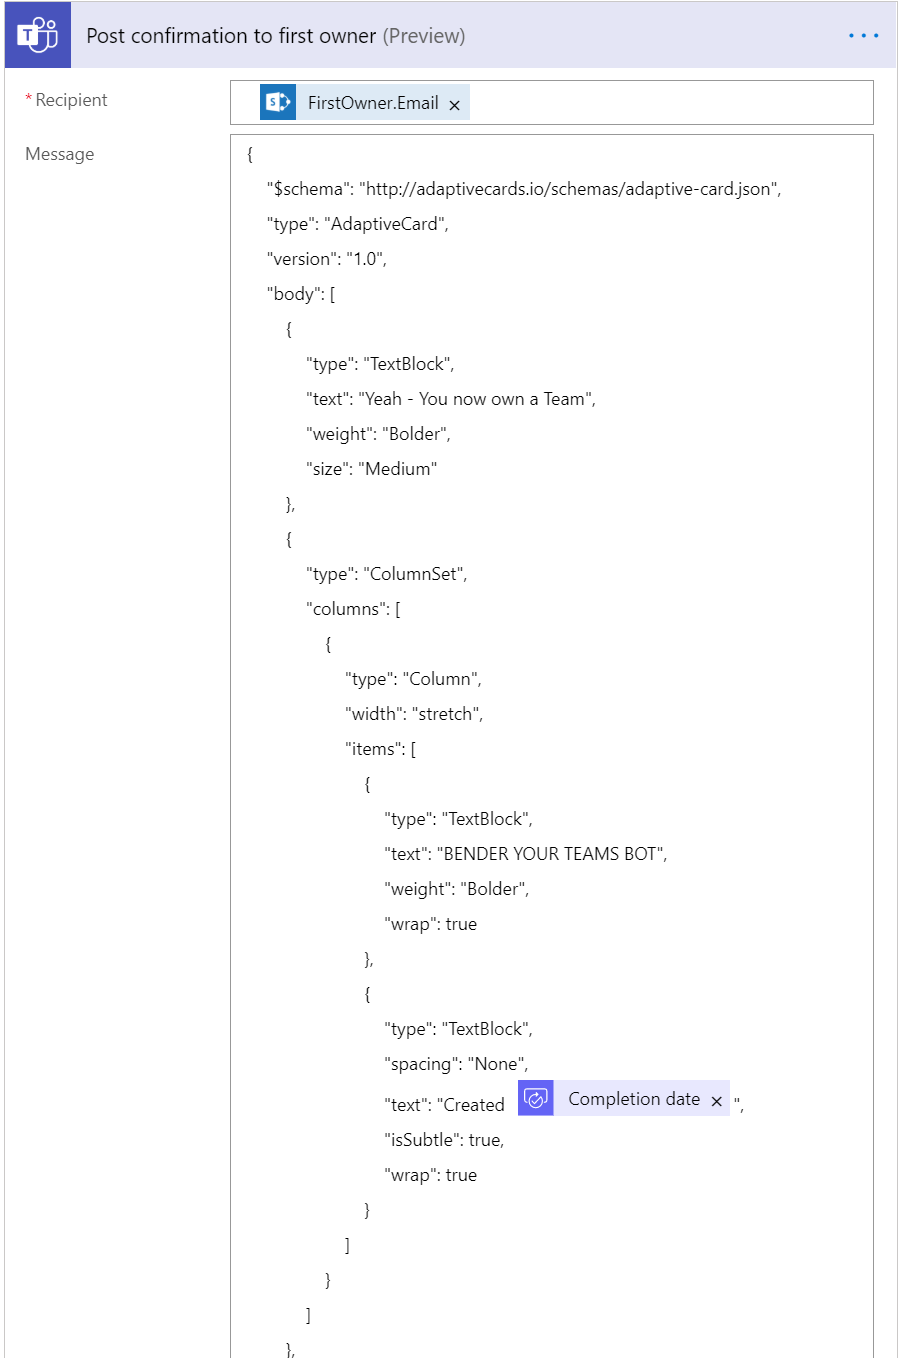

- Do this for both owners of the Team.
Now we want to focus on the IF NO branch of our flow (so when the Team was rejected)
- Add a new action UPDATE ITEM in SharePoint:

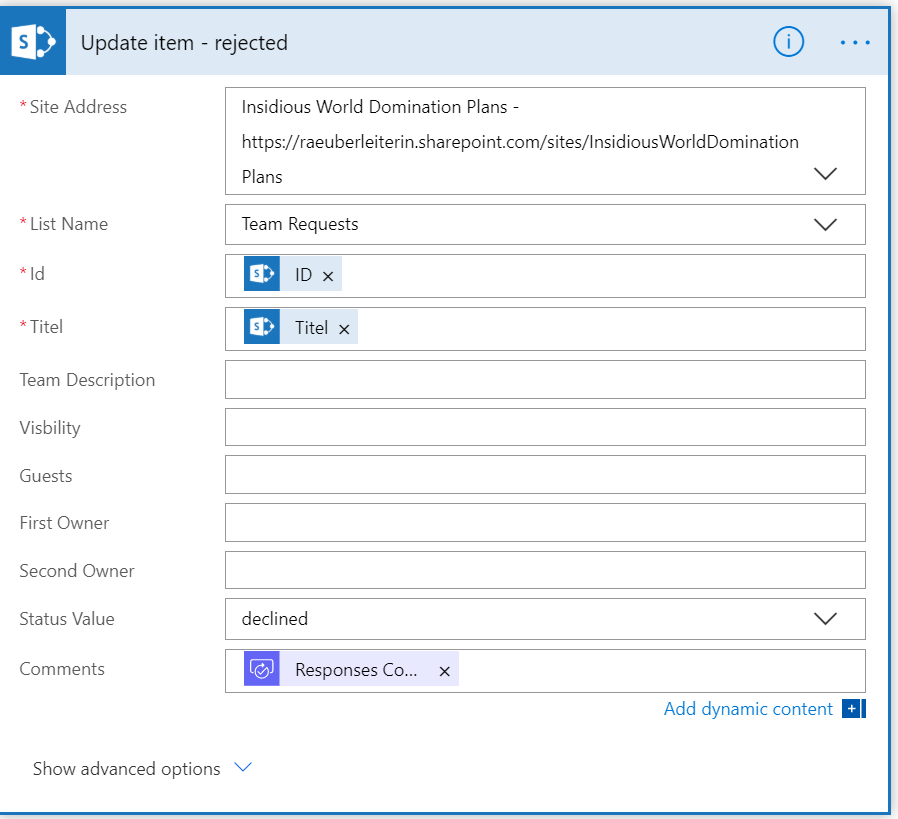
- Add another Adaptive Card with a rejection text here.
Perhaps you want to add some other actions as well, like informing the manager or adding members to the Team. You can even think about provisioning the channels and content. For now, I will leave it by that.
Publish your Bot and add it as an app to Teams
To get your bot working not only as the test bot, you need to publish it and follow the next steps:
- go back to PVA and click the PUBLISH Button
- Now click on MANAGE CHANNELS and select MICROSOFT TEAMS
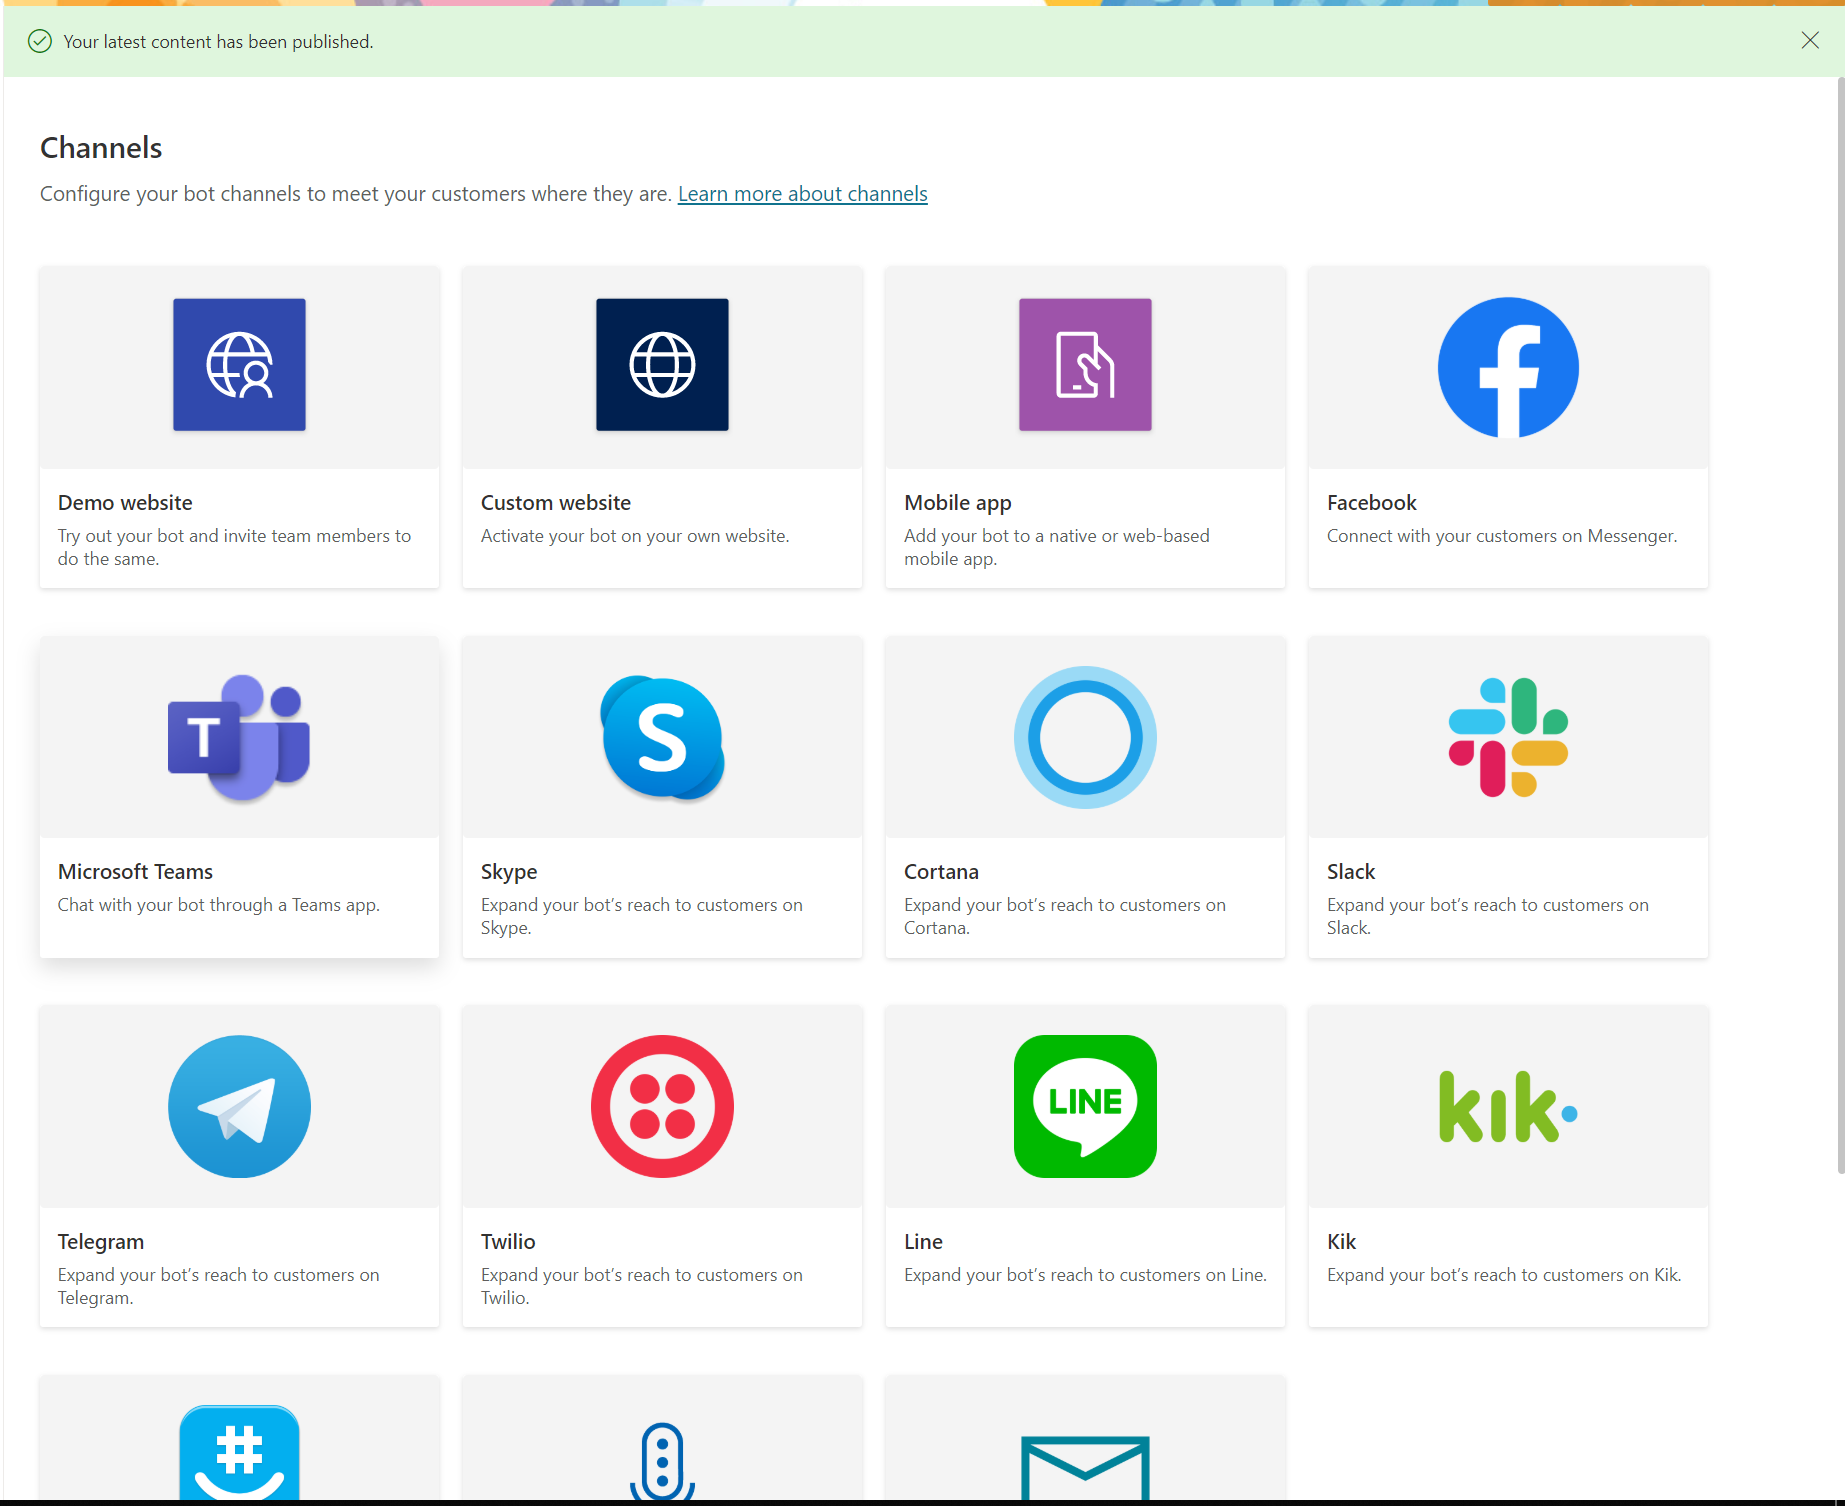
3 Click on ADD ( lower right corner), after that copy the APP ID (we will need that later).

You may close this window now.
Open Microsoft Teams, open or install (if you haven’t already) TEAMS APP STUDIO
Click the MANIFEST EDITOR and fill in some details. Paste the APP ID you copied before from the PVA into the field:
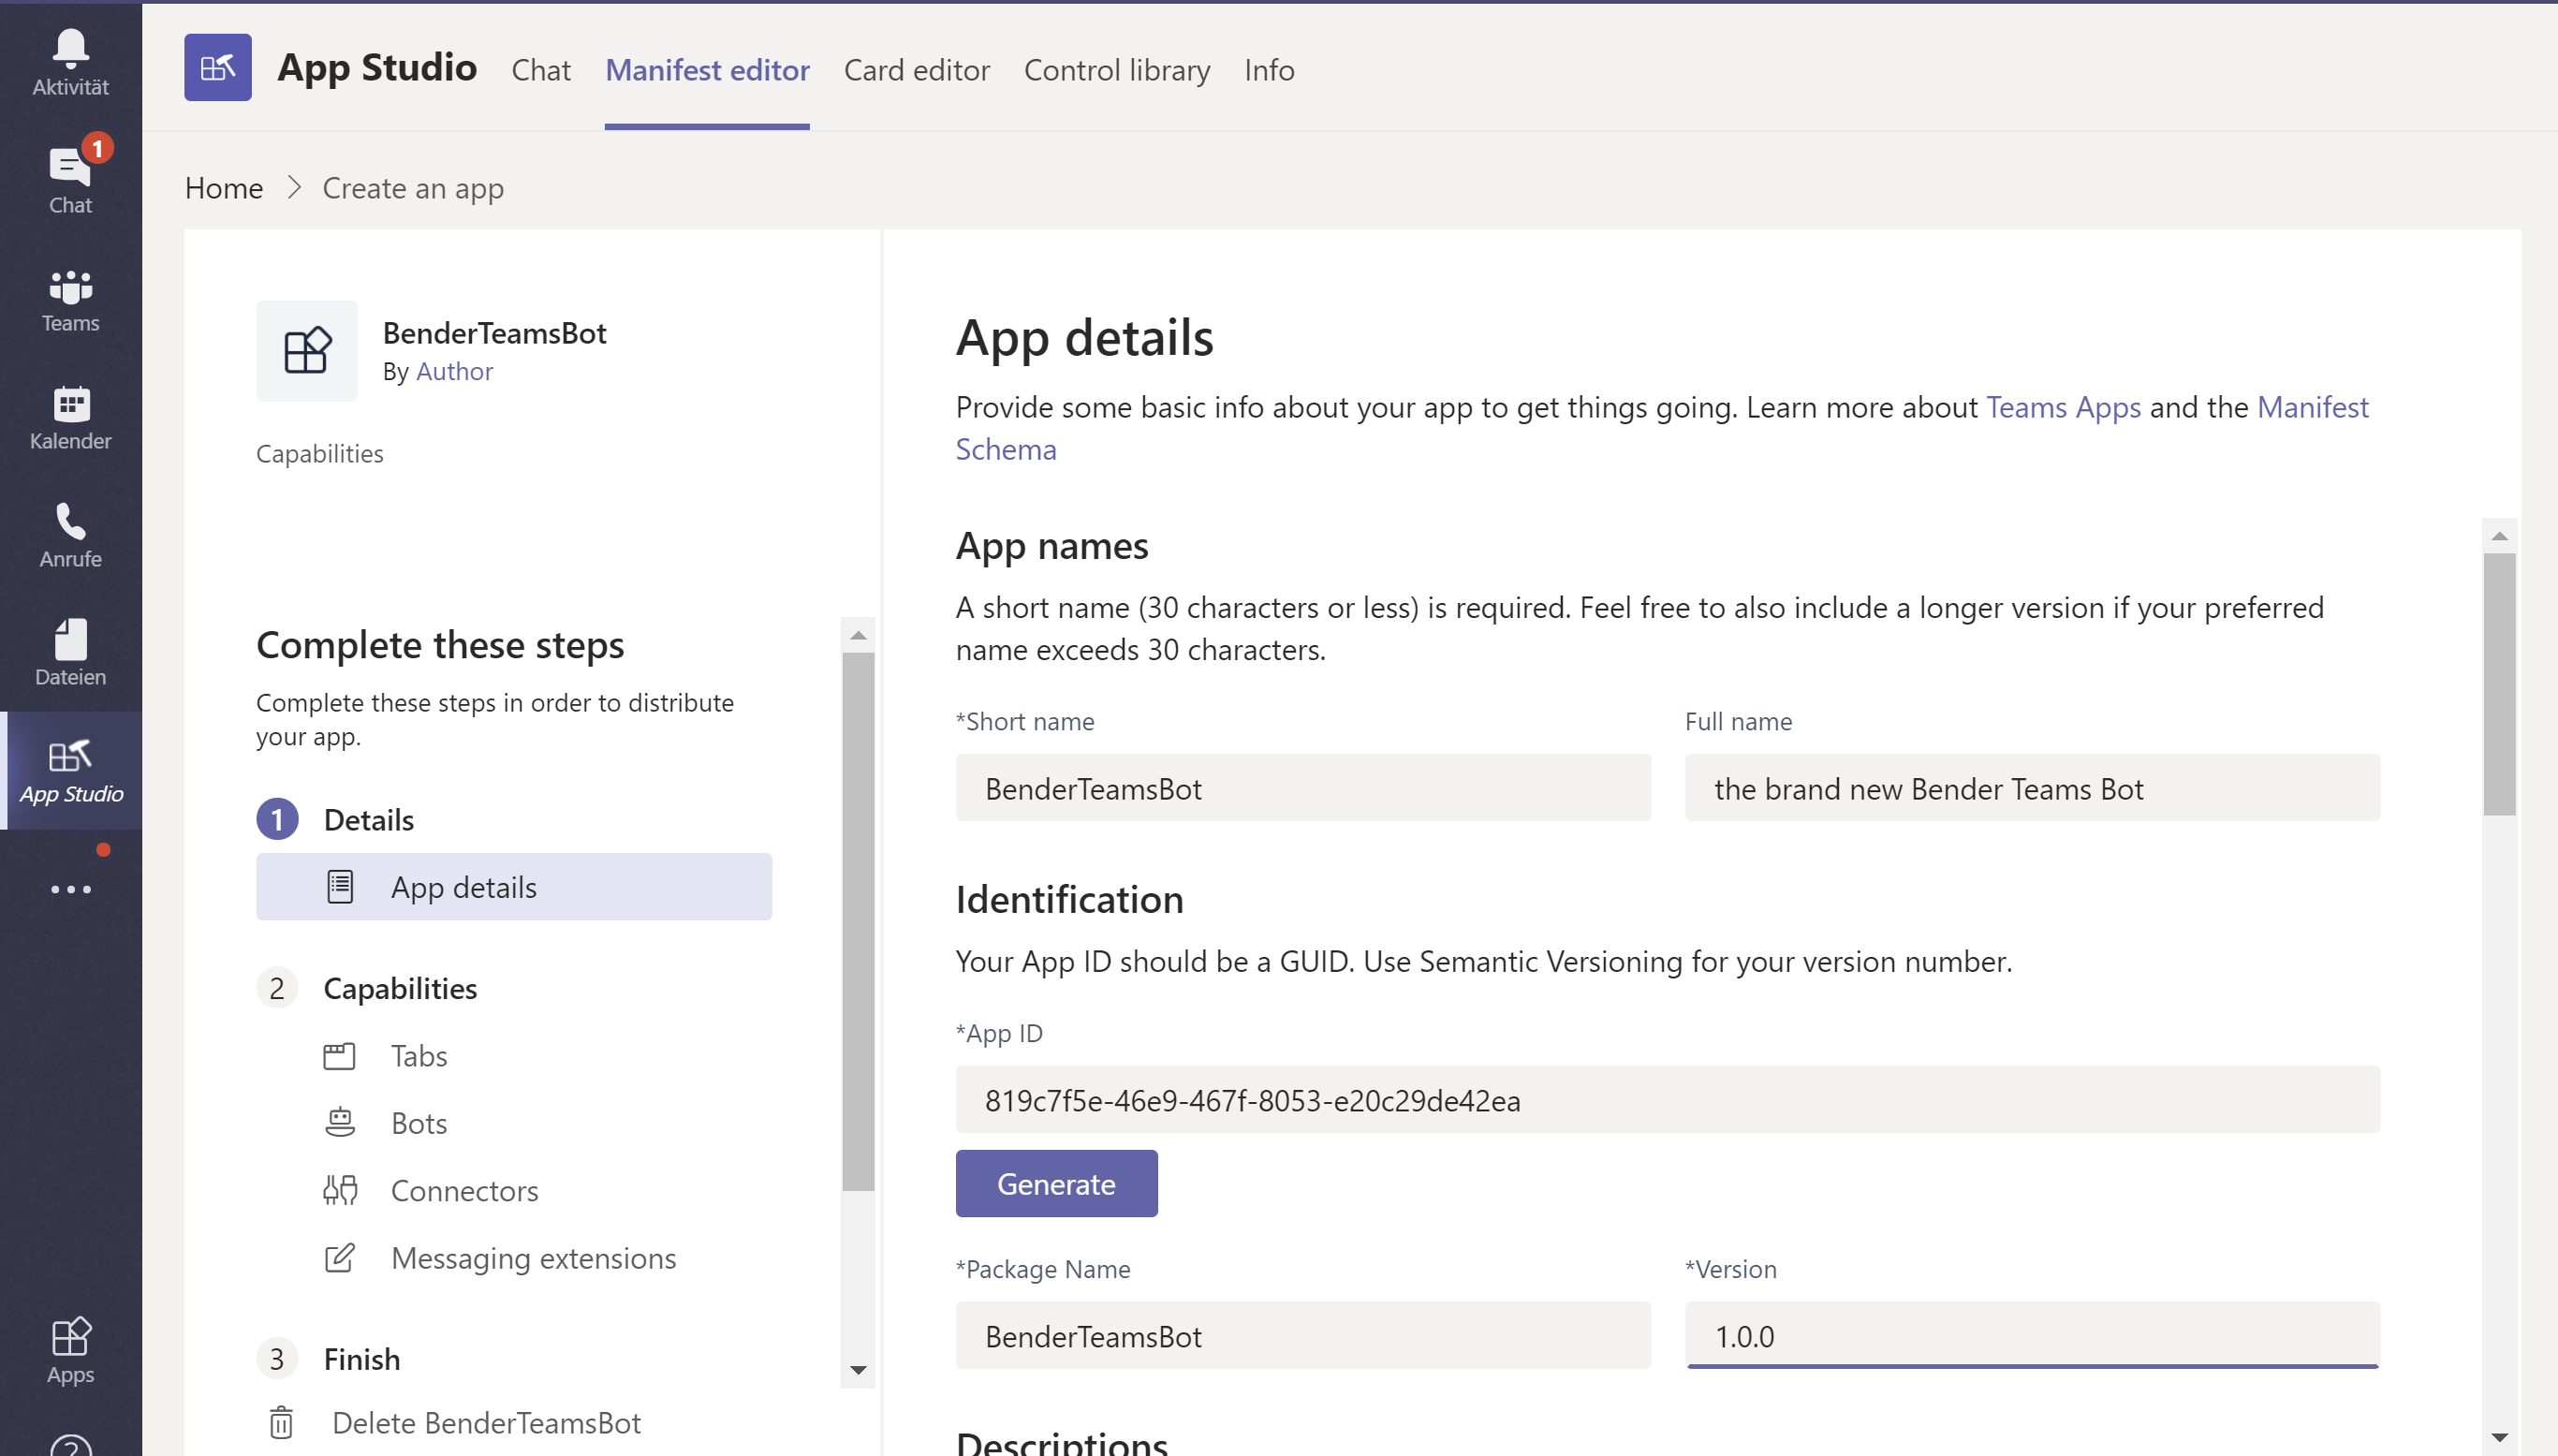
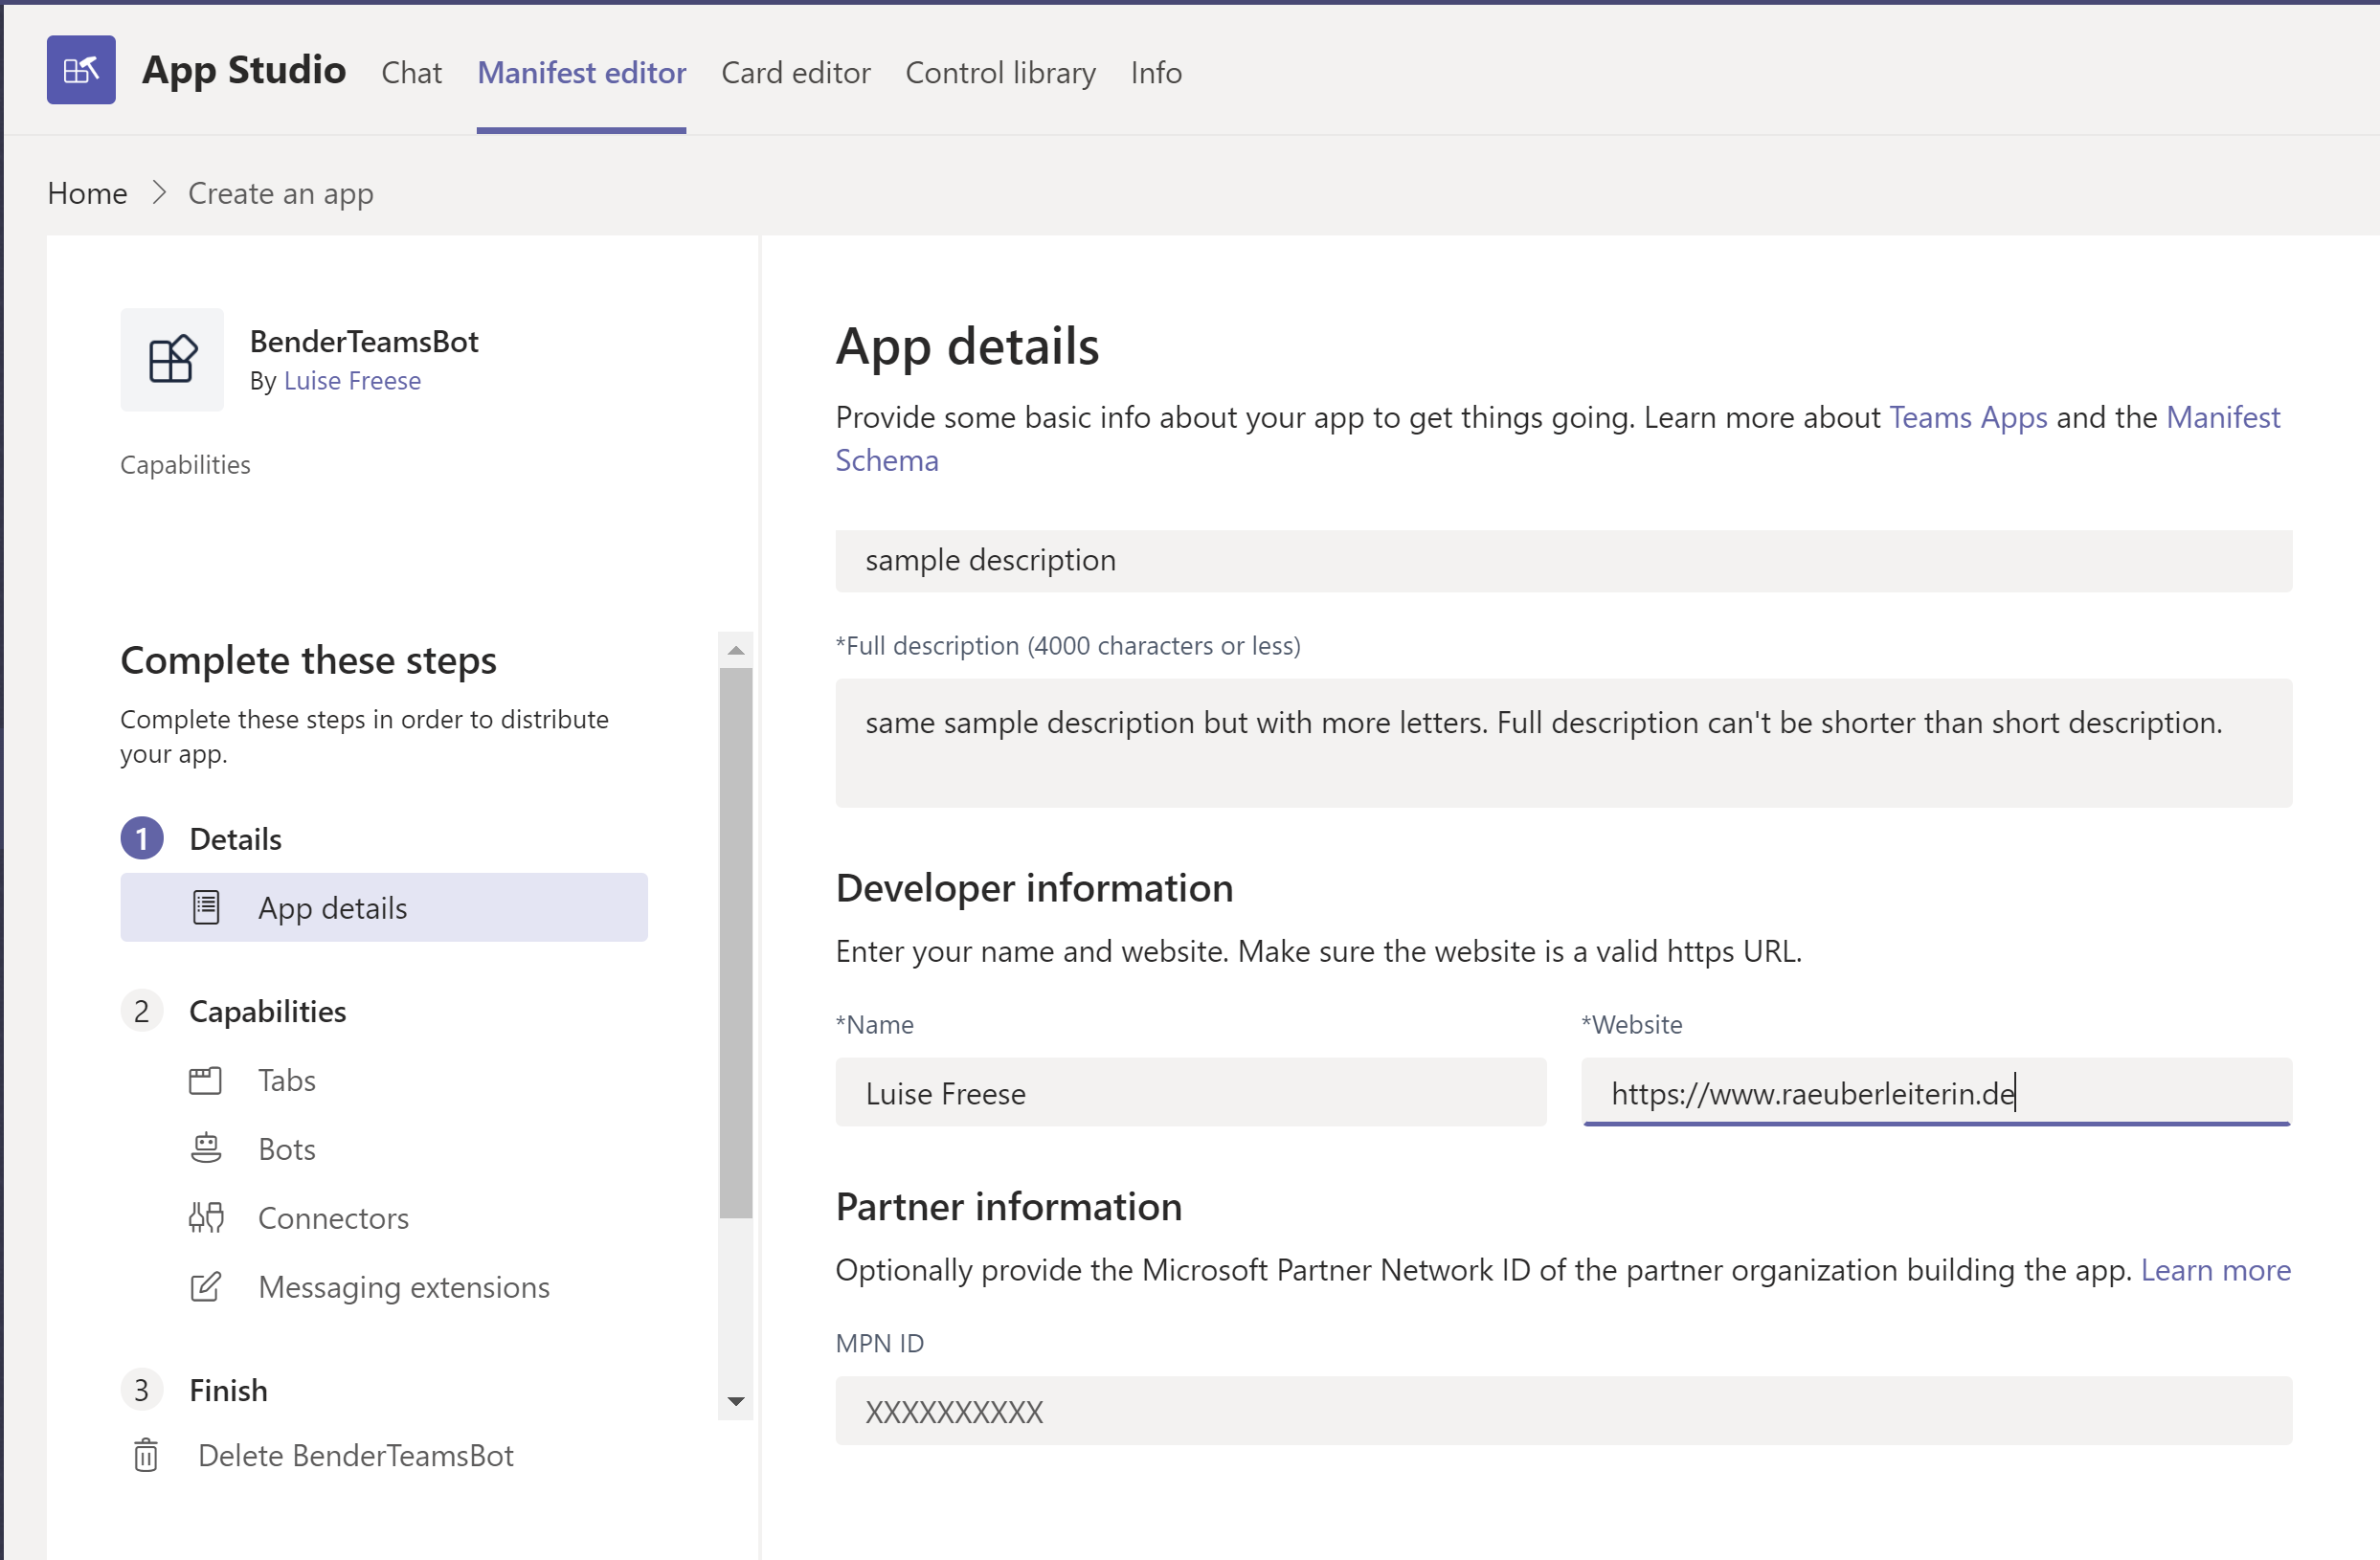
You need to fill in at least SOME information for privacy statement and terms of use… and you may brand you app by giving it a nice icon

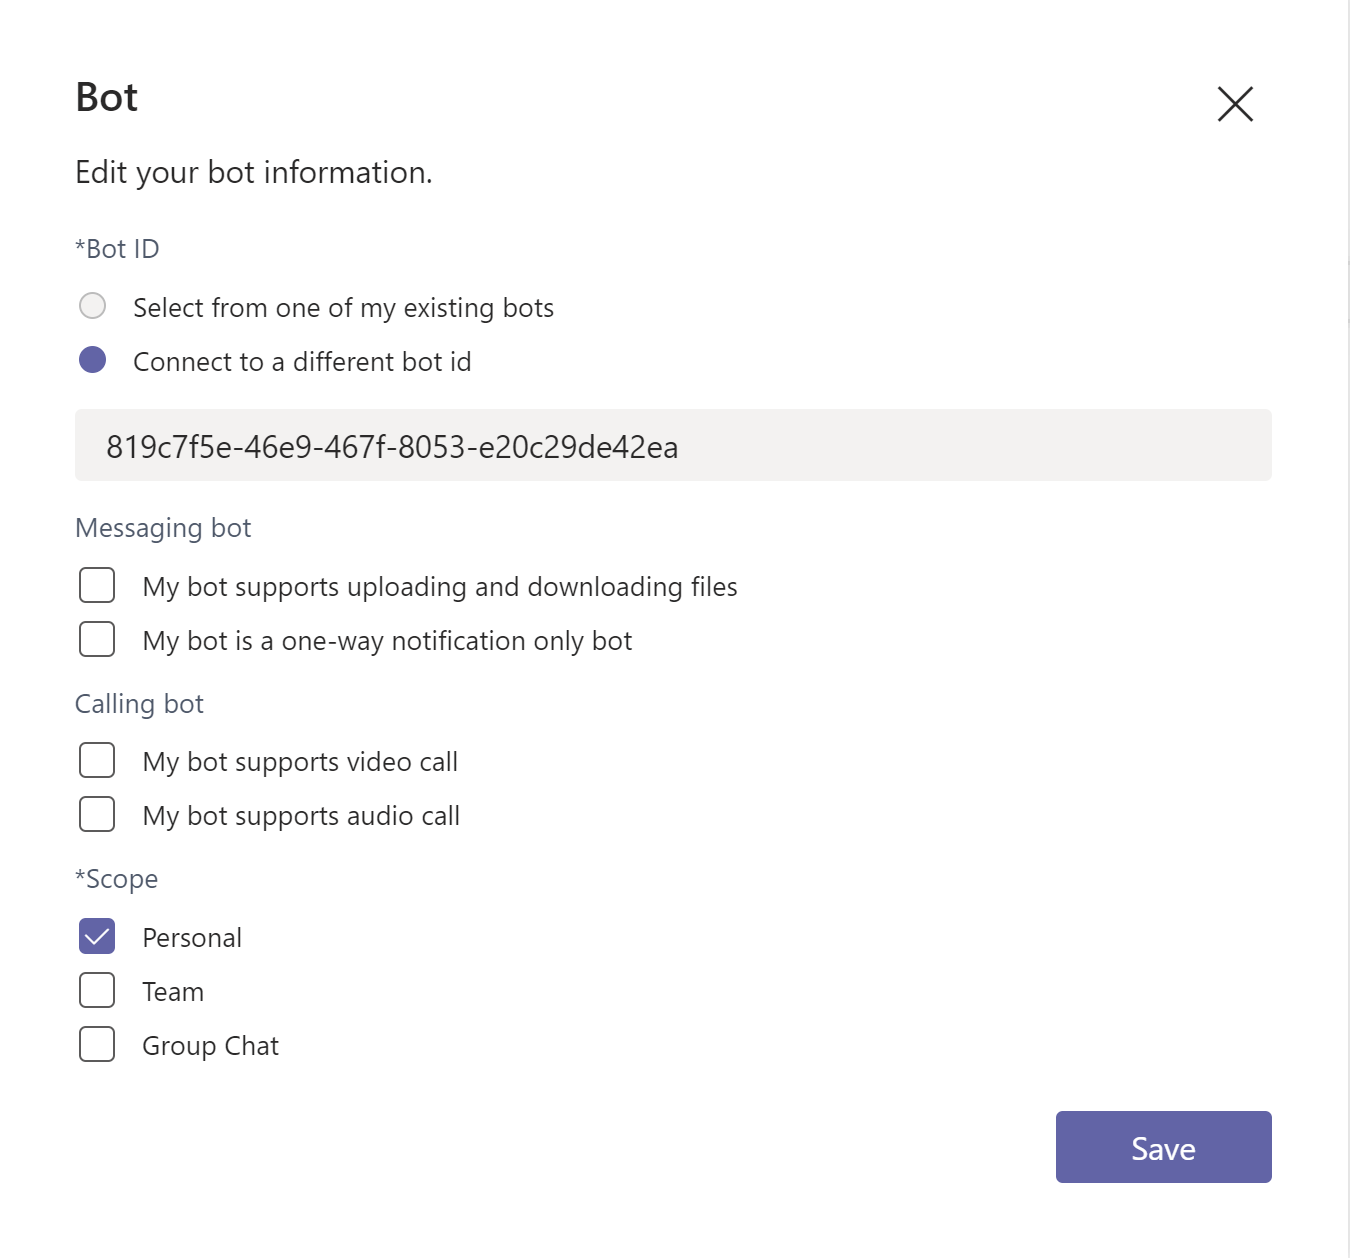
- Now click on BOTS and then on EXISTING BOT (because we already have one!) Use again our App ID and select PERSONAL as scope
- Now click on DOMAINS AND PERMISSIONS
Add token.botframework.com as a valid domain (wait 2–5 seconds, it will show up like this:

Click TEST AND DISTRIBUTE, then DOWNLOAD
Now click on the App catalogue in Teams and Upload a custom app. Select your downloaded zip file from step 8
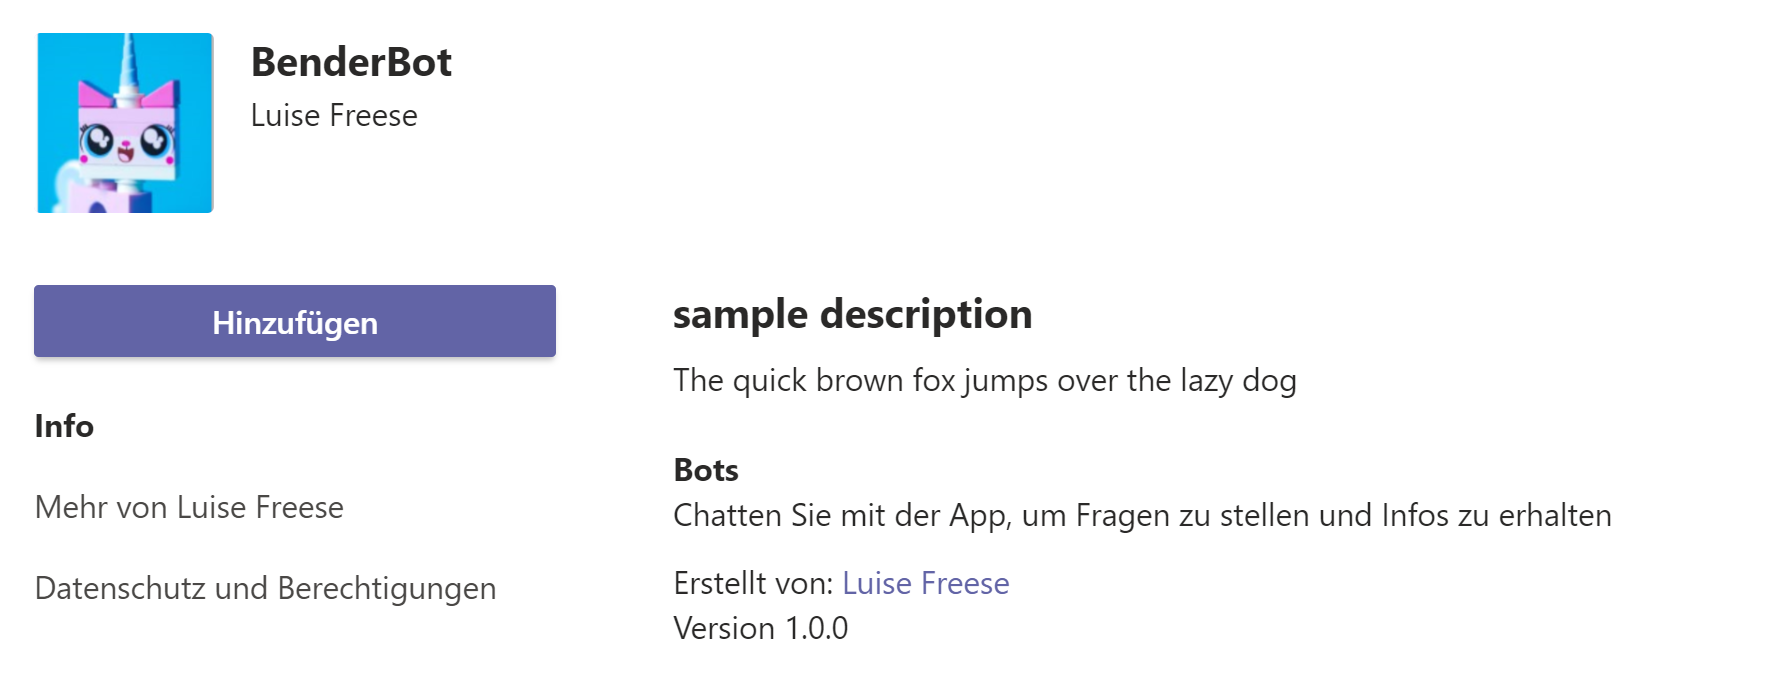
Click add — and CELEBRATE!
Special thanks to Tomasz Poszytek, who already vlogged and blogged about how to add a Bot to Teams — learned so much from that!
Business Impact
So after we successfully built this or understood how we could build this — why should we care about a ChatBot? And why should we implement a chatbot solution with Power Platform?
1. more productive internal client support
If internal clients can request not only Teams but also whatever they need in a chat experience, this will make our support more efficient, as we will free up human agent time for more complex issues.
2. fast adoption
Built in a familiar experience like teams (or on a familiar website like an Intranet Site), adoption we be more easy. A simple and lean process will satisfy users needs, we can ensure that users will like to use the Chat Bot intsead of writing emails back and forth, filling out forms, which sometimes leads to confusion and frustration

3. easy governance
As we now built a solution in Office 365 / Azure AD / Power Platform, we can apply all policies and rules we like to have in place. Right now, this solution is a mvp. If we want to ensure, that for example guests shall already be added to the team after a second approval (or after signing an NDA) we can manage that as well with Power Platform.
4. human touch and feel of an interactive interface
I think this is one of the most important aspects which will lead to my conclusion of the business impacts on solutions LIKE this. Although clients know, that they interact with a bot, it gives IT a more human face and we not only enhance the user experience but seriously unf*ck it. I know it’s sometimes hard to imagine from an IT point of view, but most IT projects and processes frustrate users before they give them any value. And this is not because all of our colleagues are just belonging to that group of dumbest assumeable users. So understanding what the business needs (for example: a lean process with a human touch to request what they need to get their work done) plus satisfying what IT needs (for example: a lean process which ensures that we stay in control but don’t need to do the same stupid job ever and ever again) seems to be the key to finally
5. narrow the historical gap between Business & IT
This is a long, long story, and I think, that this blogpost is already long enough. If you want to read more about that, please continue here:Office 365 as an IT only Project — what could possibly go wrong?Note: I did a session with Michael Roth on based on this blog post at #Office365UGHH — please connect with and follow…regarding365.com
Feedback, Thoughts?
I would love ton hear what you think about this solution. Any feedback is welcome 🙂 If you liked it, please don’t forget to clap 🙂 If you didn’t like it, please tell me what you would improve.

My name is
Luise Freese
You May Also Like

Adaptive Cards for Beginners- Monitor a Hashtag on Twitter
I wanted to work’n’play with Adaptive Cards, which are the future of notifications and I wanted to experiment with the Flow Bot in Microsoft Teams so I tried to figure out how I could monitor a …

Office 365 as an IT-only project – what could possibly go wrong?!
Note: I did a session with Michael Roth on based on this blog post at #Office365UGHH — please connect with and follow him as well. If you want to run your Office 365 project like an usual IT project …

Manage your contacts during events with Microsoft Flow
As I travel really often to speak at or just attend conferences, I wanted a smooth workflow to capture contact data of the persons I meet during an event and make sure that I catch up with them later. …